Kategorien
Magento
WordPress
SAP Commerce
Odoo
Shopify
Typo3
Shopware
nopCommerce


Prerequisites
- Shopware 6.5.x and above
Installation Steps
To install Google Login Plugin, follow the steps below.
Step 1: Download the package.
Step 2: Access your web server directories and unzip and upload the Pits\GoogleLogin folder to the path custom\plugins
Step 3: Run below commands on terminal.
- composer require google/apiclient
- bin/console plugin:refresh
- bin/console plugin:install --activate PitsGoogleLogin
- bin/build-administration.sh
- bin/build-storefront.sh
- bin/console cache:clear
- bin/console theme:compile
Product Specification
The Google Login Plugin for Shopware 6 simplifies the registration and login process for new and existing customers. New customers can register quickly by using their Google account, requiring only the addition of any missing information. Existing customers can seamlessly log in using their Google credentials if the email addresses match, ensuring a quick and convenient experience. The plugin also supports traditional login methods, allowing users to access their accounts with the email address associated with their google registration. This integration enhances user convenience and streamlines account management.
Features
- Quick Registration: New customers can register swiftly using their Google account.
- Seamless Login: Existing customers can log in effortlessly with their Google credentials.
Google API Configuration
Google requires that you create an external application linking your website to their API. Client id and Client secret are what we call application credentials. This application will link your website (example.com) to Google API and these credentials are needed in order for Google users to access your website.
- Go to: https://console.developers.google.com
- On the Dashboard sidebar click on the tab Credentials on the left side and click Create Project.
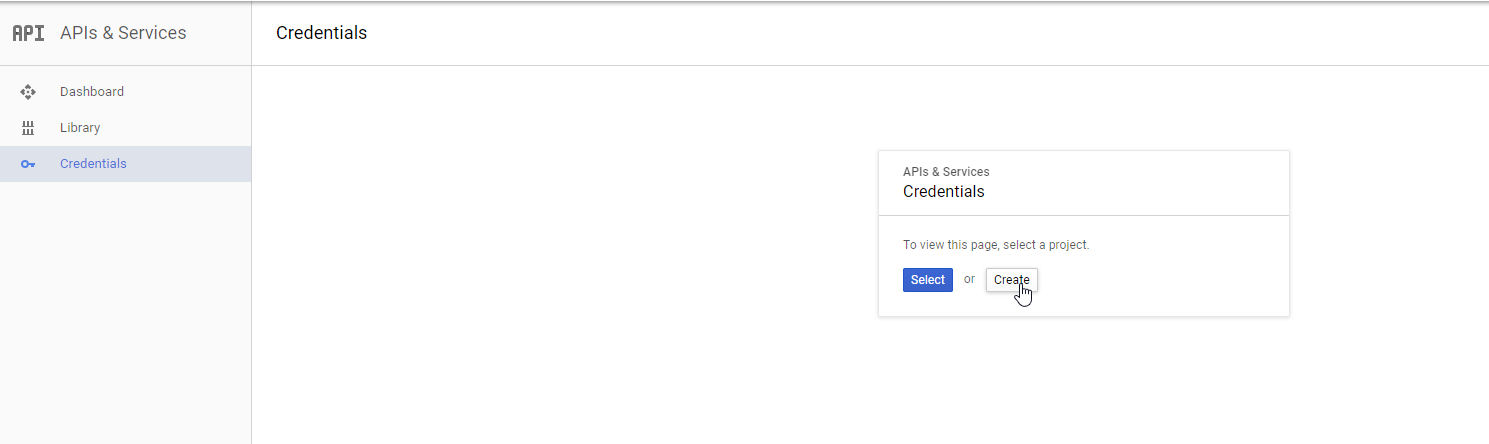
Figure 1. Google Developer Dashboard
- Fill out the project name and press create
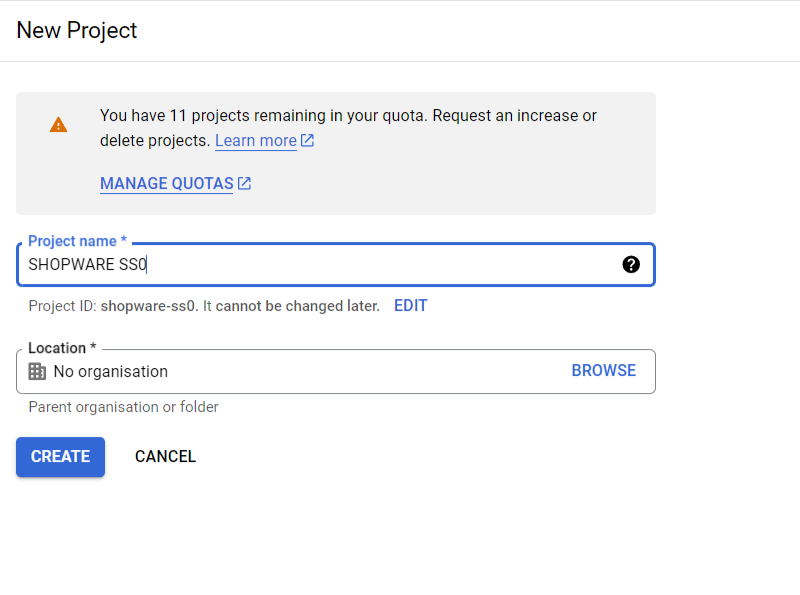
Figure 2. New Project Creation
- Click CONFIGURE CONSENT SCREEN
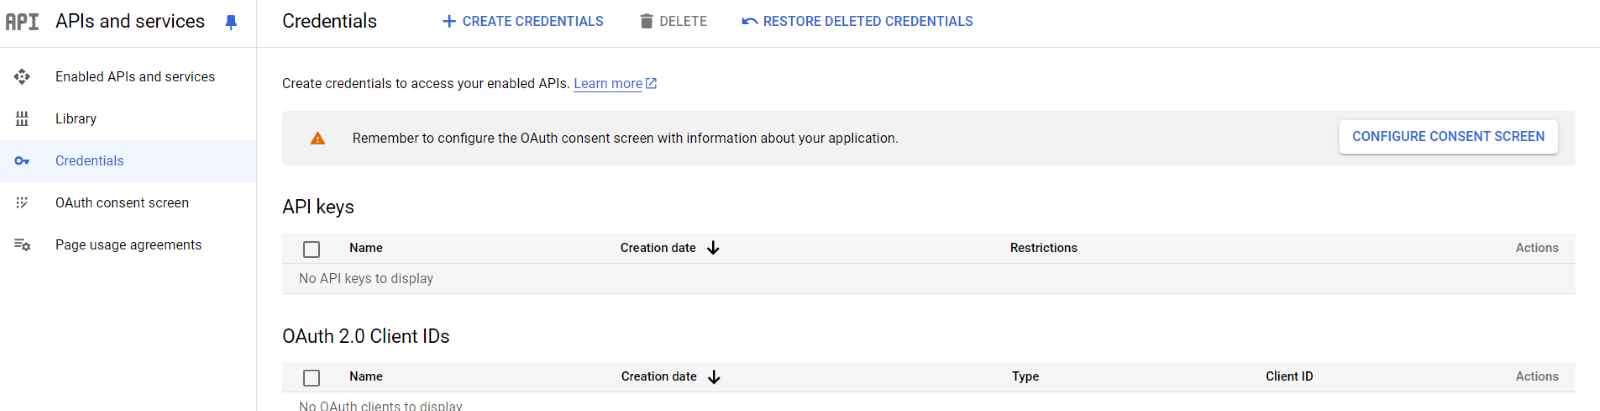
Figure 3. Credentials Dashboard
- Select External from User Type and press create.
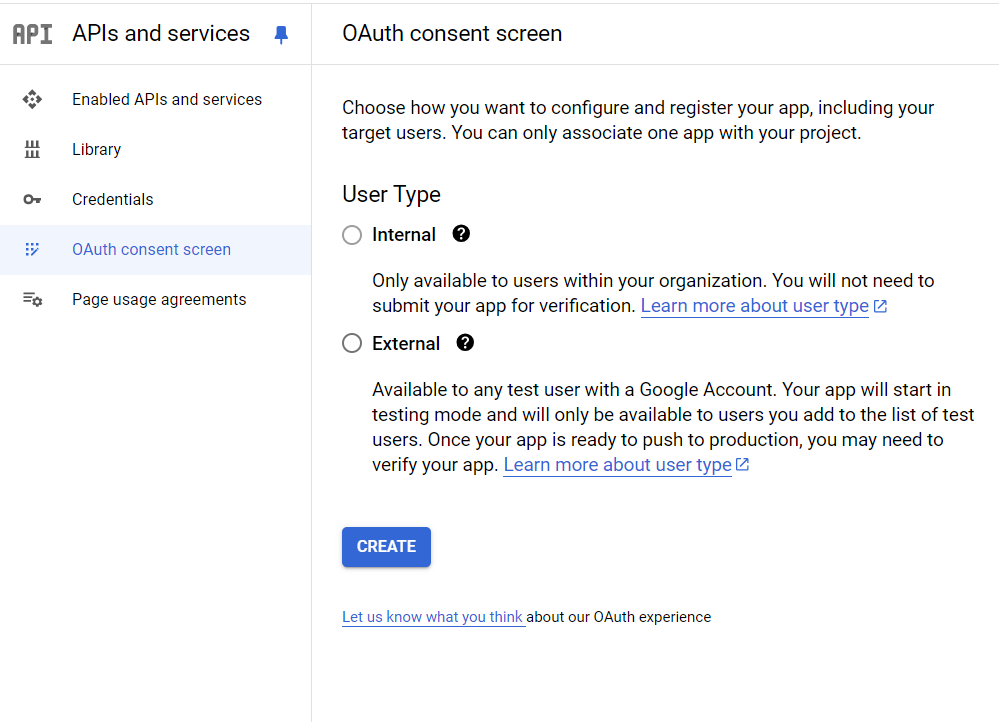
Figure 3. OAuth Consent Screen
- Add the required details in the page and click save and continue
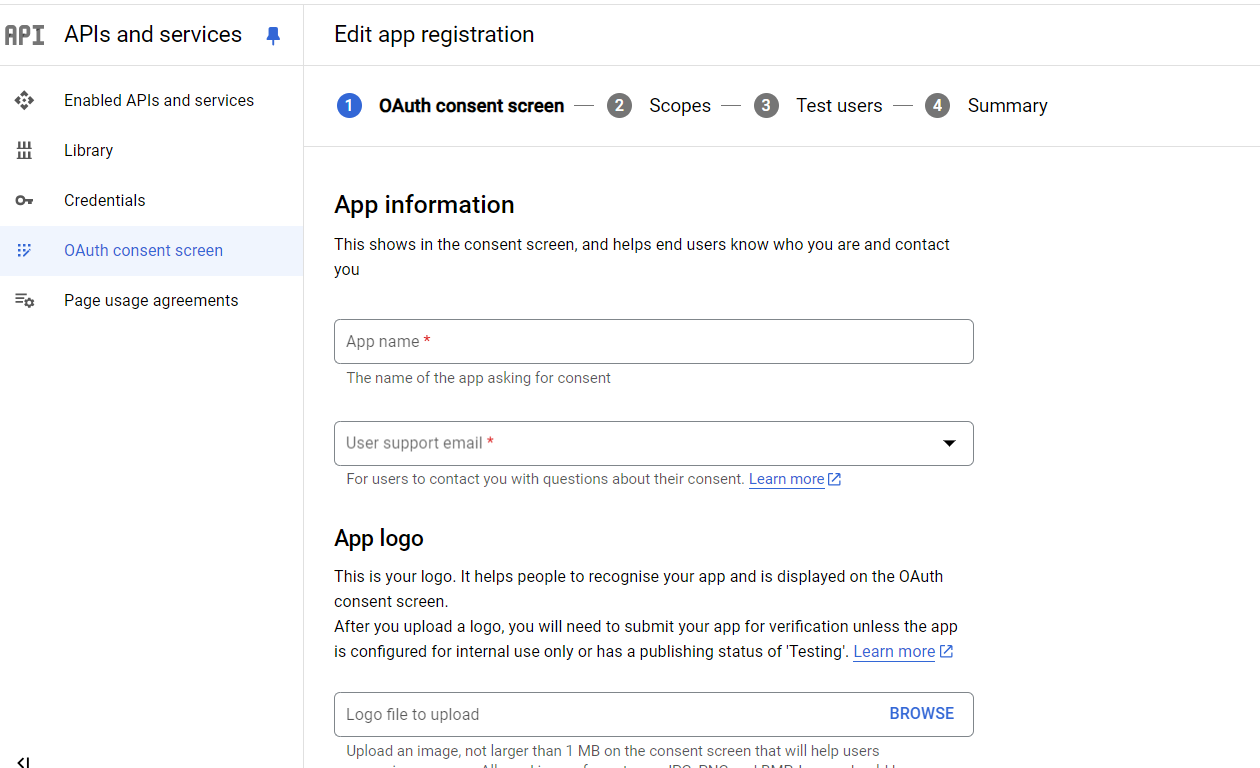
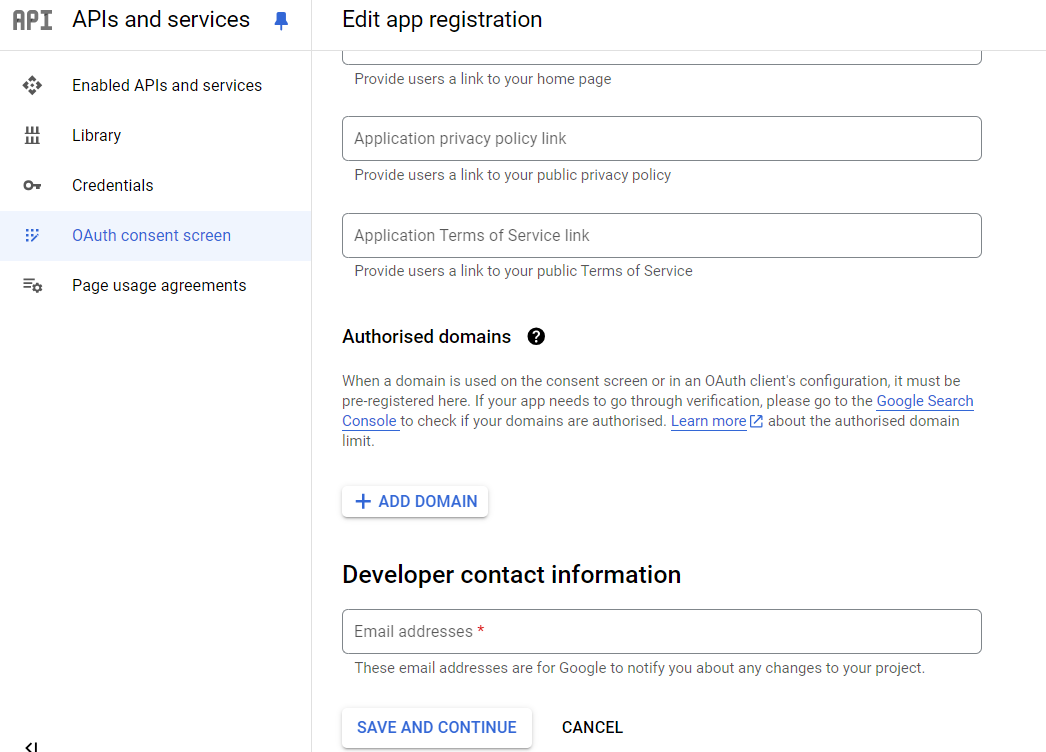
Figure 4. OAuth Consent Screen Settings
- Select Add or remove scopes and select the below selected scopes and press update. Then proceed to next step by clicking save and continue.
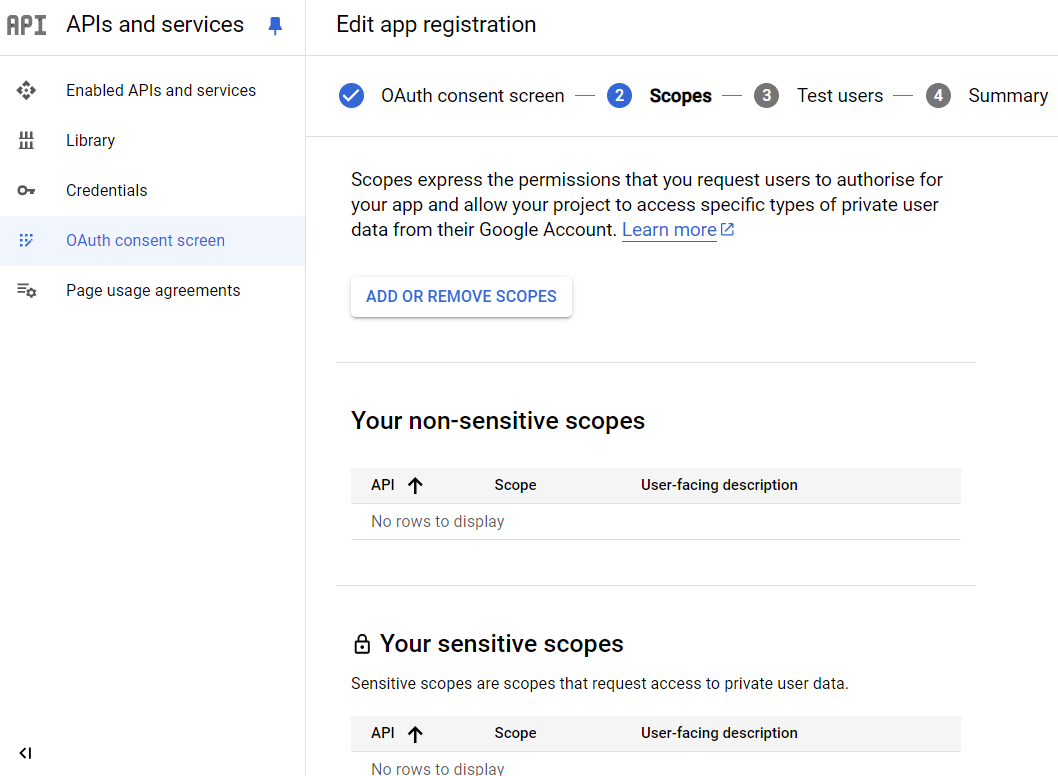
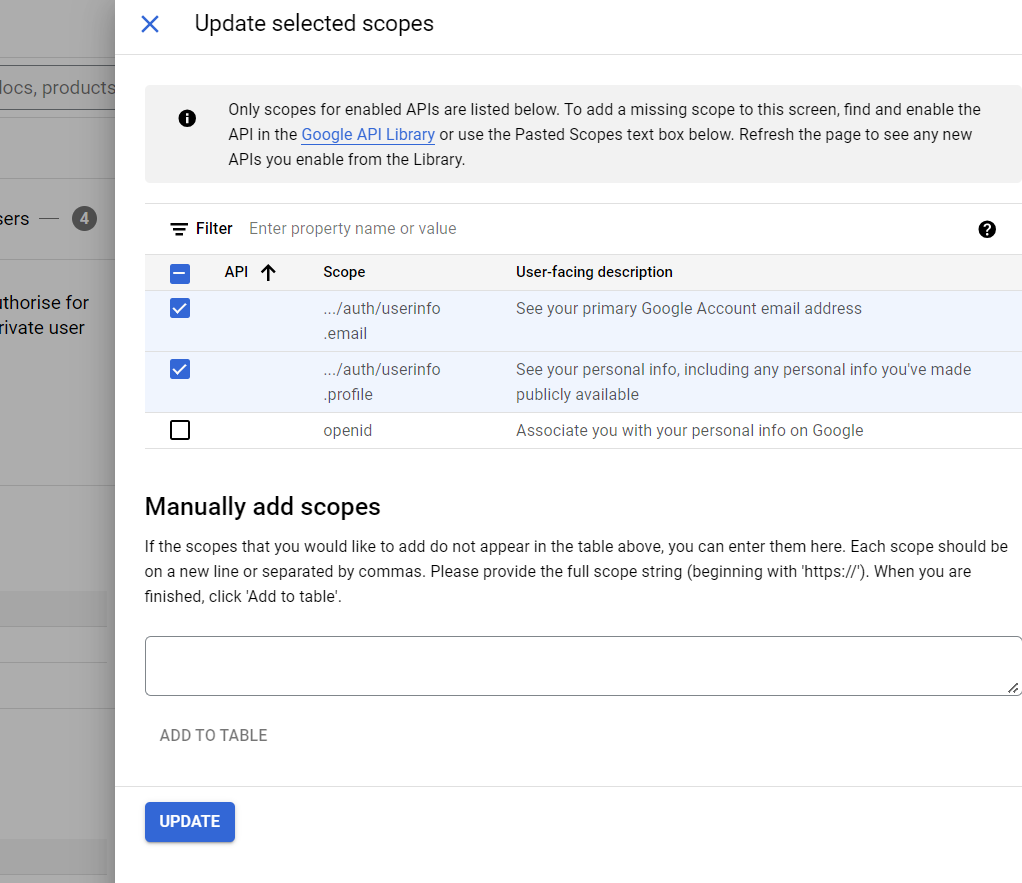
Figure 5. OAuth Consent Screen Scope Addition
- Skip the Test User addition and complete the consent screen configuration.
- The Resulting page (Figure 6) will be obtained.
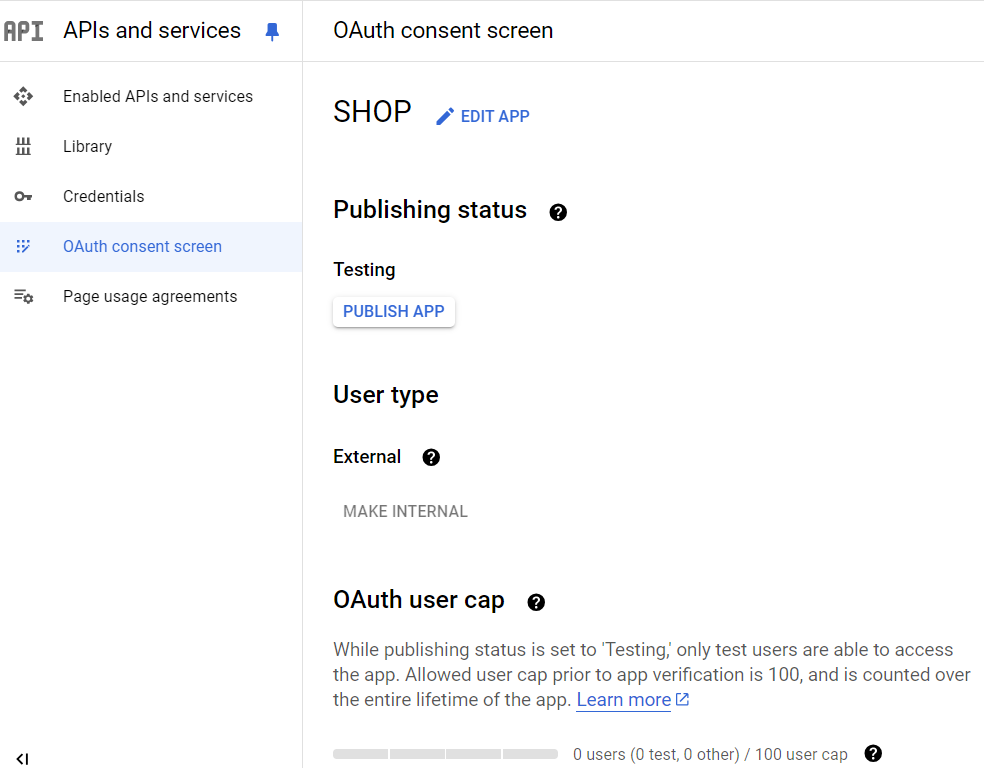
Figure 6. OAuth Consent Screen (After Configurations)
- Publishing the app result to pop up (Figure 7). Click on Confirm
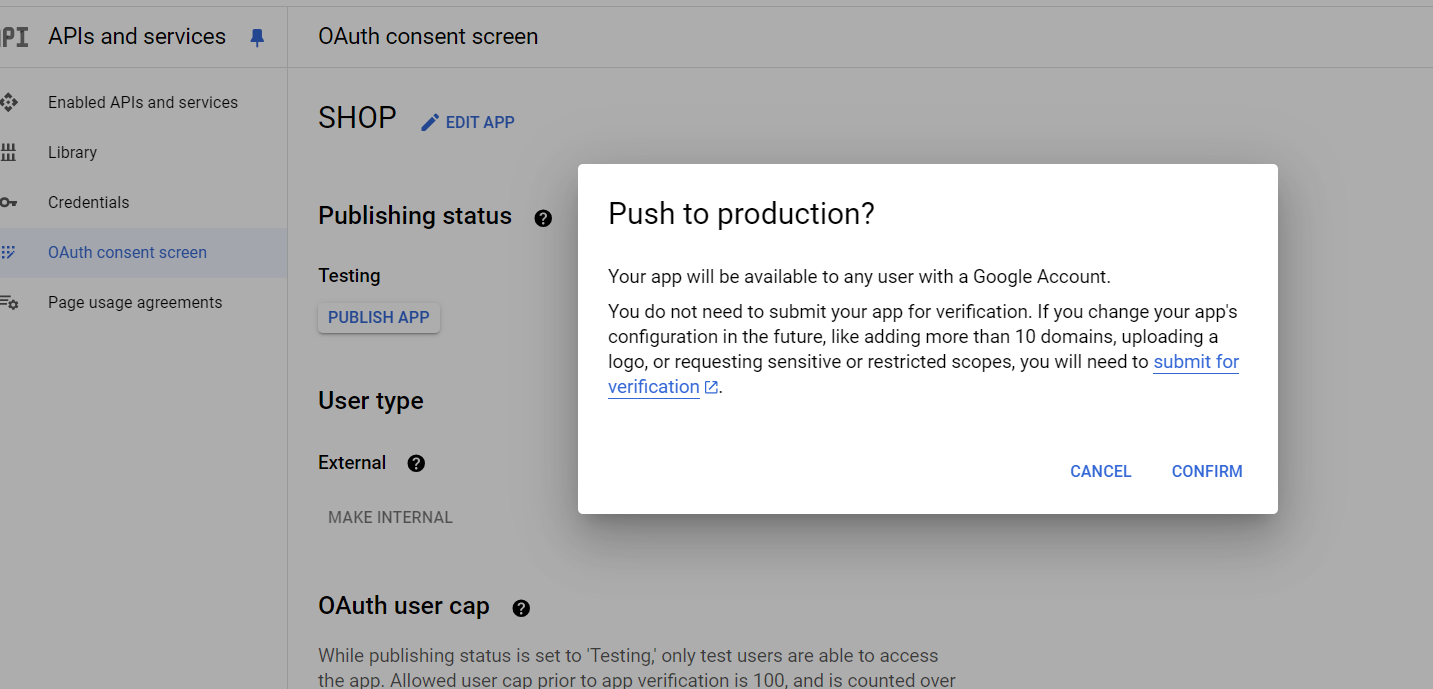
Figure 7. App Publishing (After Configurations)
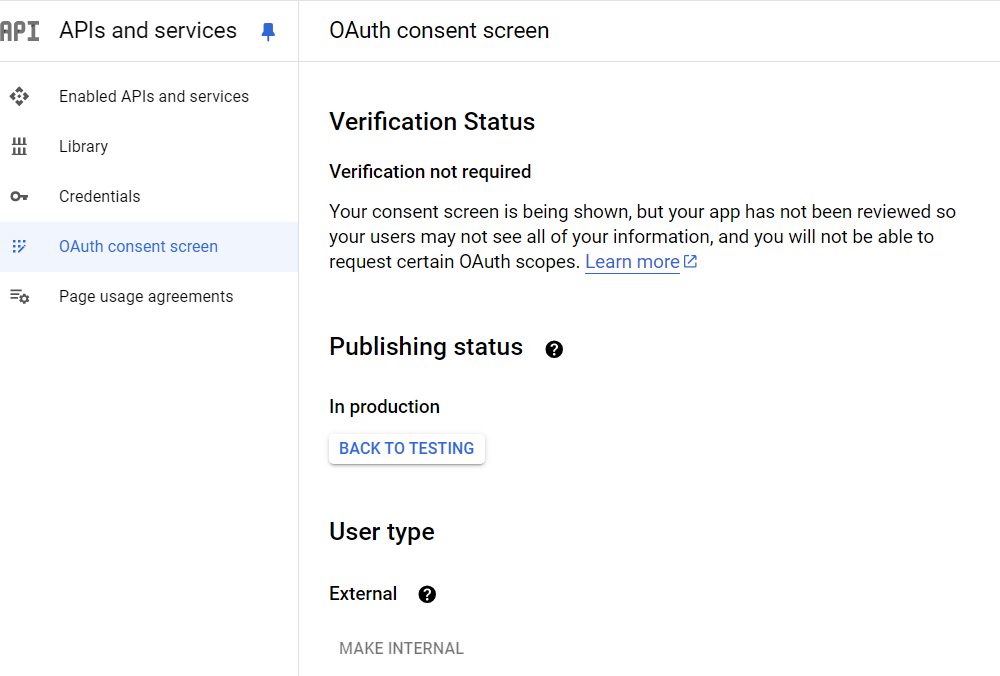
Figure 8. App Published
- In Credentials Tab, Click CREATE CREDENTIALS and select OAuth client ID
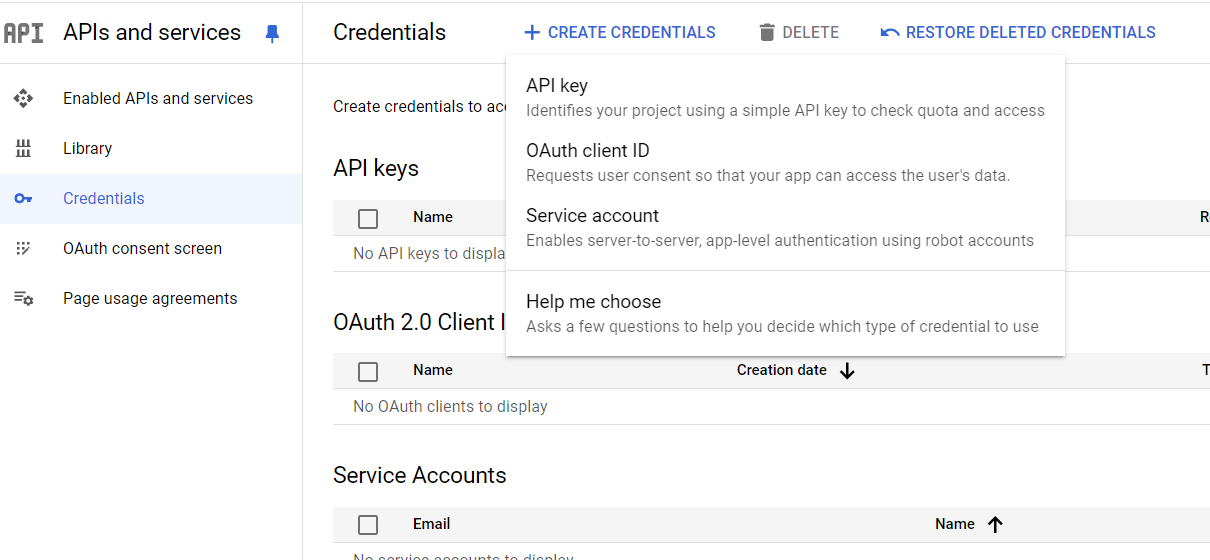
Figure 9. Credentials Dashboard
- Add application type as Web Application and add required details. Add authorised redirect uri in the format baseurl/google-login-callback (If you have multiple store URLs, add each one individually) and click create
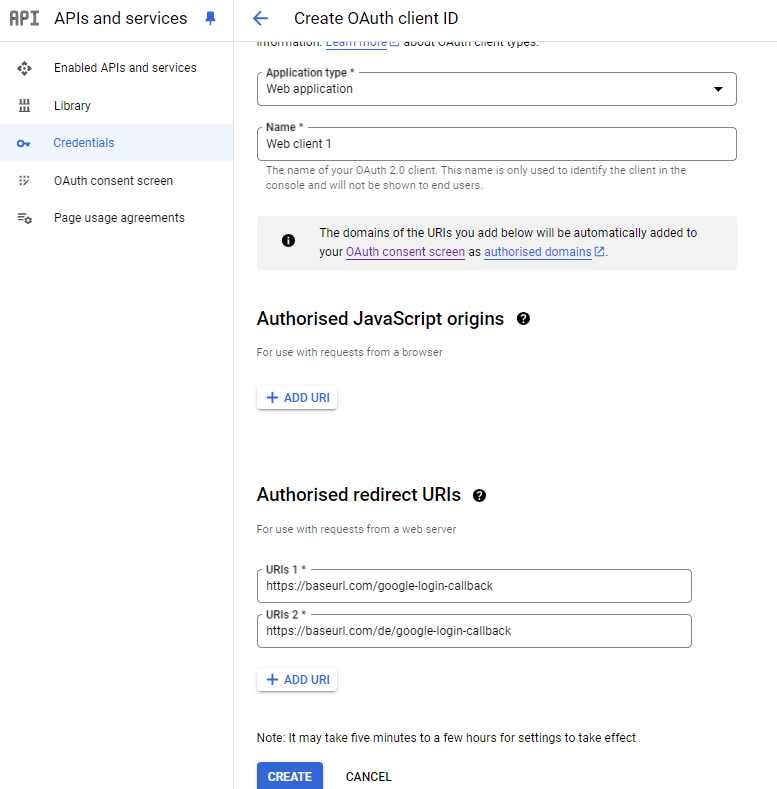
Figure 10. OAuth Client Id Creation
- After creation we obtain the client id and client secret which is used later for configuring in admin.
- At the Dashboard page, filter from Library > Social. Choose Google People API and enable it.
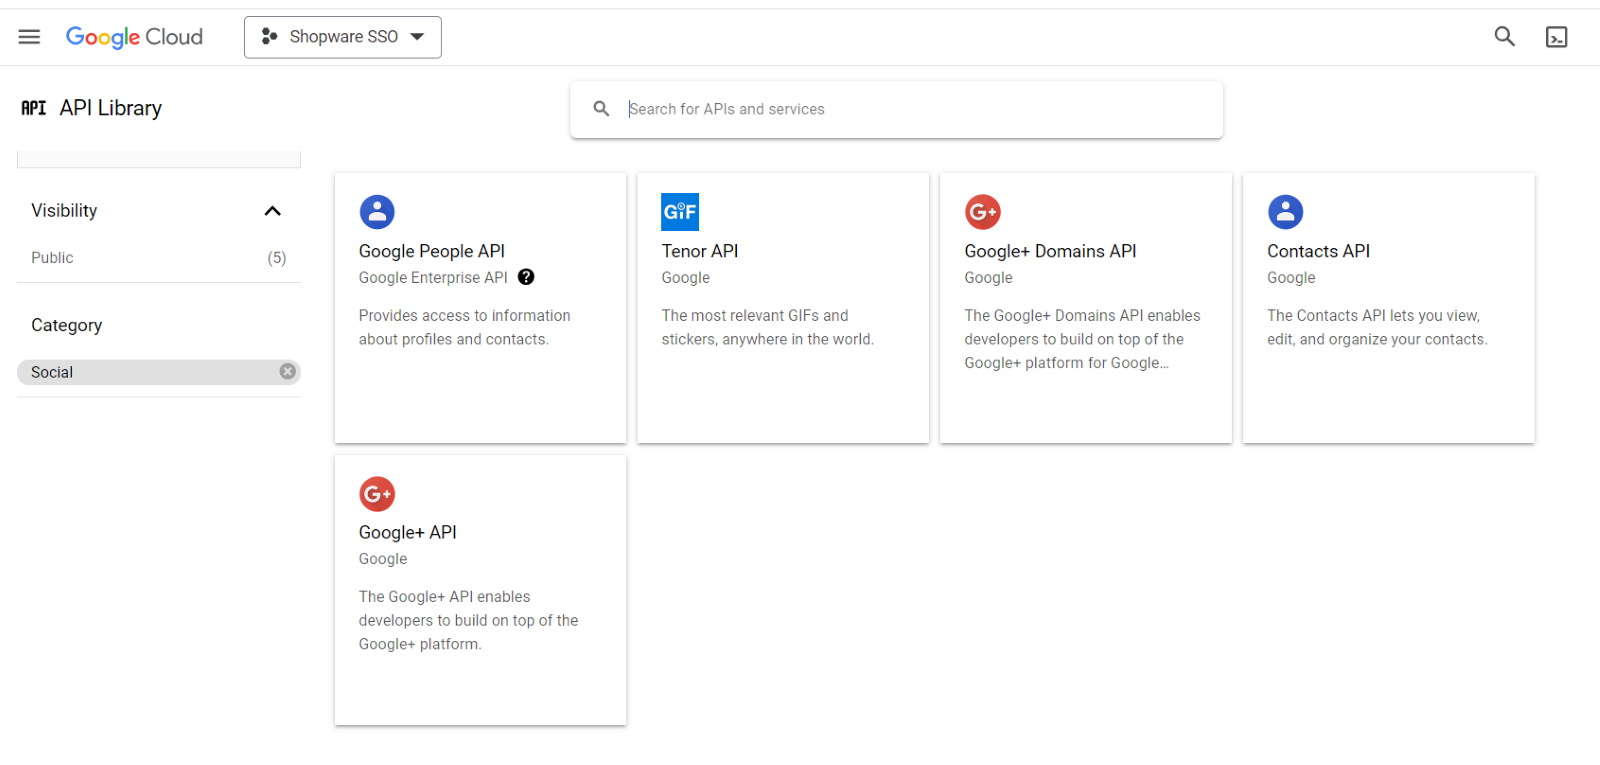
Figure 11. API Library
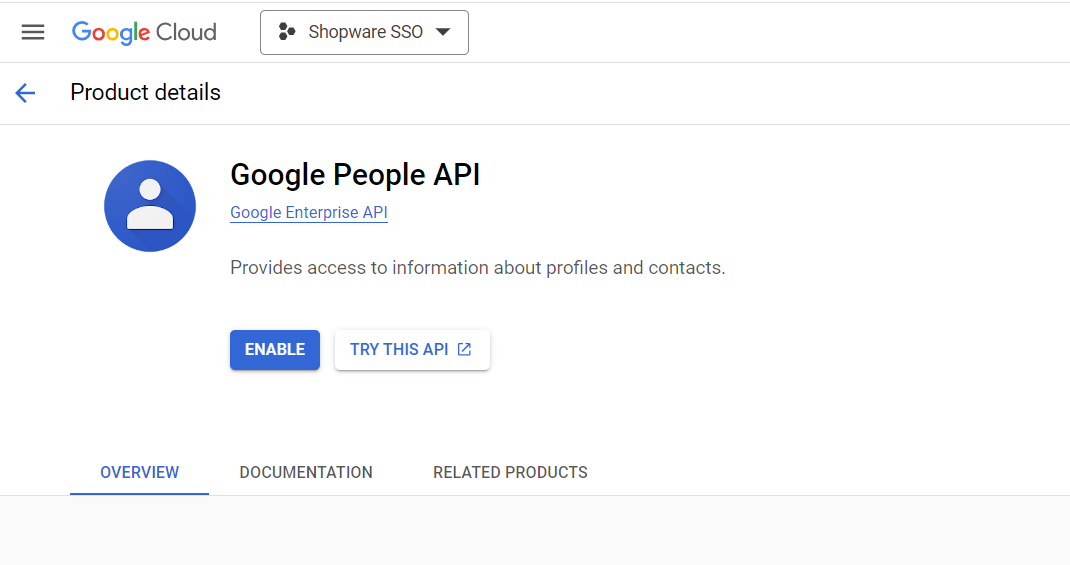
Figure 12. Google People API
Administrator Configuration
- Enable Google Login: Enable/Disable Google Login plugin.
- Client Id: Enter the client id from the google connect app.
- Client Secret: Enter the client secret from the google connect app.
- FE Google Login Button Text: Login button text to show in front end
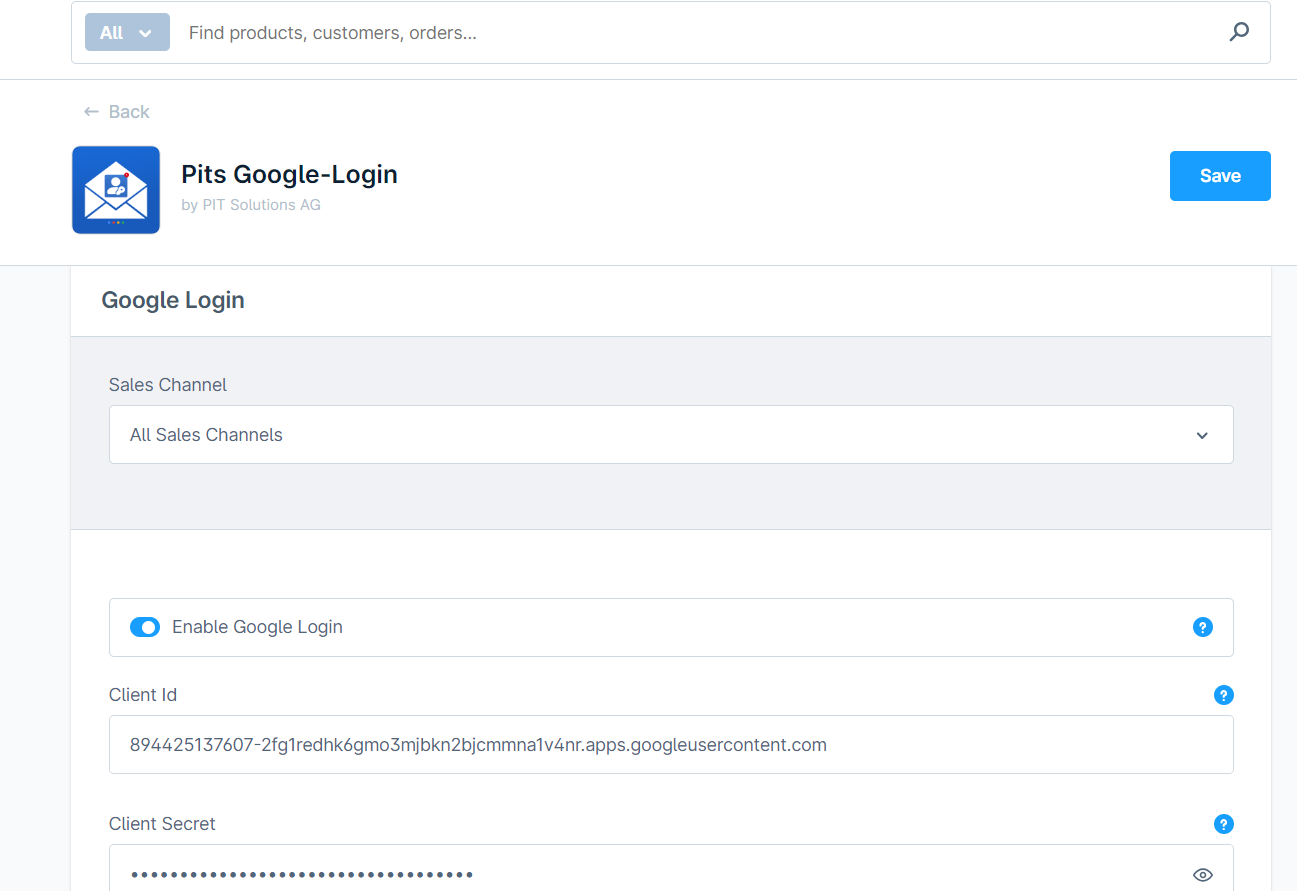
Figure 13. Configuration Page
How it works on Frontend
The frontend integration for Google Login involves adding a Google Sign-In button to your login form, loading the Google platform library, and configuring it with your client ID and secret. This setup ensures users can securely authenticate with their Google account, offering a seamless and password-free login experience. The integration also includes handling success and failure callbacks to manage user data and login status effectively.
The Google Login template will be rendered only if the Client ID and Client secret are entered, and the Google login plugin is switched to "enabled." This ensures that all necessary configurations are in place for secure authentication. When these conditions are met, users can sign in/sign up seamlessly using their Google accounts
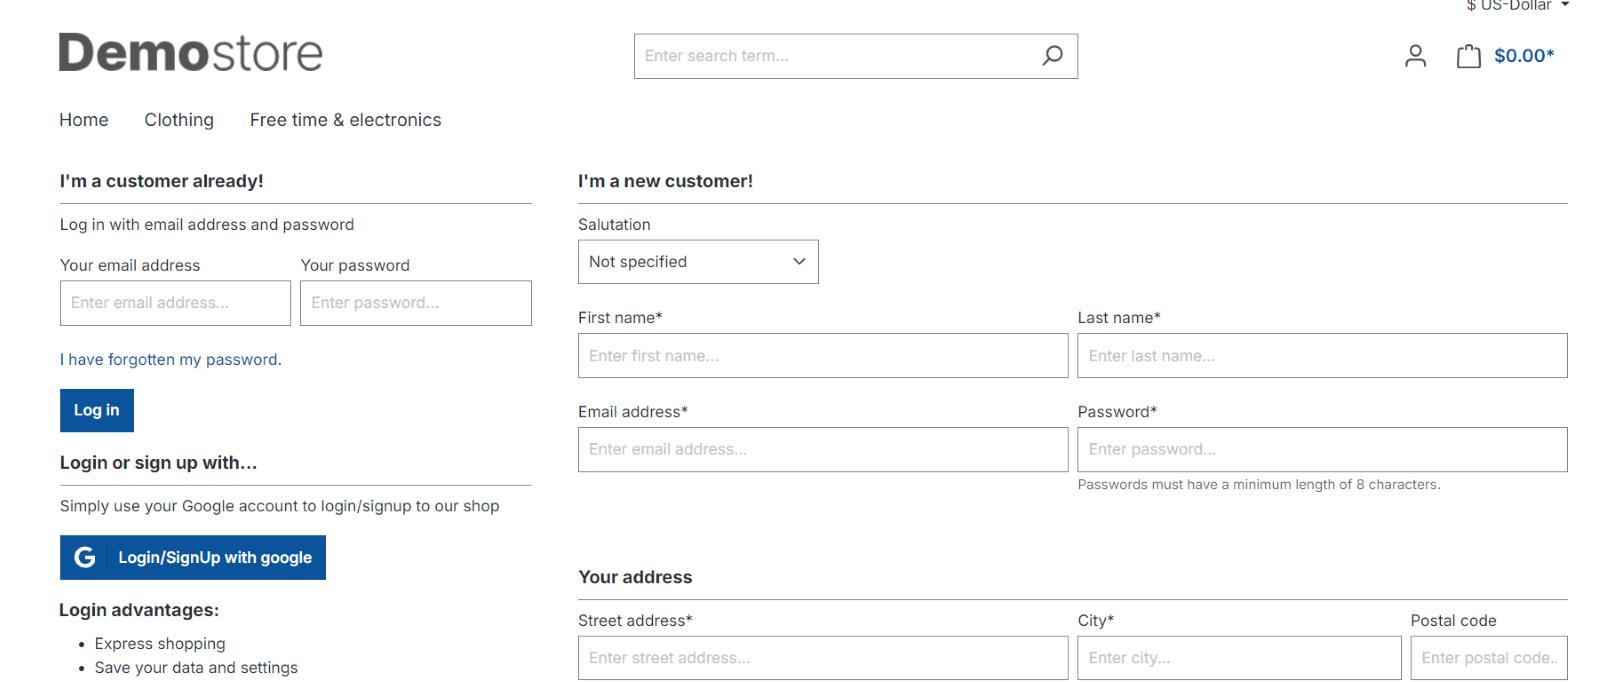
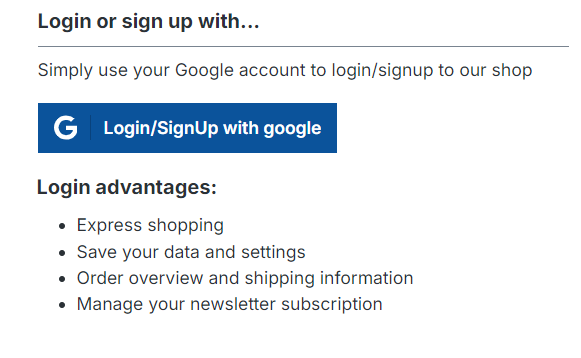
Figure 14. Google Login Template
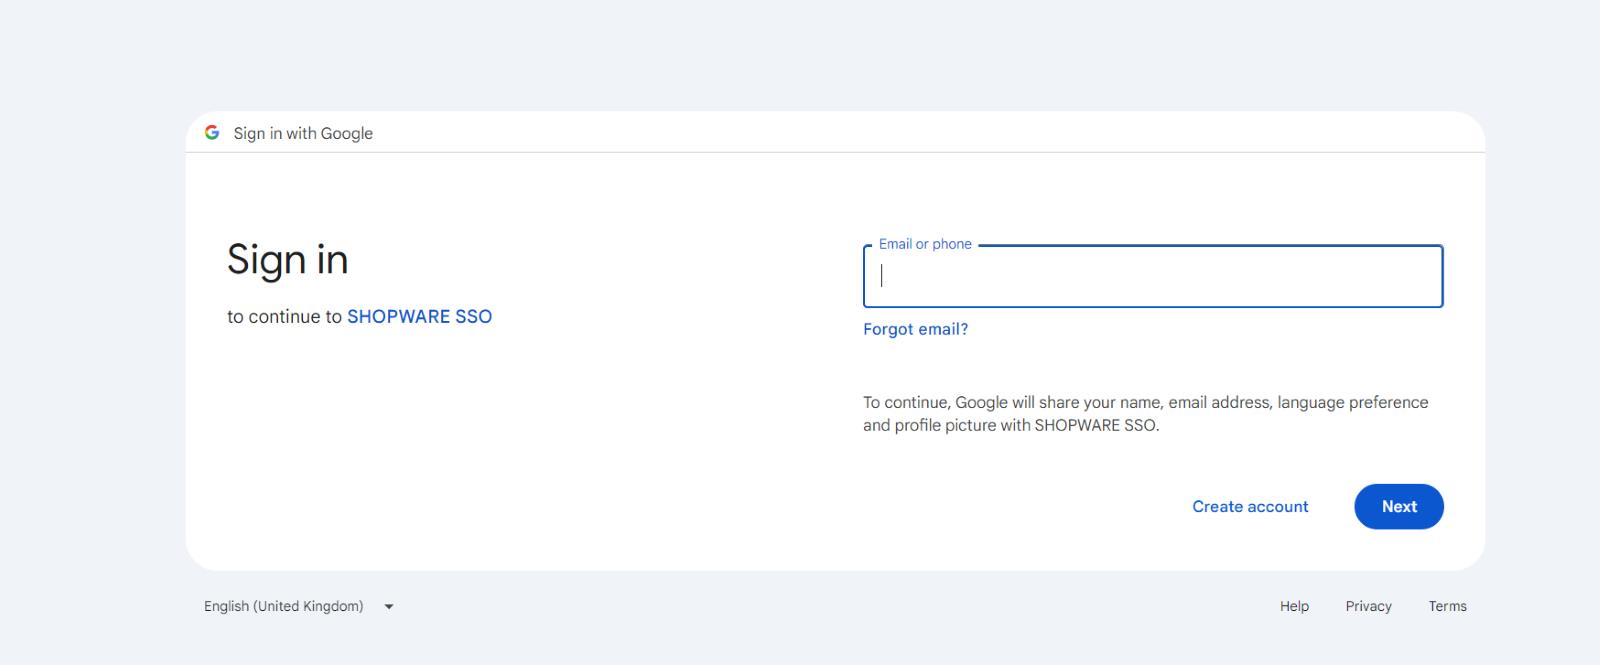
Figure 15. Google Sign in Page
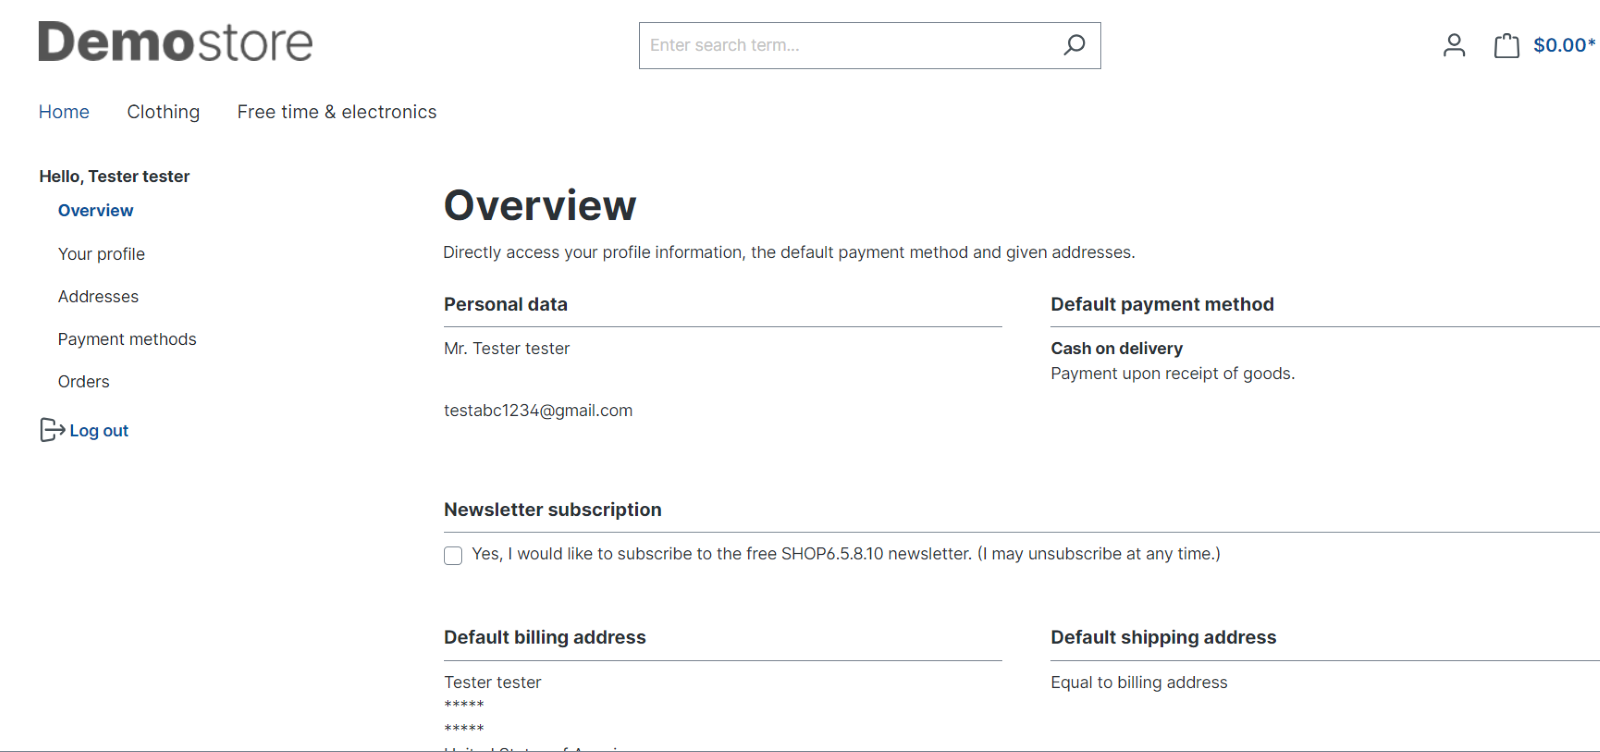
Figure 16. User Profile Page
Important Notes
During the sign-up process, the default country for the billing and shipping address is set to match the shop's default country. The street address and city fields are initially populated with placeholder text (****). Users have the option to edit these addresses after completing the registration process.
Supported Languages
English (United Kingdom), German
Change Log / Release Notes
Version: 1.0.0: June 2024
Initial version
Support
If you have questions, use our contact form in https://www.webshopextension.com or email to support@webshopextension.com