Token Management System
Kategorien
Magento
WordPress
SAP Commerce
Odoo
Shopify
Typo3
Shopware
nopCommerce
Pimcore
Hyvä
OXID eShop


1. Product Specification
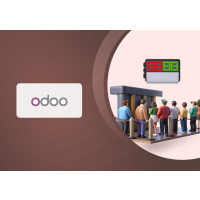
A self-ticketing system designed to optimize queue management in physical stores by providing real-time queue visibility, efficient staff management, and an enhanced customer experience
2. Features and Benefits
- Self-ticketing token system: Empower customers to seamlessly select their desired service and instantly receive a personalized, numbered token, streamlining their experience and ensuring an organized, efficient queue management process.
- Transparent Token Display: Provide customers with real-time, clear visibility of their queue position and progress, keeping them informed and reducing uncertainty throughout their waiting experience.
- Comprehensive Backend Token Management: The token management system's backend includes a comprehensive dashboard that provides detailed information about all generated tokens and their current states. It also facilitates service management, token interface configuration, counter creation, and maintains a complete list of all generated tokens.
- Crowd-Free Counters: Efficient organization of queues, eliminating crowded counters and enhancing comfort for both customers and staff, resulting in a more relaxed and productive environment.
- Priority-Based Service Management: Streamline urgent cases by implementing priority for services, ensuring that critical needs are addressed promptly and efficiently.
- Hierarchical Service Listing: Clearly categorize and organize services into distinct levels, allowing customers to easily select and navigate their desired options with minimal effort.
- Reduced Waiting Times: Achieve a smoother flow and improved communication to significantly minimize customer downtime, ensuring a more efficient and pleasant experience.
- Enhanced Staff Productivity: Streamlined service delivery allows employees to focus on their tasks, leading to improved performance and overall productivity.
- Token History and Status Management: Track and analyse token history and status to gain valuable insights into customer flow and service patterns, enabling data-driven decisions for optimizing operations
3. Installation
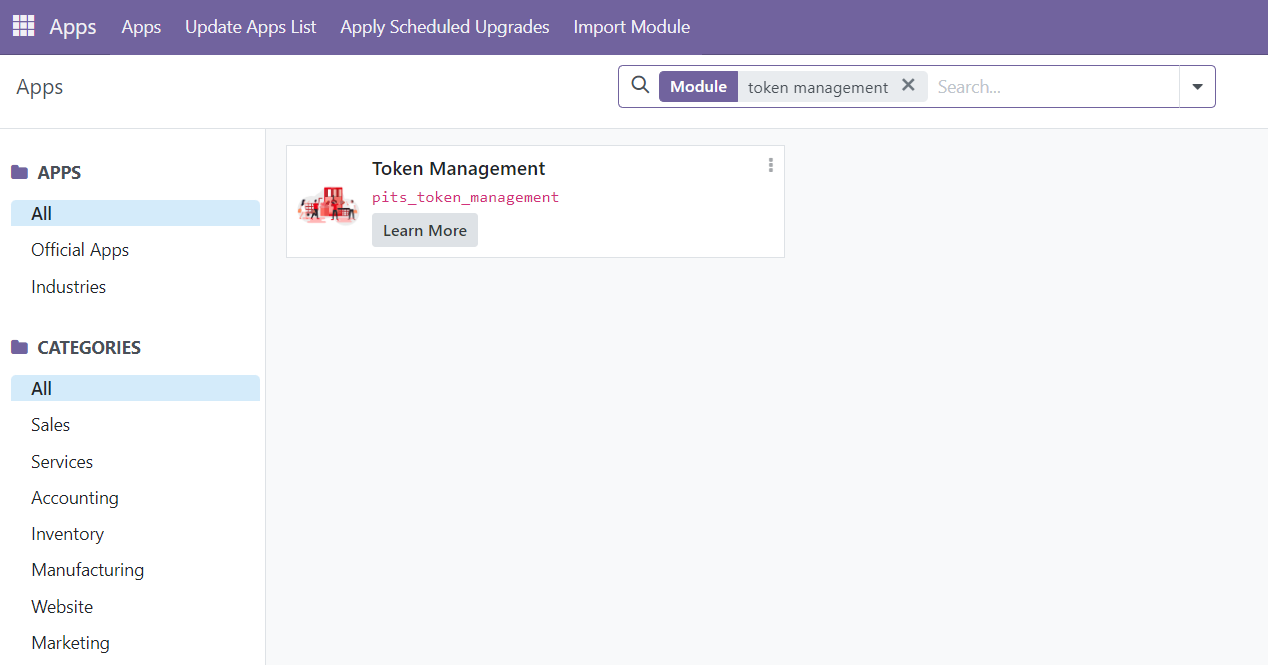
Figure 1 -Installation of Token Management
To Install the Token Management System for Odoo, follow the steps below.
Step 1: Navigate to Apps menu and search for "Token Management" from the search bar.
Step 2: Click the "Activate" button on the availed search result.
4. Token Management Settings
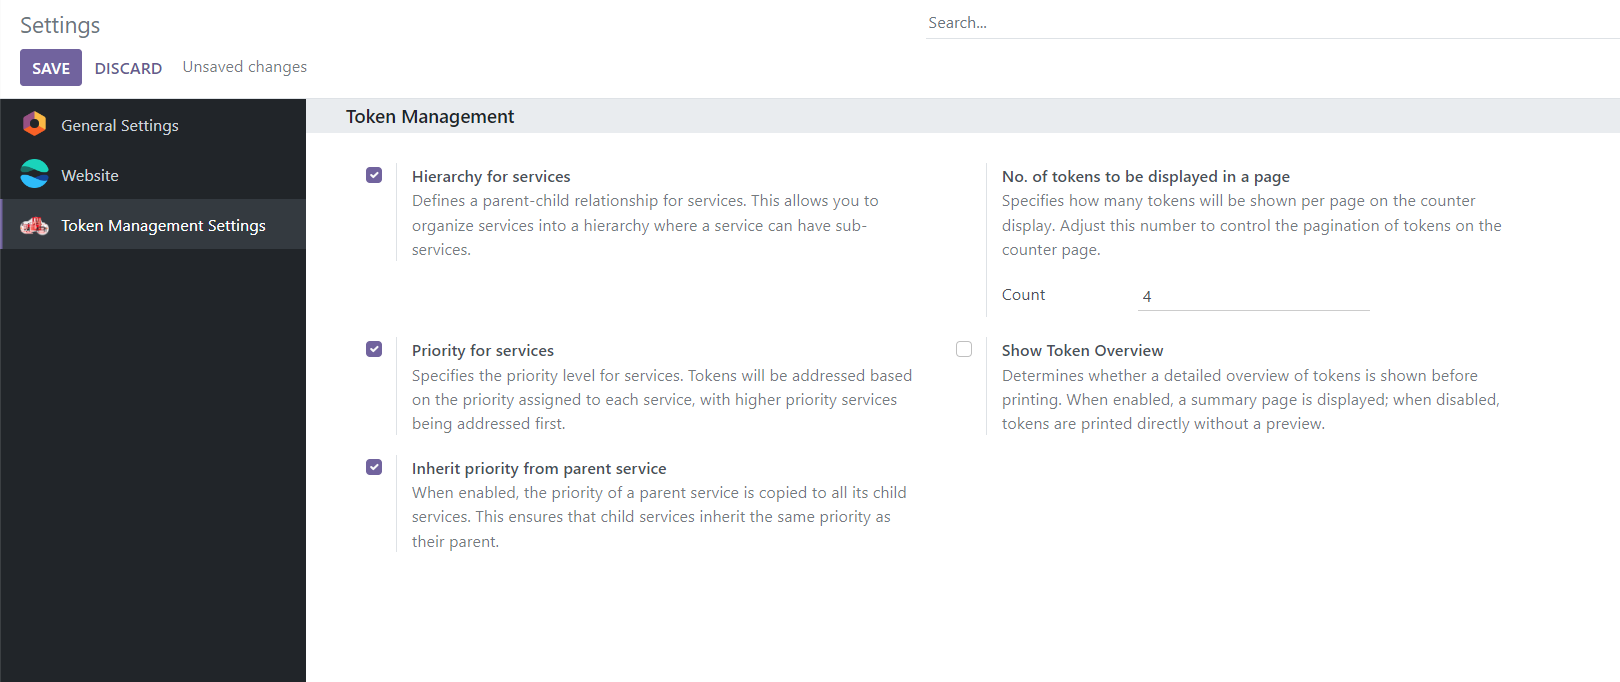
Figure 2 – Admin panel configurations
Navigate to Settings -> Token Management Settings
❖ Hierarchy for Services - This field determines how services are displayed within the token interface. If set to True, services are organized and presented hierarchically, allowing for a structured view with categories and subcategories. If set to False, all services are listed on the same page without hierarchical organization. This configuration helps tailor the user interface to either a detailed, categorized approach or a straightforward, flat listing based on your operational needs.
❖ Show Token Overview - This setting controls whether the token overview screen is displayed when a token is generated for the selected service. If enabled, the overview screen will appear, providing a summary of the token details before proceeding. If disabled, the token overview will not be shown, and users will proceed directly to the next step without viewing the summary.
❖ Set Priority for Services - With this configuration, the system will call the next token at counters based on the assigned priority levels. Once this setting is applied, tokens with higher priority will be served before those with lower priority, ensuring that urgent or high-priority cases are addressed promptly.
❖ Inherit Priority from parent service - If this option is checked, any changes made to the priority of a parent service will be automatically applied to its child services, ensuring consistent priority levels throughout the hierarchy.
❖ No. of tokens to be displayed per page - User can configure the number of tokens to be displayed in a single page in Queue Counter display.
5. Service
Service: Admin/Manager can define and configure service by specifying their details, setting parent-child relationships, and assigning priority levels as needed.
5.1 Creating a service
- Navigate to Service menu from the Token Management root menu.
- All the services created will be listed here.
- Admin/manager can click on NEW button to create a service or open an existing service to make any changes.
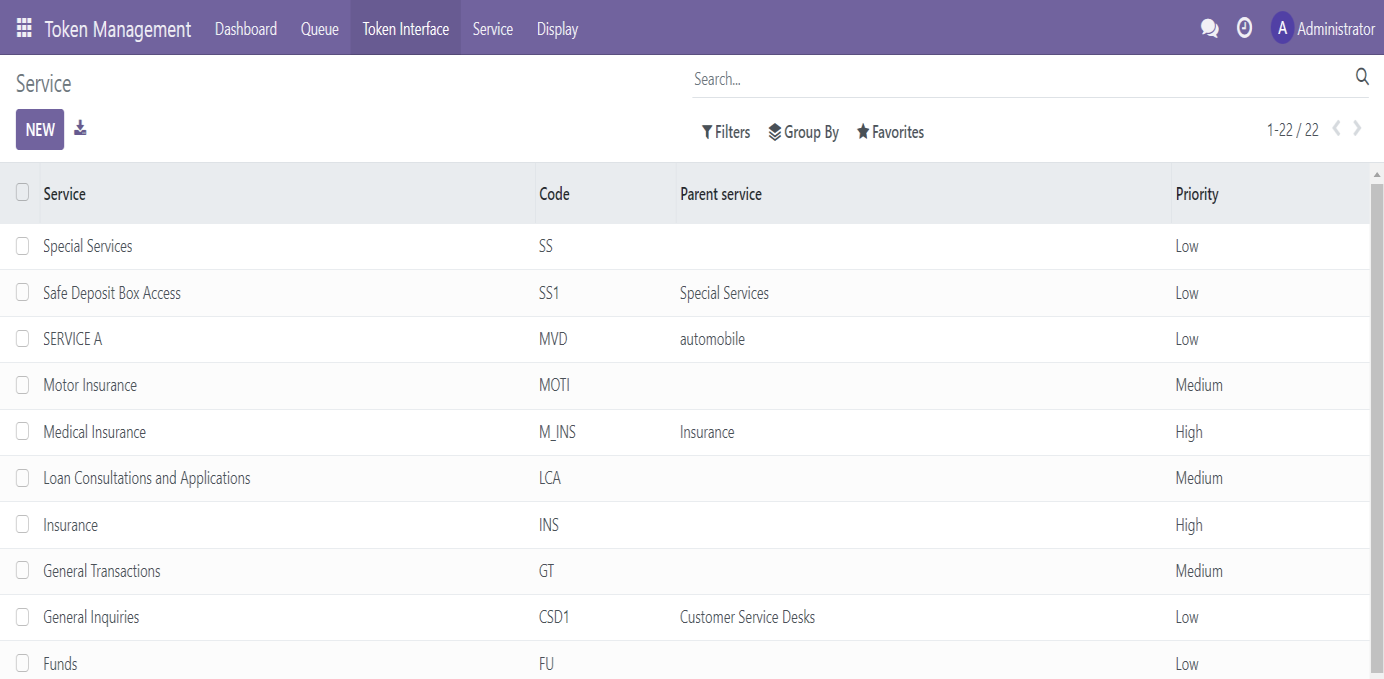
Figure 3 – Service page
- Enter the name of the service in the column specified for Service Name.
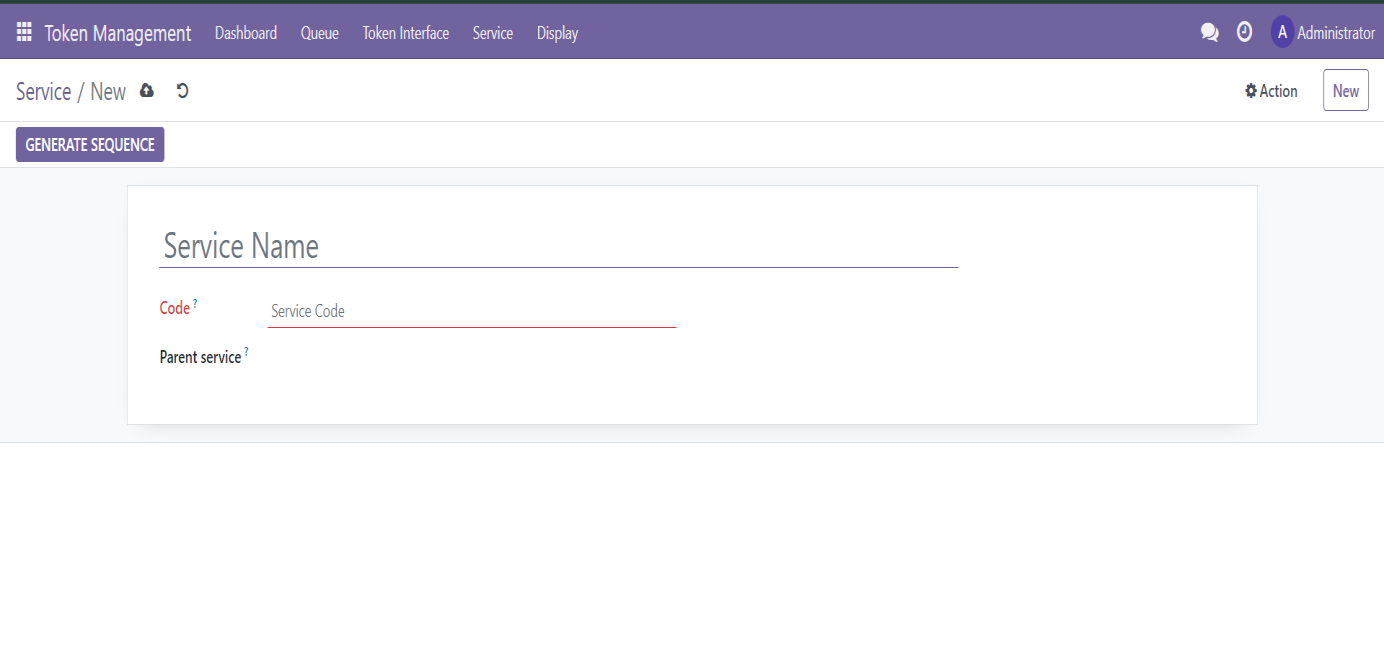
Figure 4 – Creating a service
- Code – A unique code to identify the service. Code can include letters, numbers, special characters, or a combination of all. This value will be used when generating the token as Token Sequence.
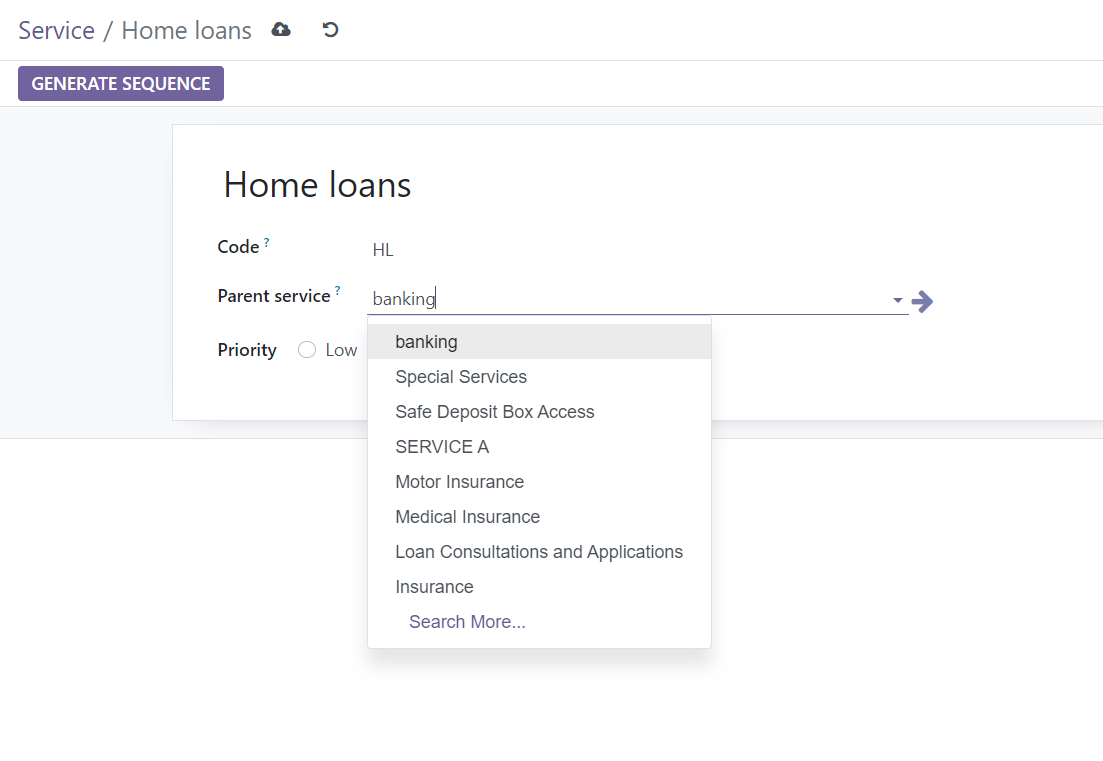
Figure 5 – Parent service listing
- Parent service: Choose a service from the available services if applicable. All the available services will be listed when clicking on “search more” button, subjected to pagination.
- Once done, Admin can save the service manually by clicking on save button icon on top or it will be saved automatically.
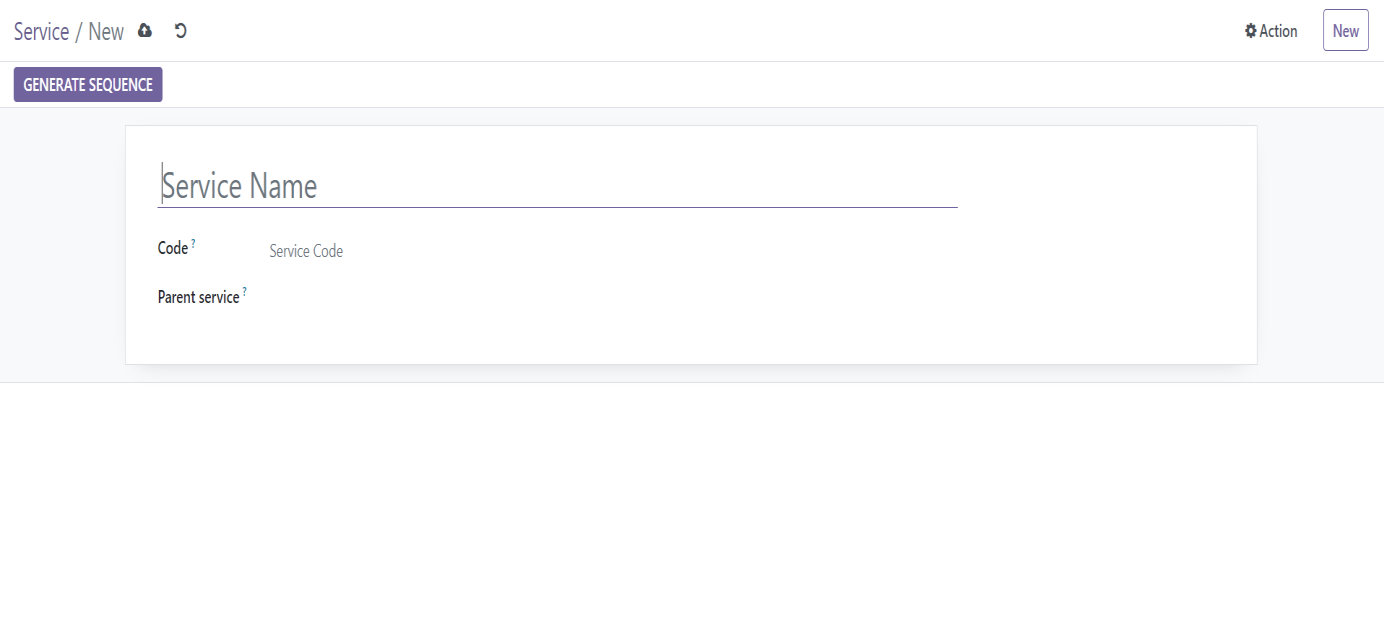
Figure 6 – Saving manually
- Priority for the service can be set based on the predefined available options; Low, Medium& High, having default value as “Low”.
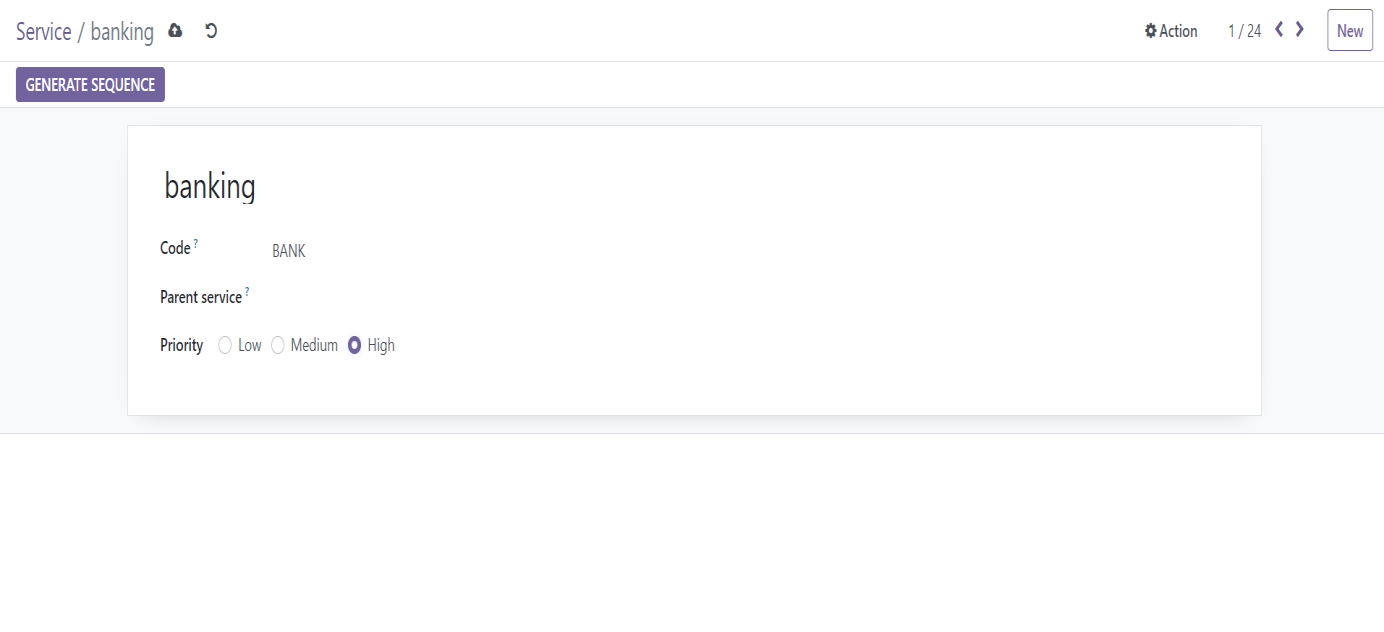
Figure 7 – Priority levels
5.2 Creating a new parent service
- Enter the Parent service name which you want to create
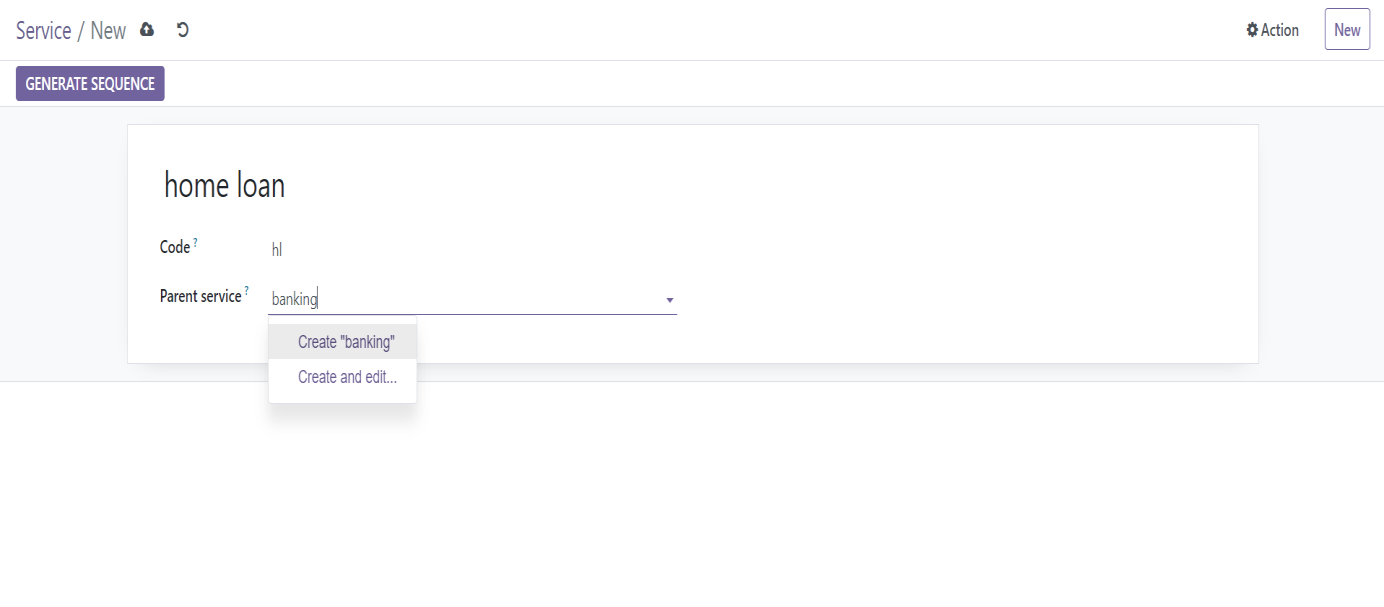
Figure 8 – Creating new parent service
- A dropdown will be seen with the “create” option.
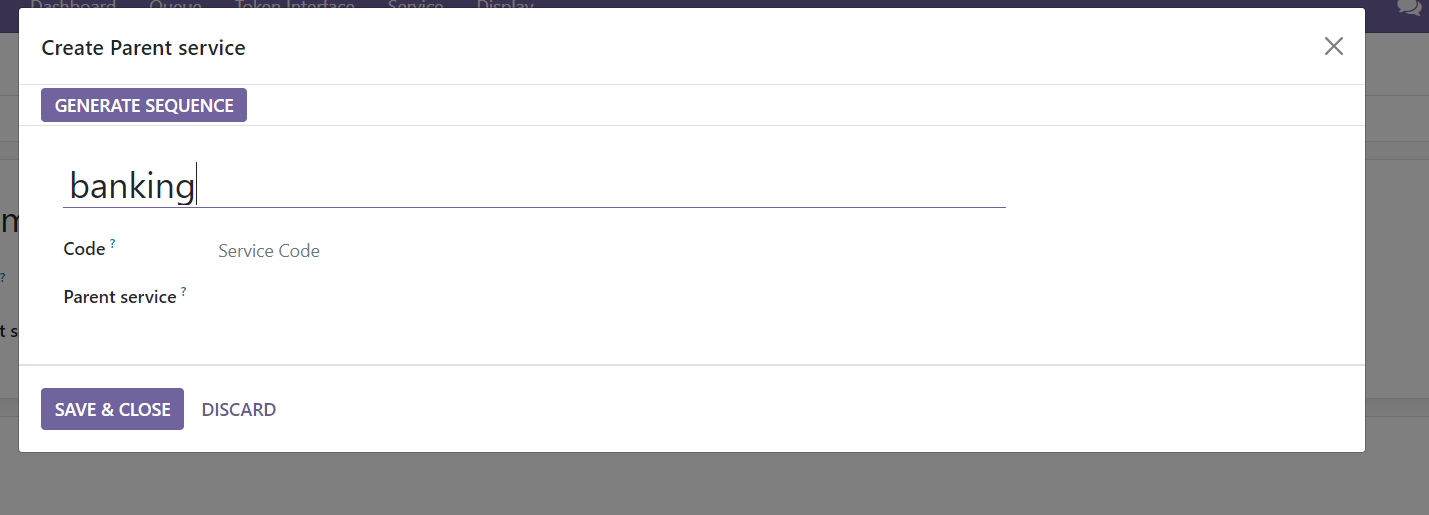
Figure 9 - Creating new parent service
- Enter the unique code as mentioned above
- Clicking on SAVE & CLOSE button will create a parent service record.
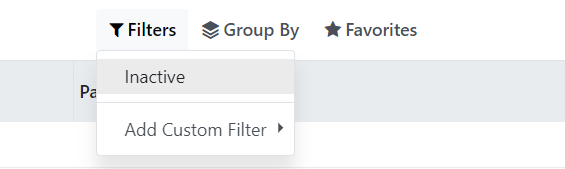
Figure 10 - Filters
- Filters – Clicking on this will show the inactive and add custom filter tab. Admin can view all Inactive services and if needed can add any custom filter to the list.
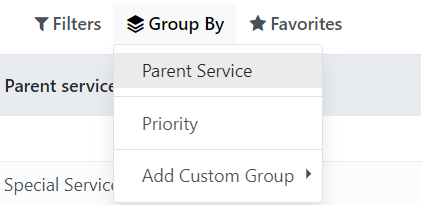
Figure 11 – Group By
- Group By - Admin can view the services based on parent services and priority.
- Add Custom group – Any customised group can be added to the list. Click on the apply button once selected.
- Favourites - User can save the current search by adding it to the favourites
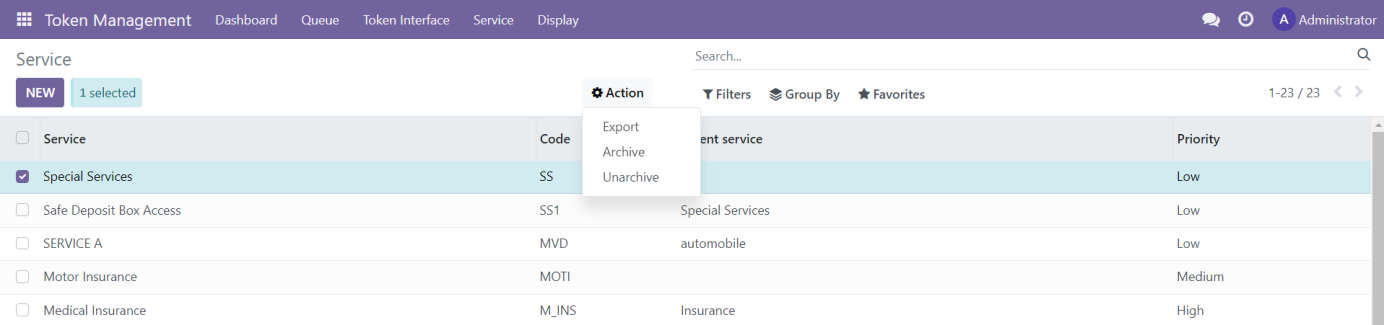
Figure 12 – Action button
- Action – Clicking on the box field of any of the service listed will display the Action button. Admin can export the data, Archive or Unarchive the field with this menu.
6. Queue Counters
Admin can create new queue counters and view/manage the existing queue counters with this menu from the dashboard.
Navigate to Queue -> Counters -> New.

Figure 13 – Queue counter page
- Counter name - Enter the name of the counter.
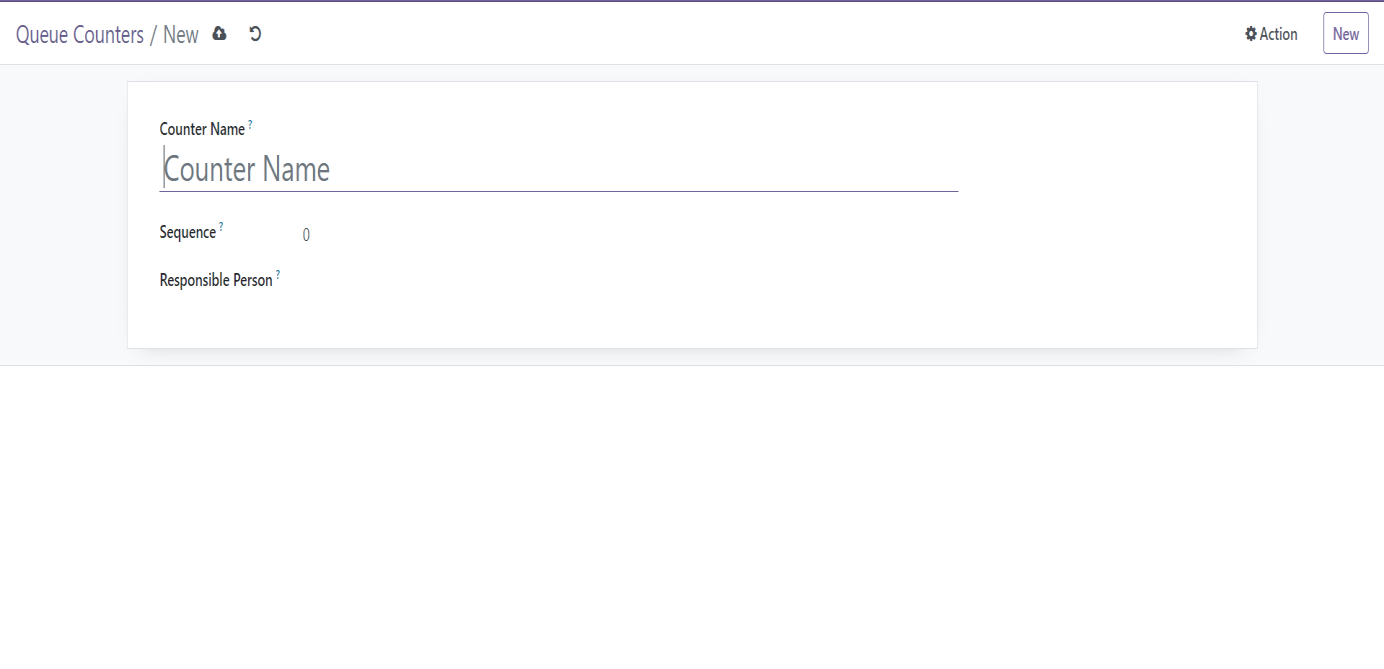
Figure 14 –Creating new counter
- Sequence – Specifies the order of display for counters in the TV display page. Records with lower sequence values will be displayed first. “0” will be preset as the default value for each counter. Admin can enter the required numerical value here.
- Responsible person – Clicking on the responsible person will gives the list of all the users available.
Once assigned, the responsible person can manage the counter.
- To create new user and to assign the user role, navigate to Settings > Users & Companies > Users. Refer Fig.15 for more details.
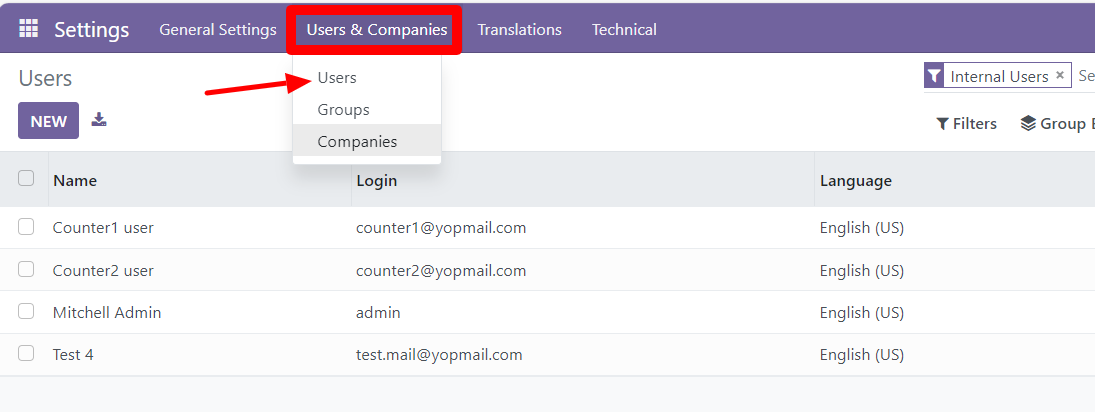
Figure 15 – Users List View
- To create a new user profile, click on New button and add the necessary details.
- To update an existing user profile or to set access role to any user profile, open the desired user profile and make the necessary changes.
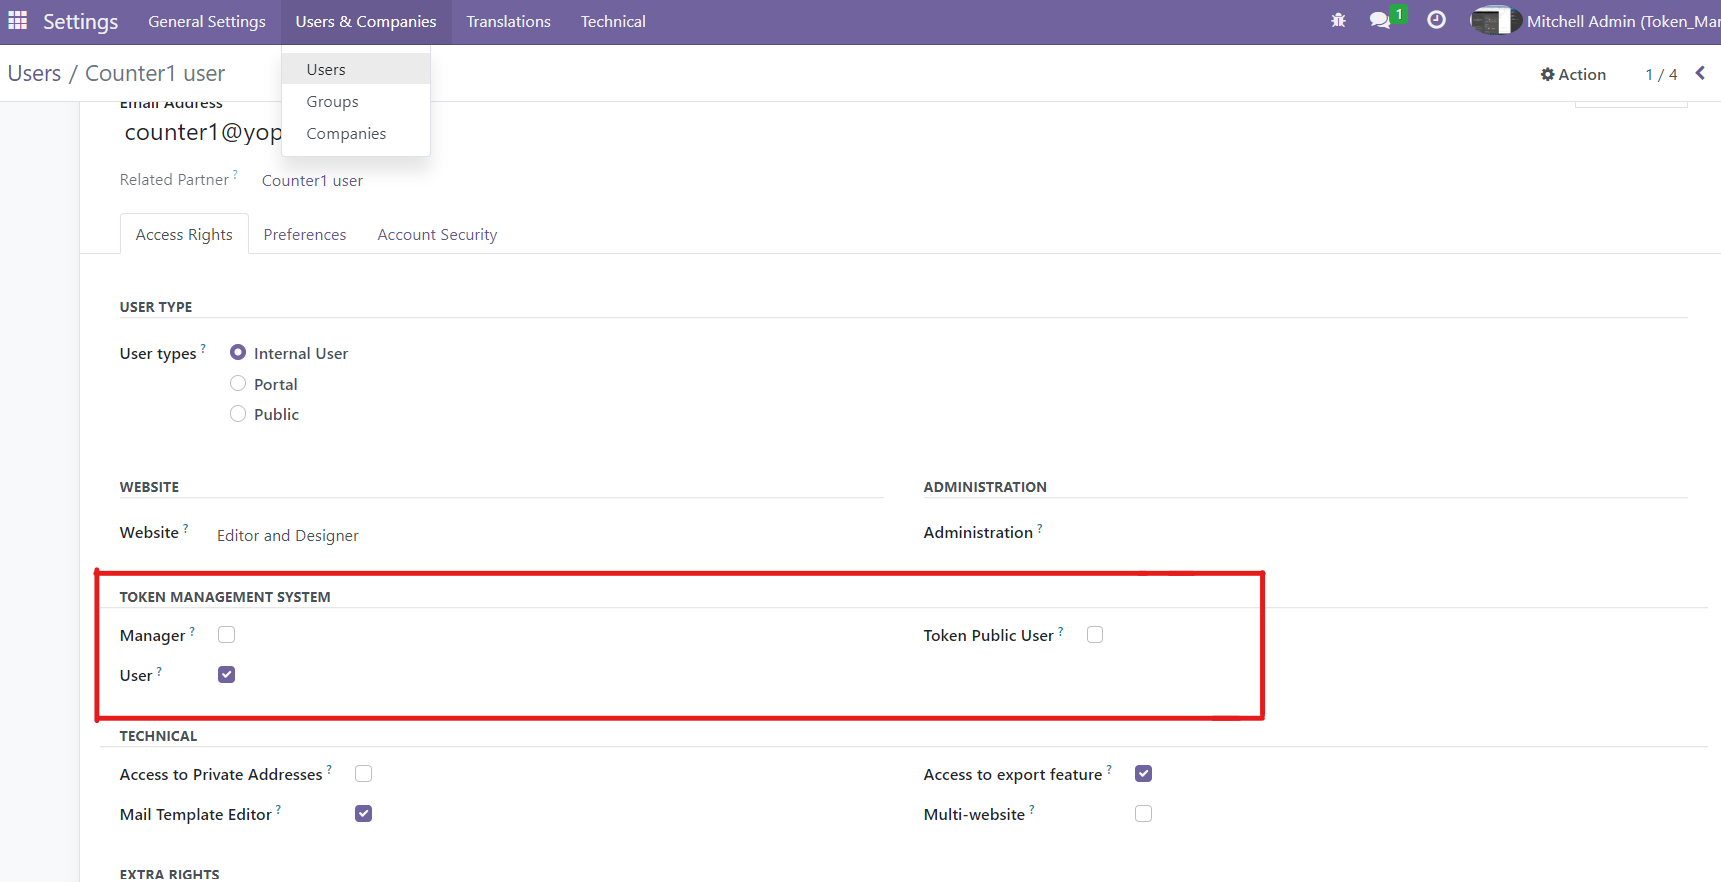
Figure 16 – User access roles
- User Roles
- Manager – Allows access to whole Token Management settings, records and data.
- User – Limited access to records, such that the user is allowed to access only the data for which he is responsible.
- Token Public User – Allowed access to Token Generation menu and Display menu.
6.1 Opening a Counter Session
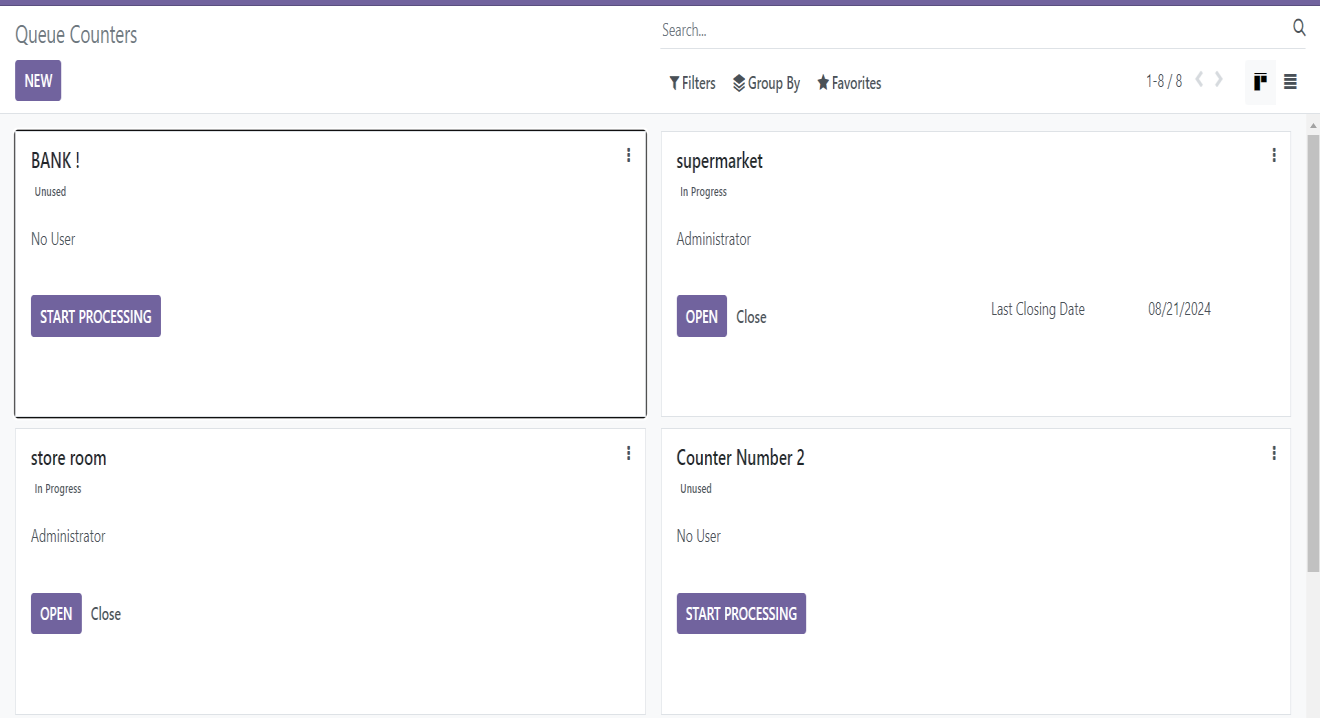
Figure 17 – After creating a new counter
Once the counter is created, Admin can view the created counter on the screen. (refer fig - 17)
- Click on the Start Processing menu and choose the required services for the counter. All the services will be listed by default.
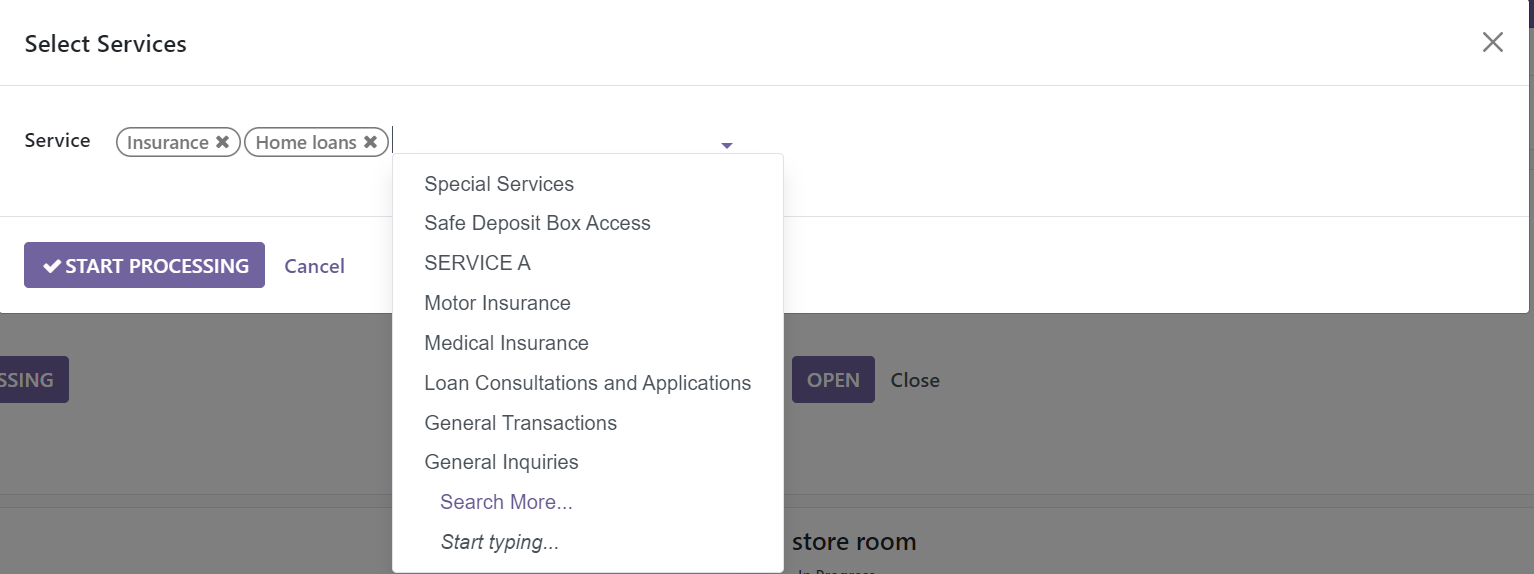
Figure 18 – Selecting services for the counter
- Admin can clear/remove the unwanted services and select the only services as per the services offered in the selected counter.
- User can select multiple services by clicking on “Seach more” from the dropdown list where all the services are listed and then selecting the Services using the check box at the left. (refer fig - 20).

Figure 19 – Selecting services from the list
- Click on “New” button to create and configure a new service.
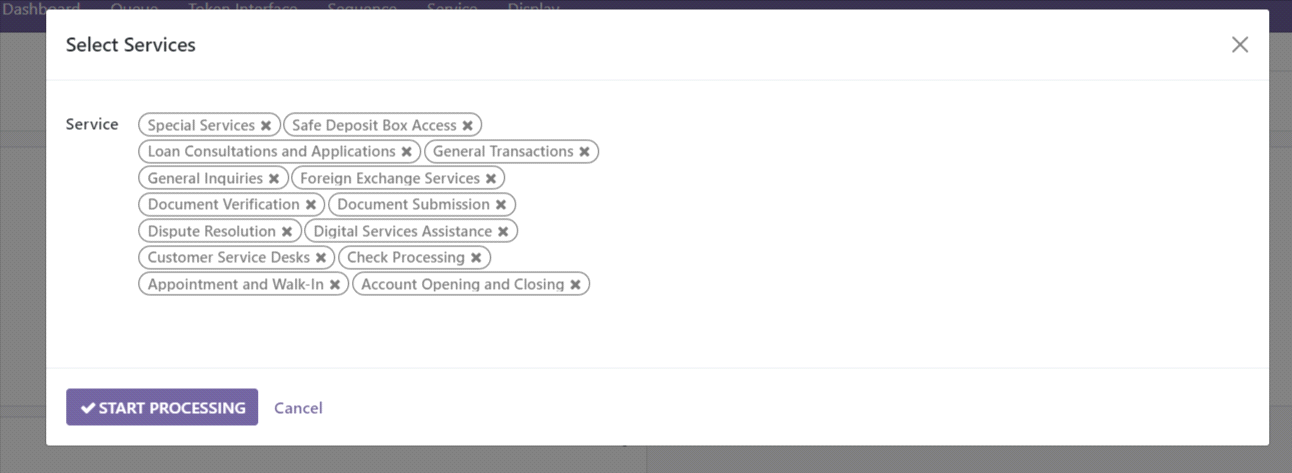
Figure 20 – Selecting services from the list
- Click on the Start Processing button to activate a new session against the counter.
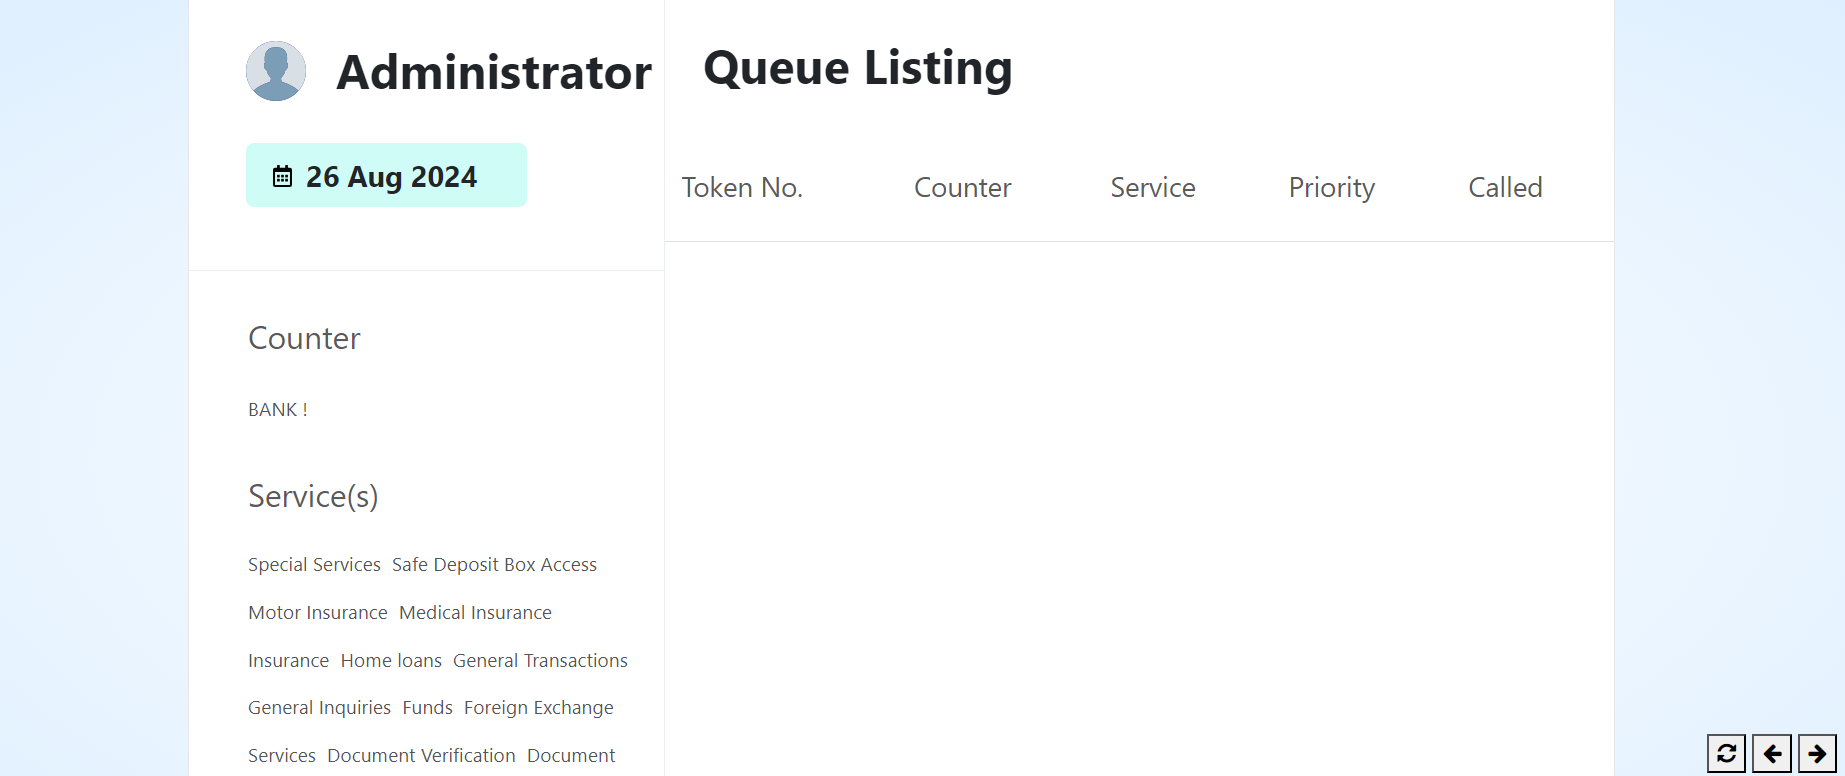
Figure 21 – Created counter
6.2 Queue -> Queue Processing/Sessions
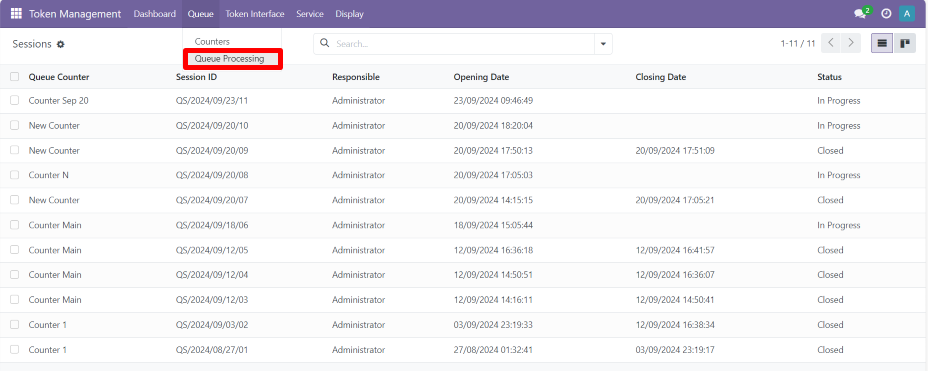
Figure 22 – Queue processing/Sessions list view
Queue Processing menu list the details of session against all the counters. Session details such as Counter, Session Ref., Session Opening and closing time and Status are few of the columns displayed in the List view.
- Queue Counter – Name of the counter.
- Session ID – Session reference.
- Responsible – User responsible for the session.
- Opening date – Queue Session opening time.
- Closing date – Queue Session closing time.
- Status - Status of the session.
- All the details shown here can be exported to xlsx format by clicking on the Download button on the top left corner of the list view.
- Users can make use of the Search Panel at the right top corner of the page to filter the records and to organize records by applying group by option in the search panel. Dropdowns available will be Session ID, Queue counter and Responsible person.
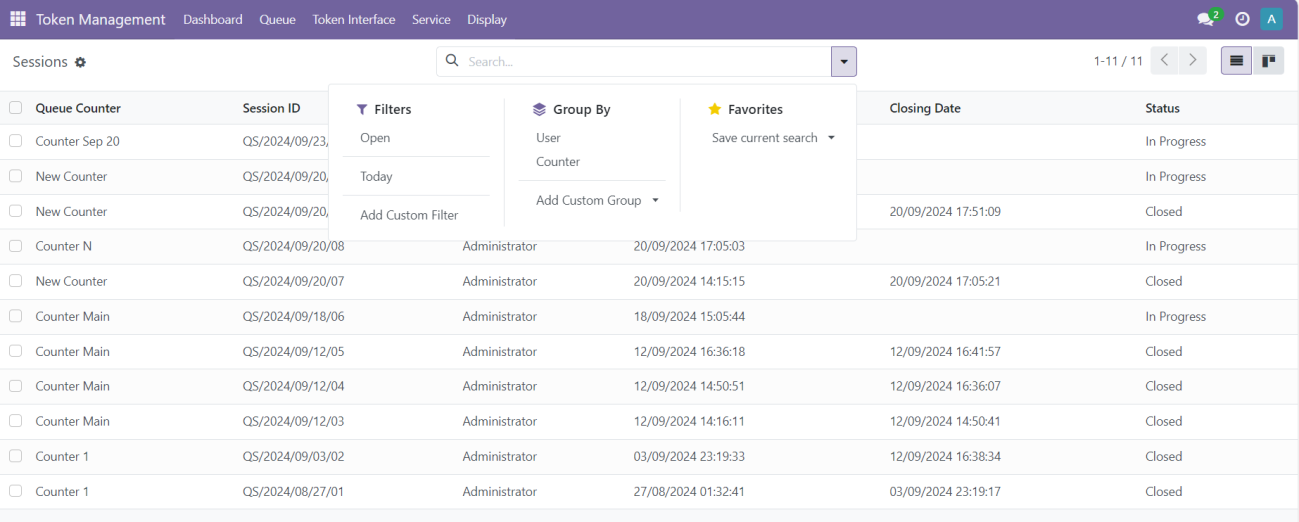
Figure 23 – Search bar
Search Filters:
- Open – Applying Open filter will filter the records and list all the sessions which are in “In progress” stage.
- Today – Lists the sessions which are opened today.
- Add Custom filter – A custom filter can be used to search details based on any conditions set by the user.
Group By
- User – Applying Group by Users will group and display the records based on the Responsible user of the session.
- Counter – Similarly, applying Group by Counters will group and display the records based on the Counter for which the session is opened against.
- Add custom group – User can apply Group options based on the applicable fields from the list.
- Favourites – User can save the current search by adding it to the favourites.
- Sessions can be viewed as a list or in Kanban.
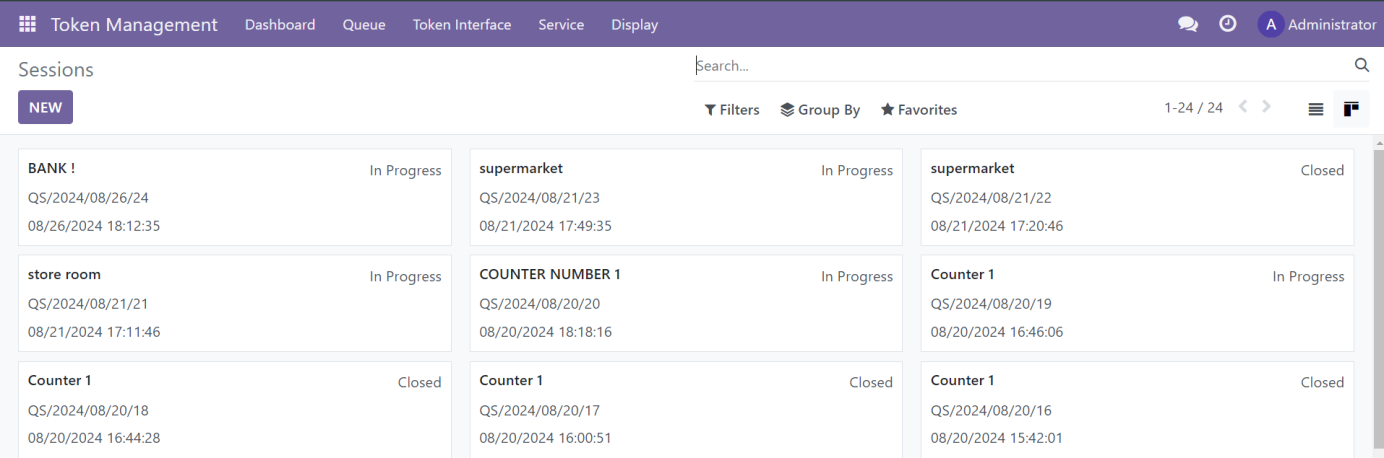
Figure 24 – Kanban view
- Action - Clicking on any counter will display the “Action” button on the top. This can be used to Export the details.
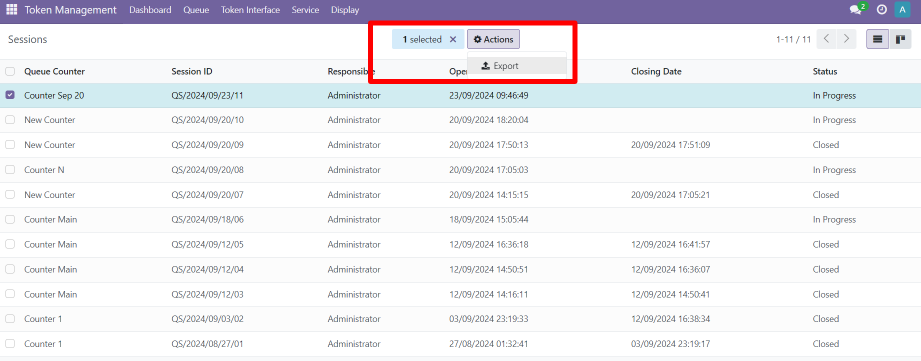
Figure 25 – Action Button
- Users can customise the export result by adding new field or by deleting it to get the required result they want. They can either export into xlsx or csv format.
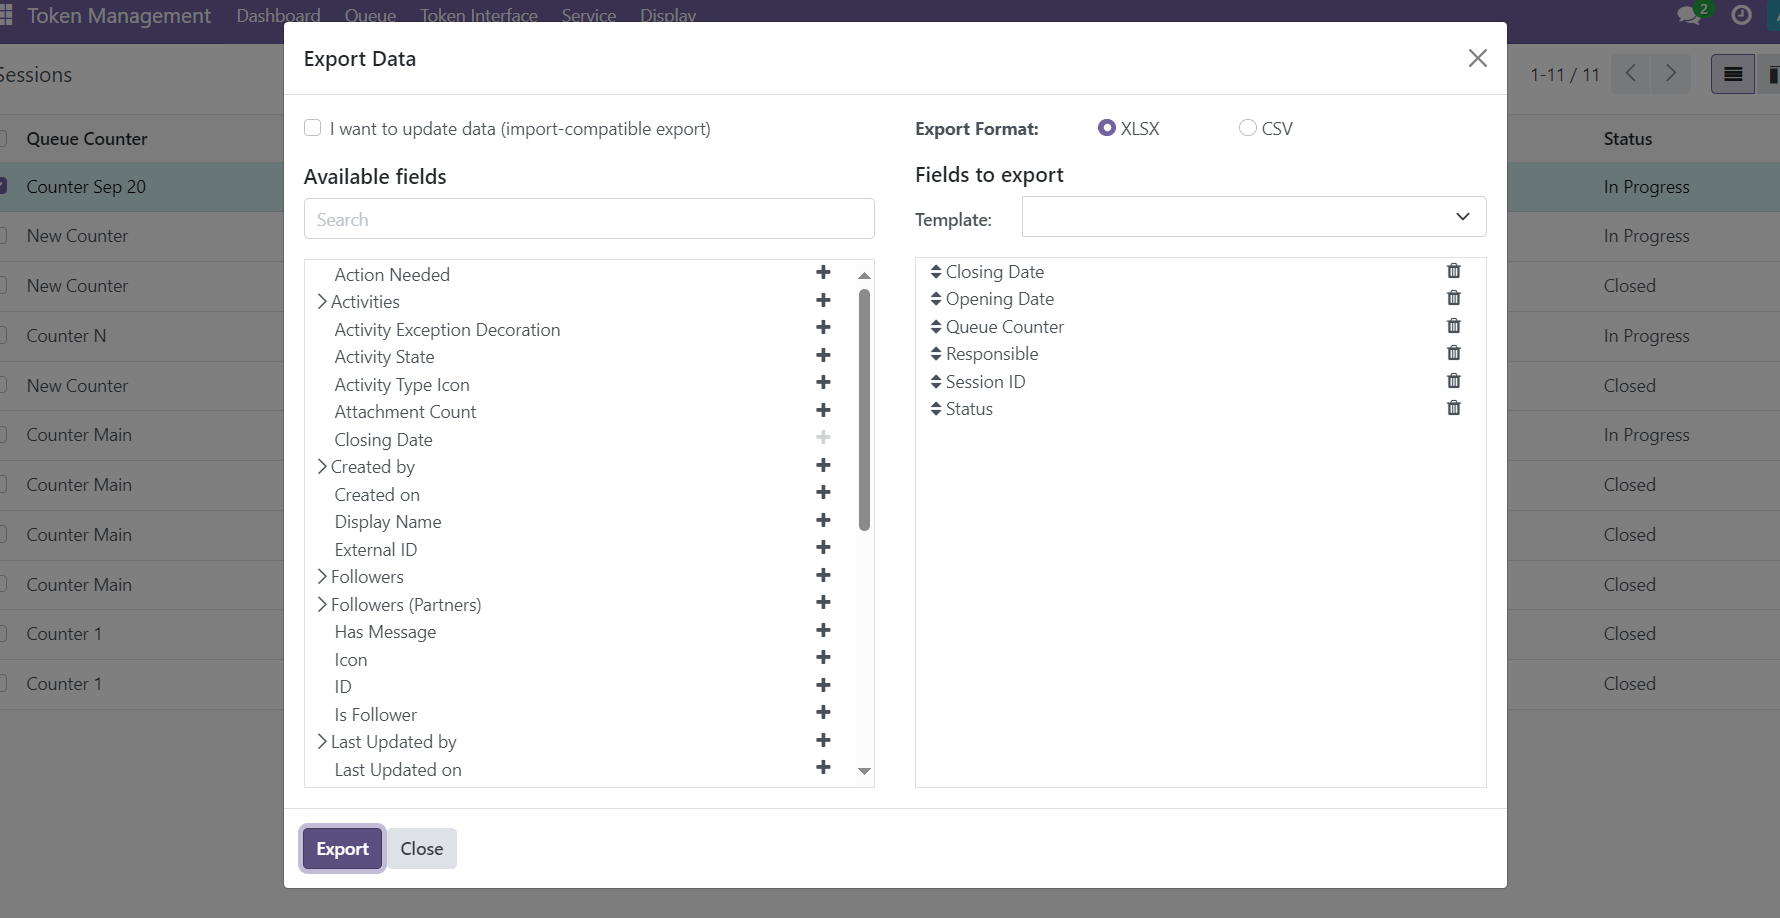
Figure 26 - Export Data
7. Token Interface and Token Generation
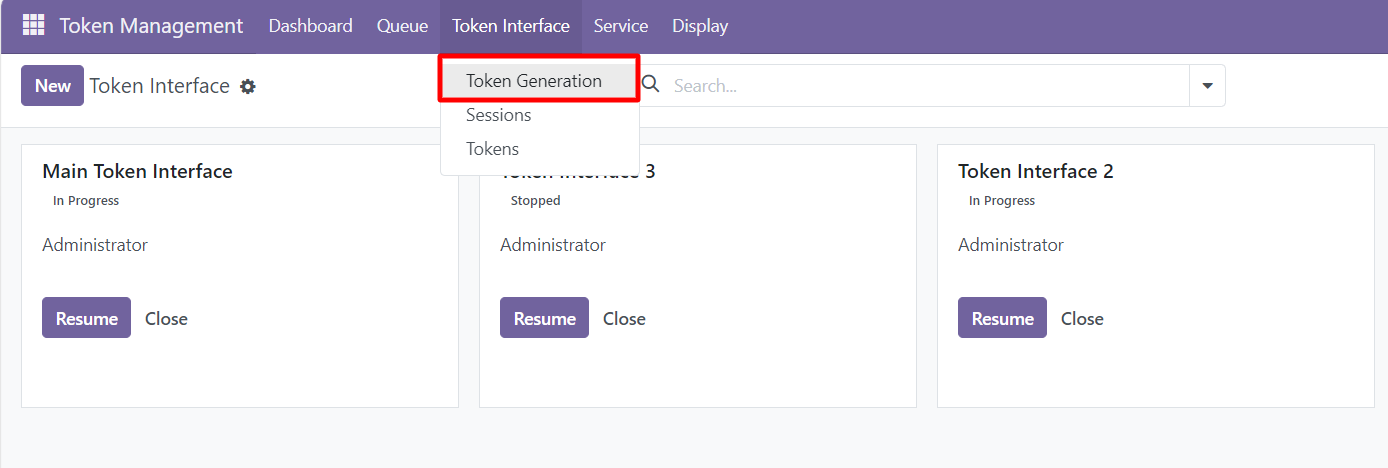
Figure 27 – Token Interface page
Token Generation menu is used to view and create a new token interface. Already created interfaces will be listed here. The generated tokens are displayed on the counters, providing a clear view of the current queue and token statuses
7.1 Creating a Token Interface
Click on New button from the kanban view and enter the details of the Token Interface in the specified columns.

Figure 28– Creating a new Token Interface
- Name – Name of the Token Interface.
- NEW SESSION button will be visible for all the interfaces for which there is no active session.
Clicking on NEW SESSION will create a new session against that Token Interface.
User can click on "Resume" button in the Kanban to open a Token Interface which has not been closed.
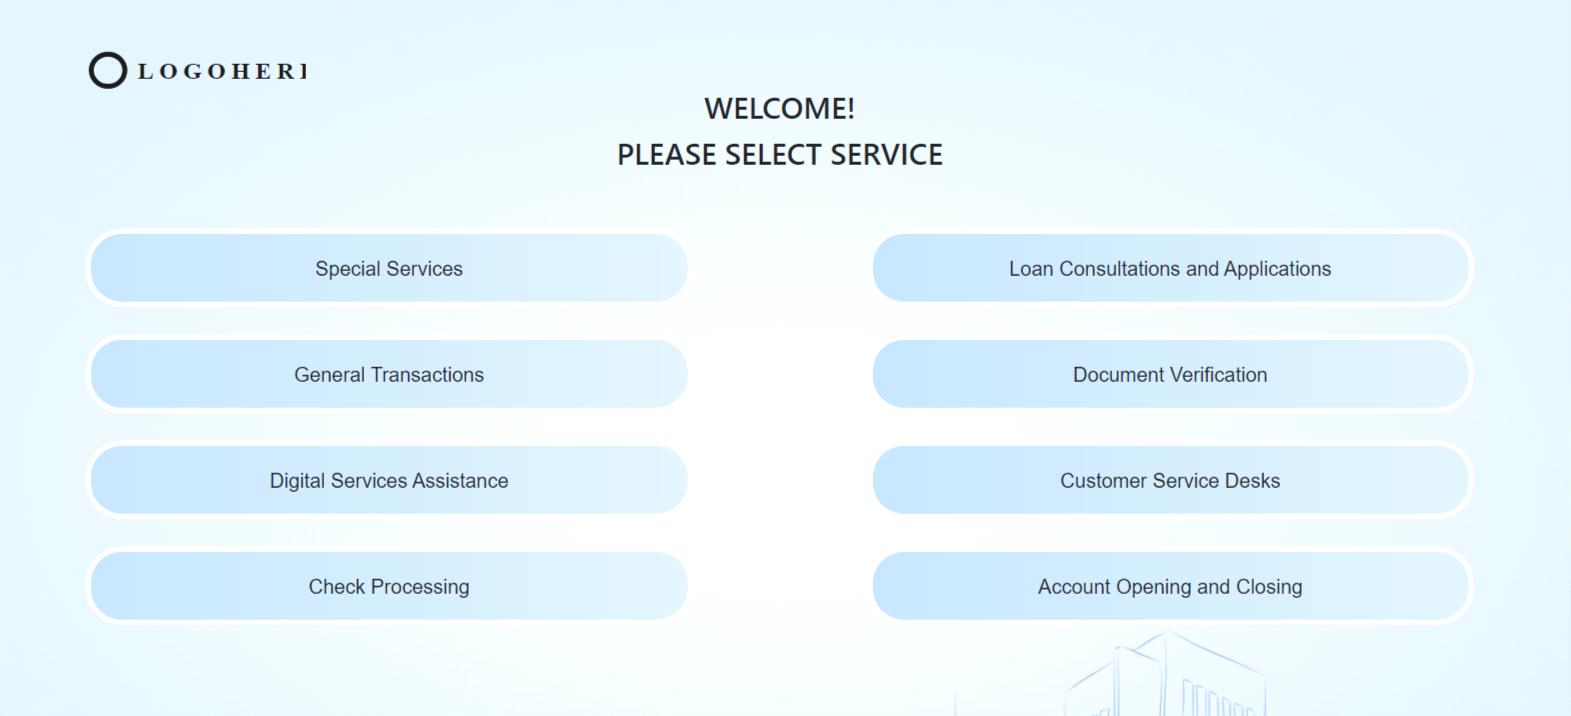
Figure 29- Token Interface
Generate Token: Selecting a service will generate a corresponding token with a Token Number against the selected service and will be redirected to the mentioned Token Overview page based on the configuration.
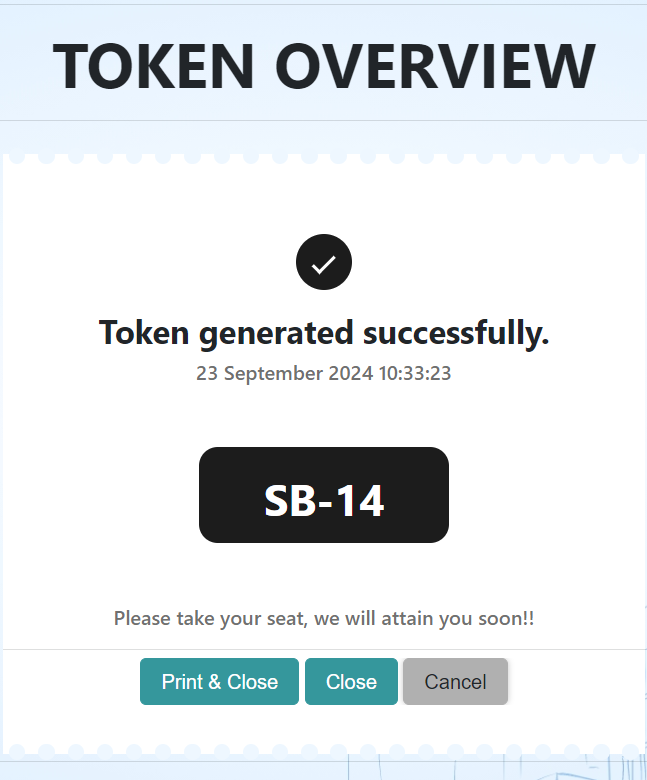
Figure 30– Generated Token
- Close: Clicking on Close button will redirect the page to Token Interface without generating a printout
- Print & Close: Generate a printout of the generated token for reference and redirects to the Token Interface page.
- Cancel: Clicking on this button will cancel the generated token.
- Token Printout: Obtain a printout of the generated token for reference.
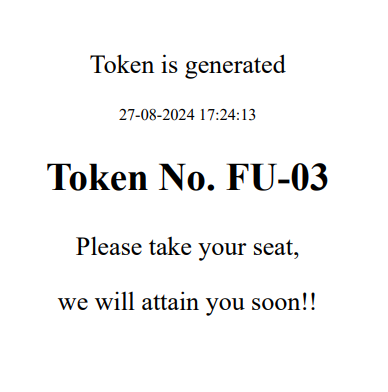
Figure 31 -Token Print
7.2 Closing the session
Admin can close any interface by clicking on “close” button. (Refer fig- 27)
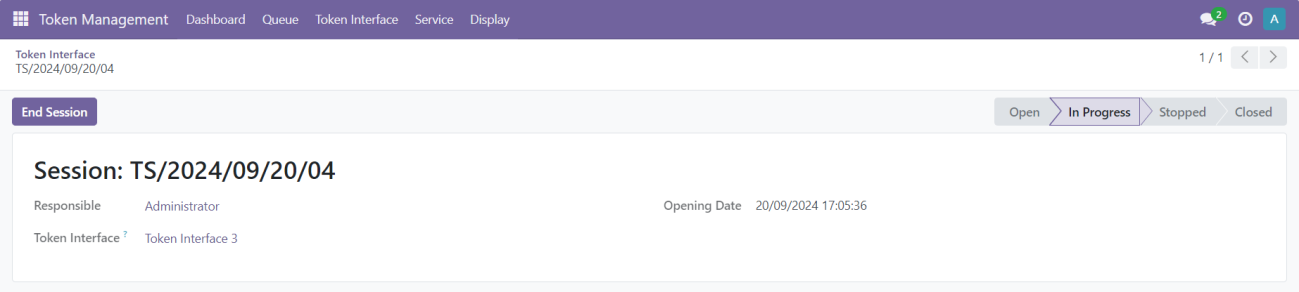
Figure 32 – Session closing
Clicking on END SESSION button, will move the status of the session to Stopped.
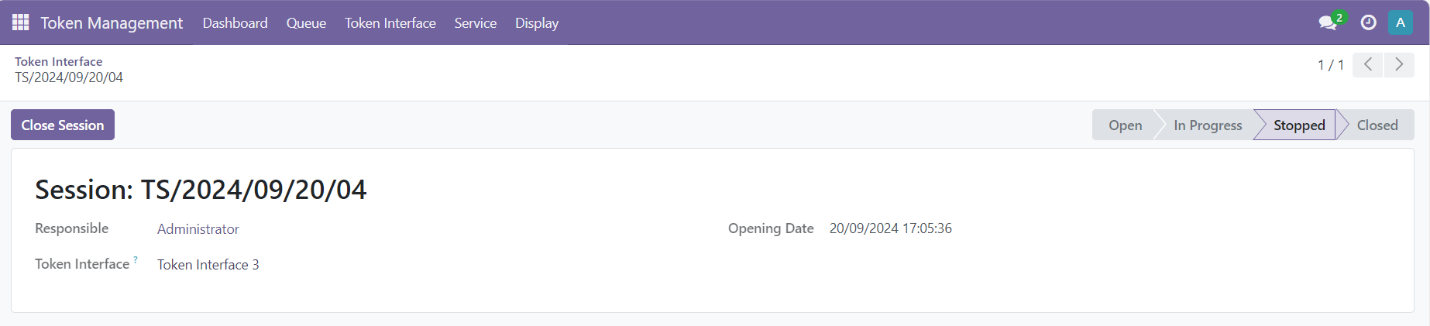
Figure 33 – Interface session moved to stopped state
Then needs to click on close session tab, finally the session will be closed and now in the interface menu it will be seen as “New Session”.
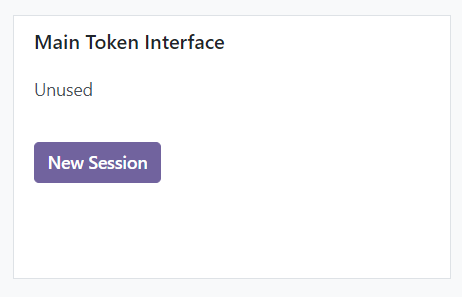
Figure 34 – New session update
7.3 Token Interface -> Sessions
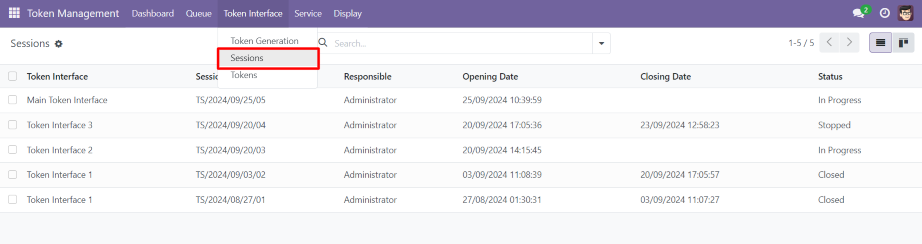
Figure 35 – Token Interface Sessions
Both Admin and Counter users have access to view the status of Token Interface sessions. However, Admins can view the status and details of all sessions across the system. In contrast,Counter users can only view the status and details of sessions for which they are designated as the responsible user.
This session view contains Token interface name, Session ID, Responsible, Opening - closing date and status.
Filters, Group by and Favourites are available for Admin to customise the view results
7.4 Token Interface -> Tokens
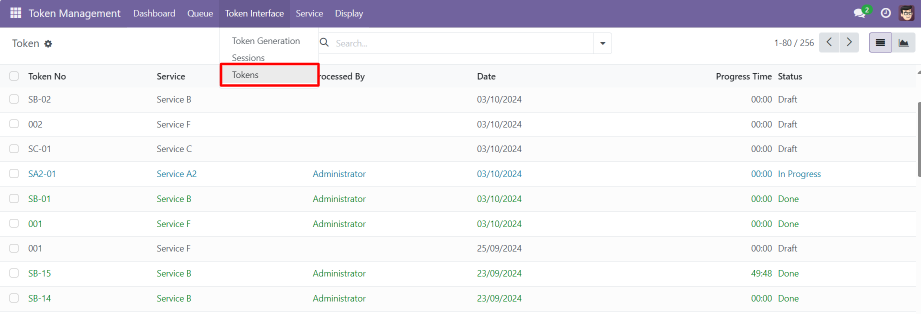
Figure 36 – Tokens list view
-
- All generated tokens are visible here, regardless of their status. By default, the list is filtered to show only tokens that were generated today.
- Clicking on any token will give the detailed view.
- Admin can view the token status and can cancel the token if needed.
- Only tokens in the draft can be cancelled, those which are in progress or done cannot be cancelled.
- Admin can move the token which are in ‘In progress’ status to ‘Done’ from here
- Token No - Shows the token no of the customer.
- Service – Associated service regarding the token number can be seen here.
- Processed by – Responsible person handling the token (administrator or person set by the administrator).
- Date – Date by which the token processed.
- Progress Time – Time taken to move the status of a token from ‘In progress’ to ‘Done’ stage.
- Status –
-
- Done – Tokens for which the processing has been completed.
- In Progress – Tokens which are currently being addressed.
- Draft – Token which are yet to be processed.
- Cancel – Tokens which has been moved to Cancelled stage by the user.
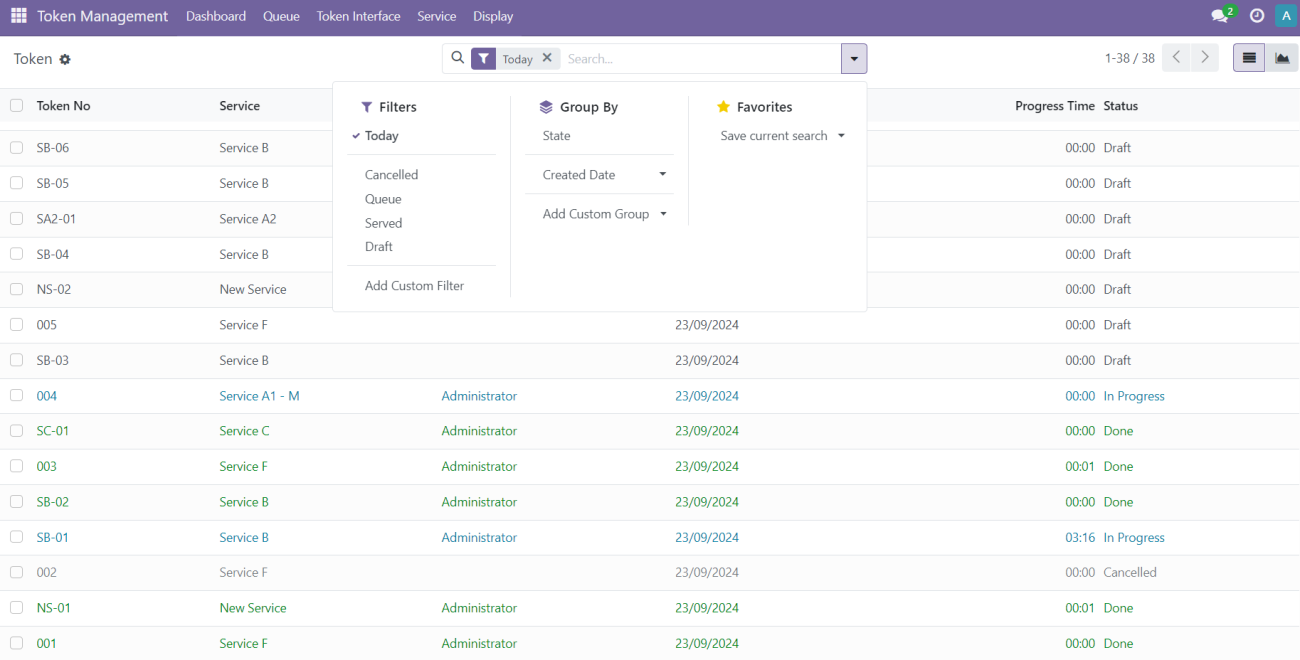
Figure 37 – Tokens – Search bar
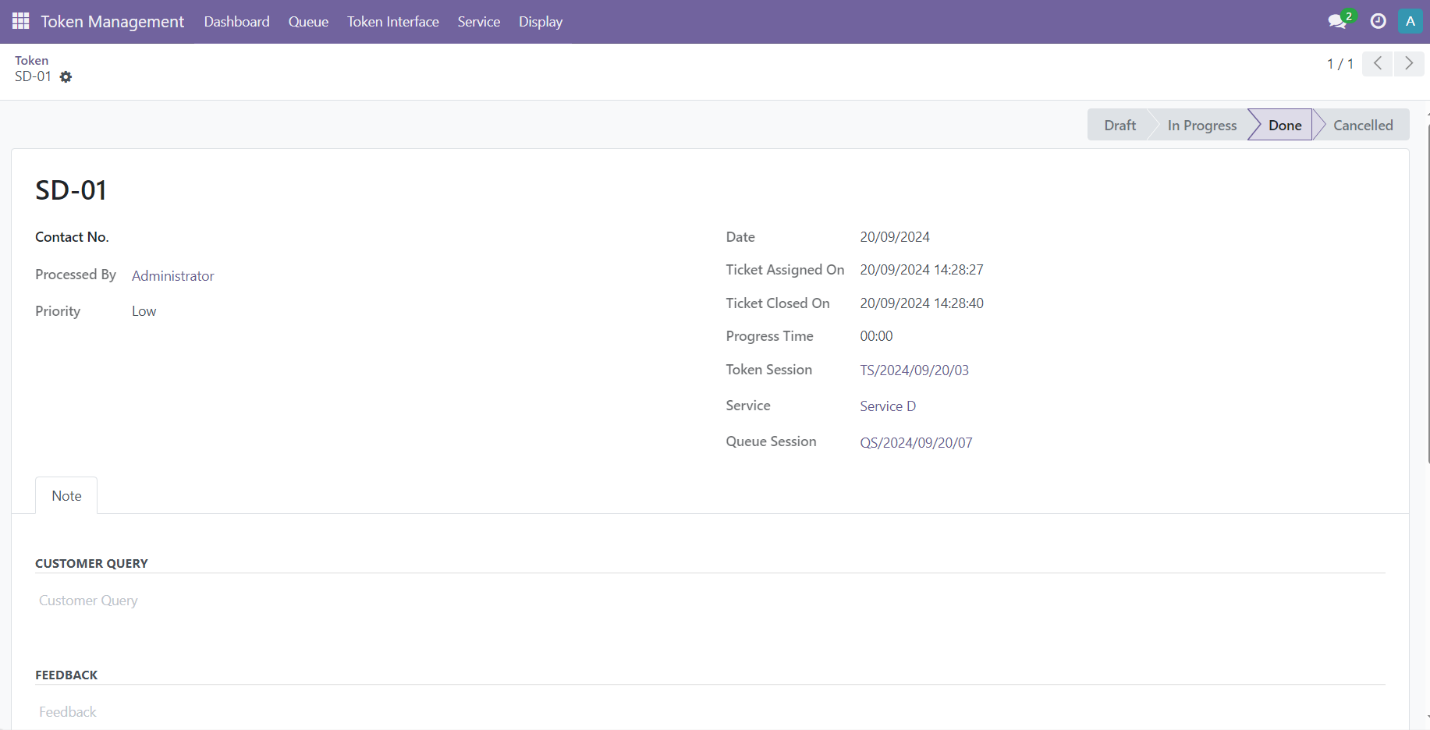
Figure 38 – Token details
- All token-related information is accessible here. The 'Customer Query' and 'Feedback' columns allow Admins and token-responsible users to view and update customer queries and feedback as needed. These columns serve as reference points for managing and tracking interactions.
- Admin can send message to the followers of respective token or can send any log note also.
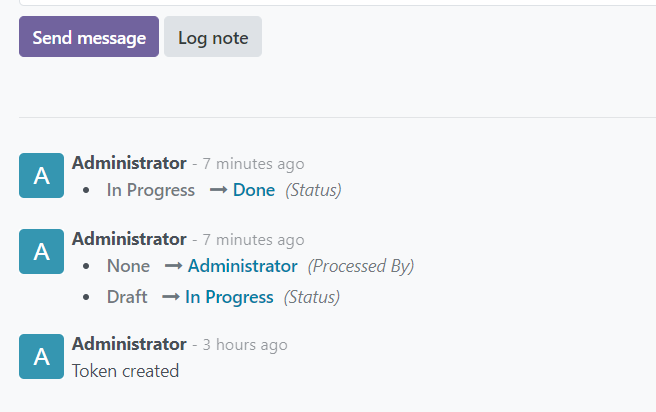
Figure 39 – log note/ send message
8. Token Counters
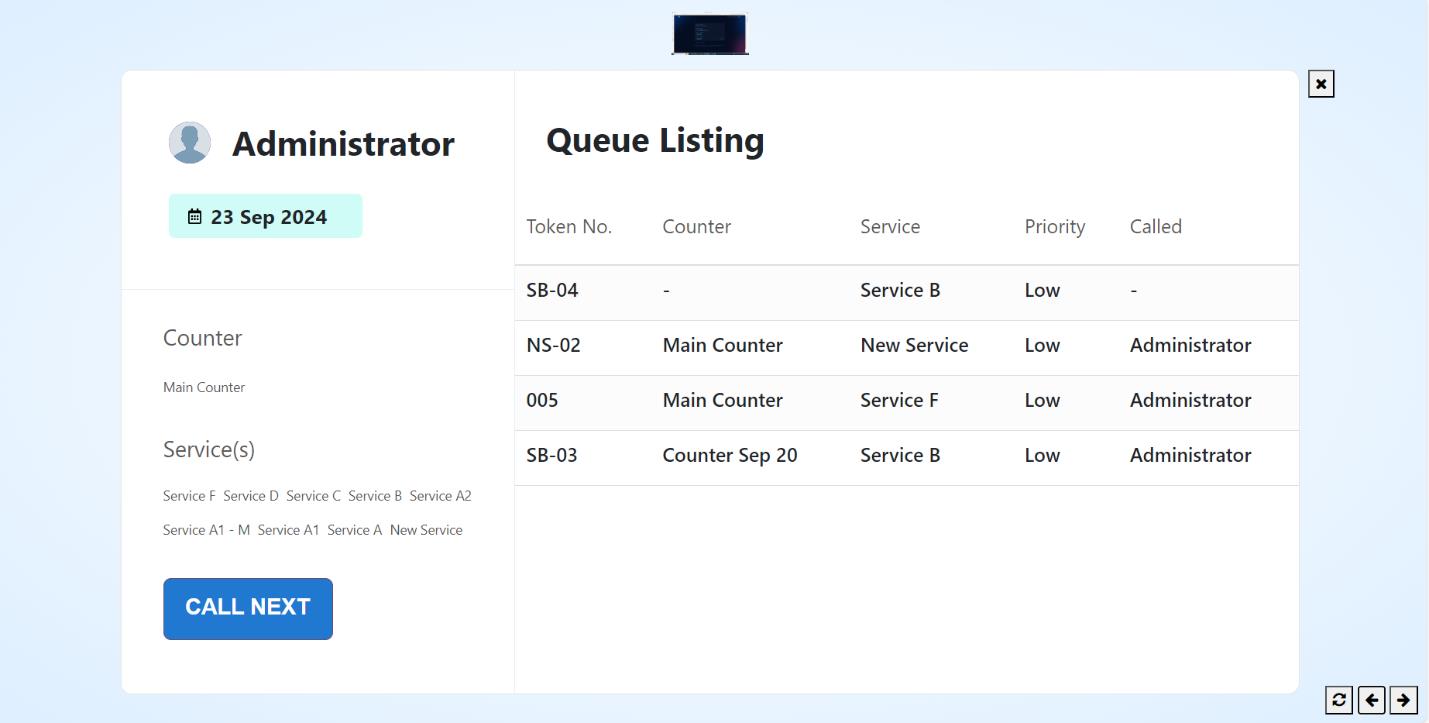
Figure 40 – Listing of tokens and Call Next button
- Service-Based Token Listing: Tokens are organized and displayed on the counters according to the selected services. Each counter shows tokens based on the specific services configured for that counter.
- Token Listing: The generated tokens are listed on the counters.
- Call Next Token Button: The calling of the next token is determined by the priority assigned to the service. If priorities are set, the system will call the highest-priority token next. If no priority is applied, the system will use the FIFO (First In, First Out) method to call the next token in line.

Figure 41 – Listing of tokens and Call Next button
- No Next Token Note: If there are no tokens remaining to be called, a notification will be displayed to inform users of the absence of the next token.
9. Token Display
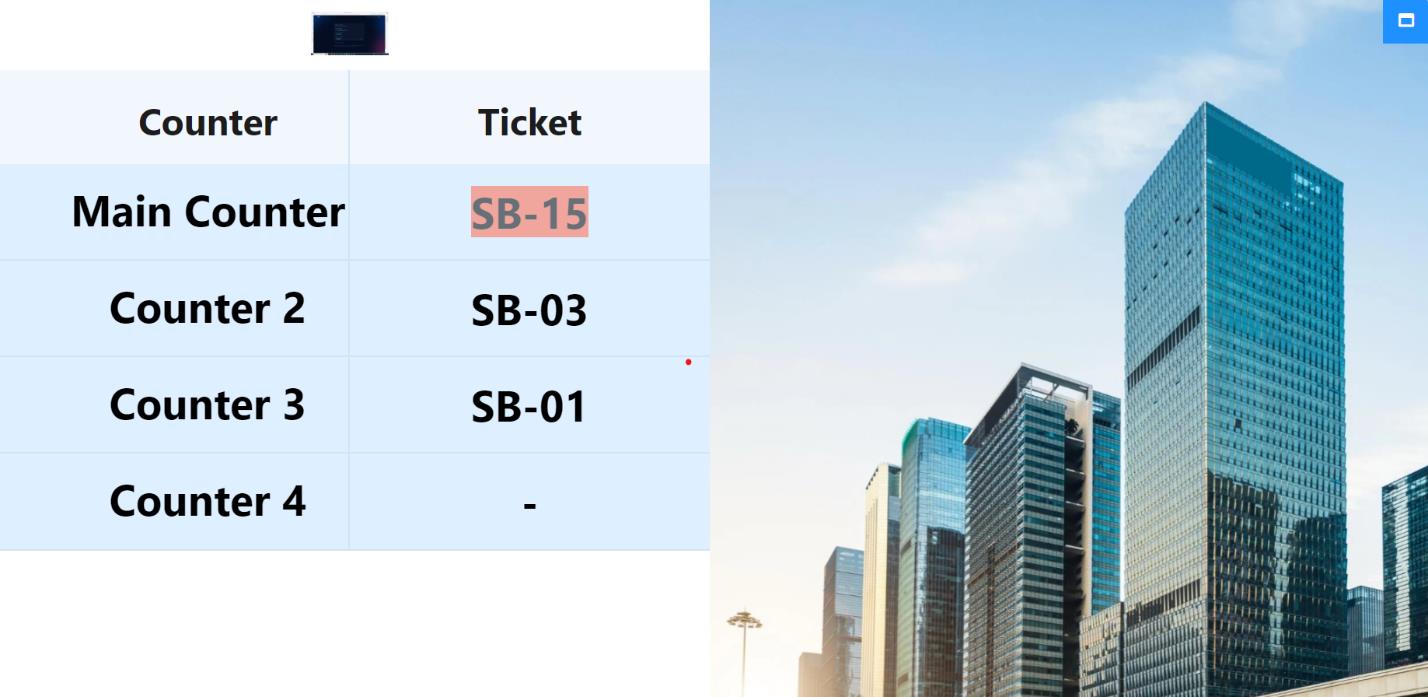
Figure 42 – Counters Display Scree
- Display: The current token at each counter is highlighted on the TV display, providing customers with real-time status updates for each counter and enhancing overall queue management visibility.
10. Dashboard
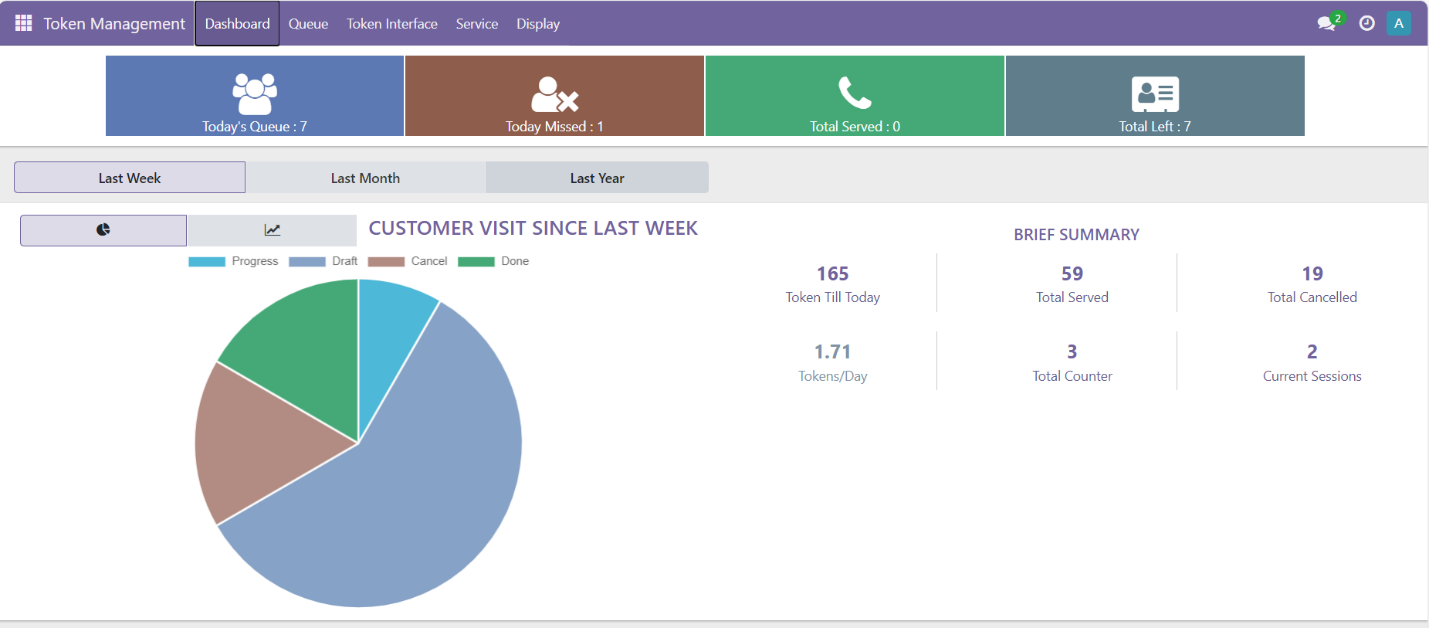
Figure 43 – Dashboard
Token management dashboard offers a comprehensive overview of the system's performance.
- Historical Data: Track performance trends over the past week, month, and year.
- Visual Insights: Utilize pie and line charts for easy data interpretation.
- Real-Time Metrics: Stay updated with today's queue status, missed tokens, and total served and left.
11. Technical Requirements / Compatible with:
- Odoo Community Edition: v17.0
12. Supported Languages
- English
13. Change Log / Release Notes
Version: 1.0.1: November 2024
- Bug fixes and improvements.
Version: 1.0.0: September 2024
- Initial version.
14. Support
If you have questions, use our contact form at webshopextension.com or email at support@webshopextension.com.