Odoo Van Sales POS
Categories
Magento
WordPress
SAP Commerce
Odoo
Shopify
Typo3
Shopware
nopCommerce
Pimcore
Hyvä
OXID eShop


1. Introduction
The van point of sale is easy to install and fits neatly into the Odoo web shop. This module adds a few features to the point of sale that are specific to VAN sales. In this module, allthe products are stored in the warehouse, which can be fully controlled by the module inventory. Here the process starts with the loading of products into the van, and the process ends at the time of unloading the unsold products from the van.
2. Features
- Easy to configure a POS as Van Sale POS.
- All van stock is recorded.
- Loading and unloading processes are recorded.
- Session management is mainly based on the loading and unloading of products.
- Stock management is controlled by the inventory module.
- Transparent stock transfer history.
- This module adds new features to the point-of-sale module.
- Salesman and supervisor groups are created.
- Enable Realtime Inventory in POS
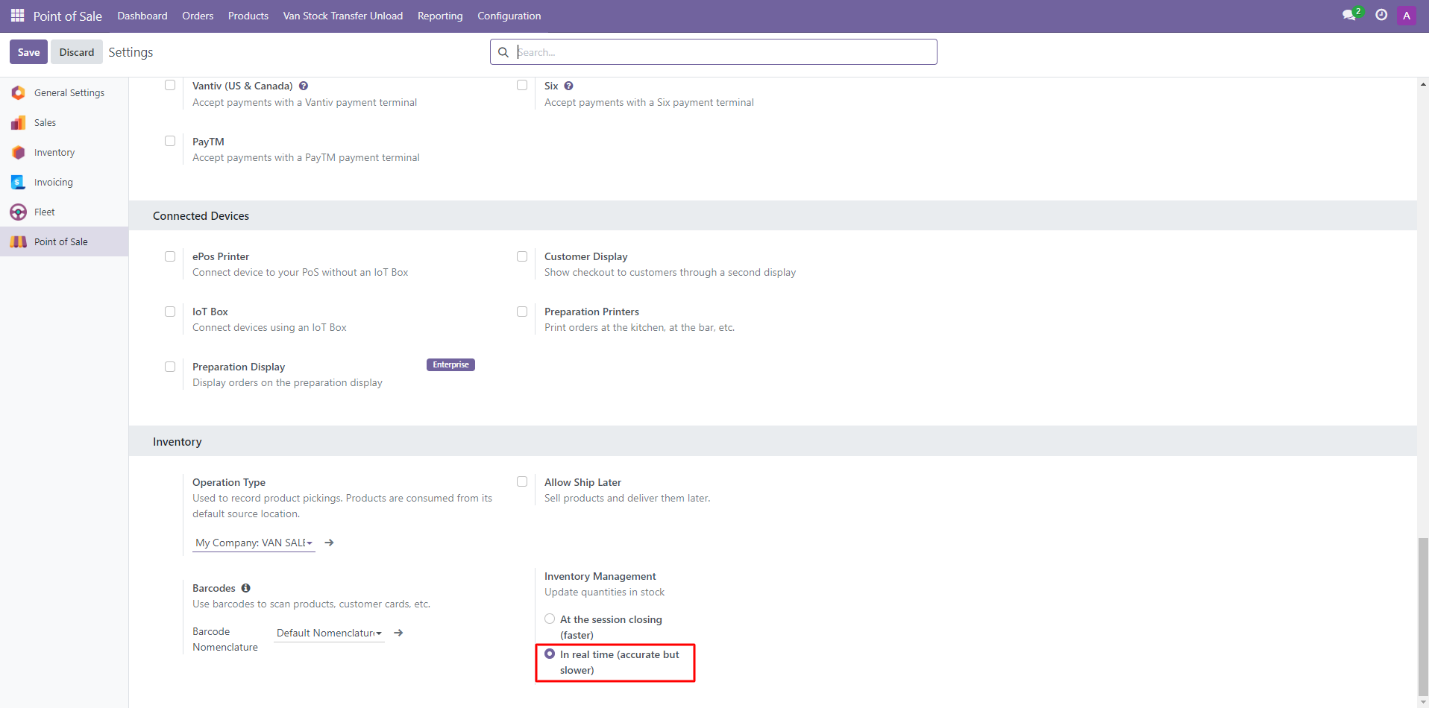
To ensure accurate stock management and apply quantity restrictions in real-time during Point of Sale (POS) transactions, you need to enable the Realtime Inventory feature in the POS module (Refer Screenshot 33). This setting allows the system to check the actual stock levels instantly and prevent overselling.
3. Screenshots
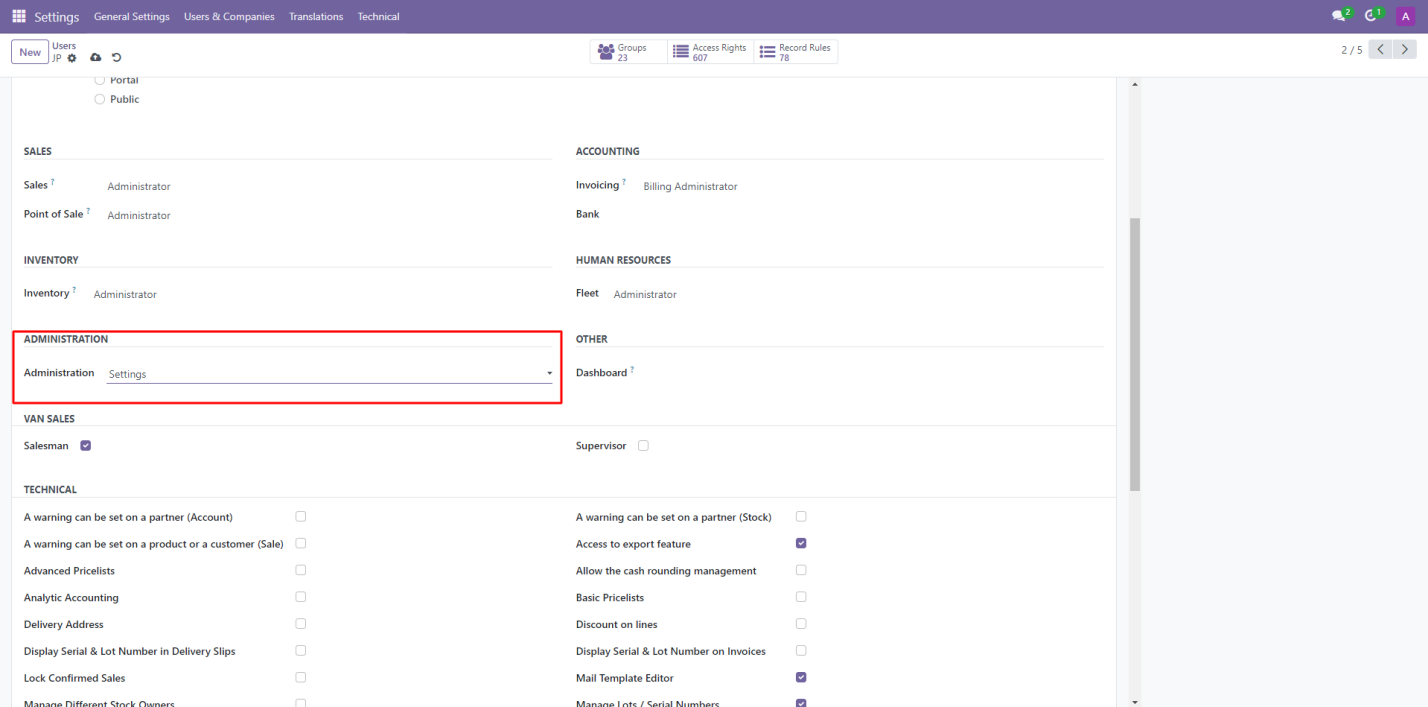
Screenshot 1: Van point of sale - Add Salesman or Supervisor user groups:
- Go to Settings.
- Enable developer mode by clicking on the ‘Activate the developer mode’.

- Navigate to User & Companies menu -> Select Users.
- Open the desired User -> Enable Salesman/Supervisor role -> Save.
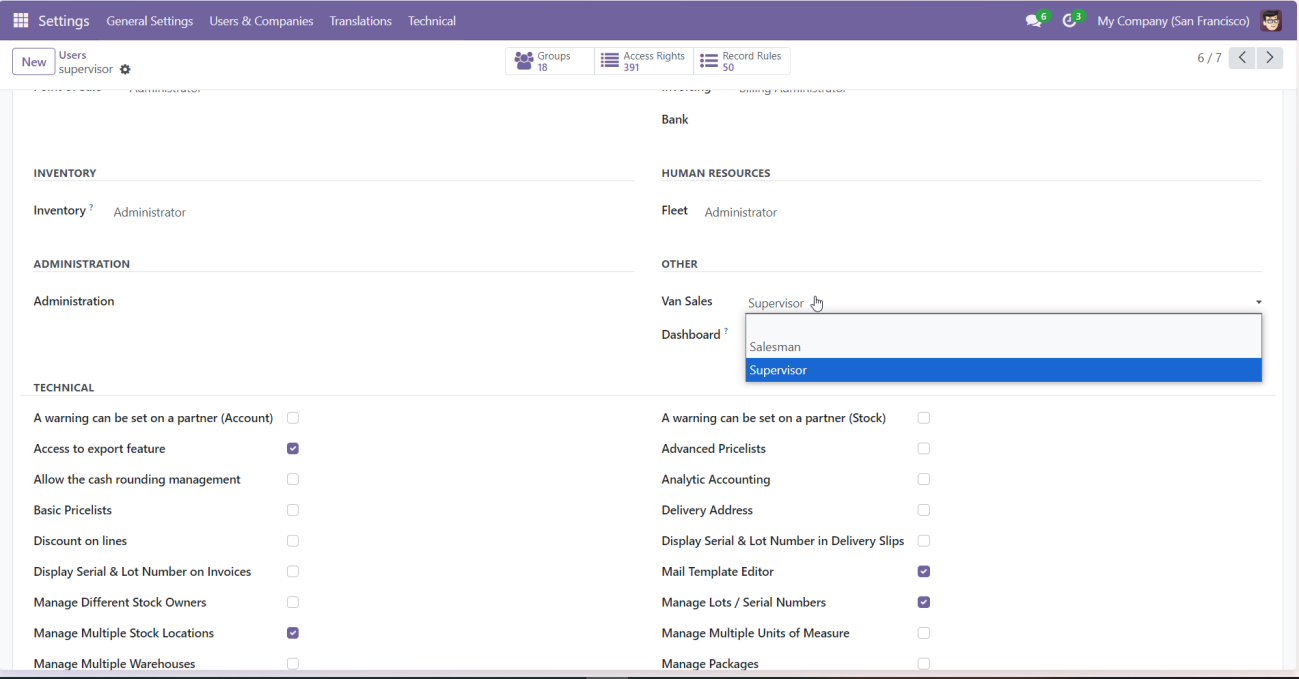
- If you want to give supervisor as administration access.
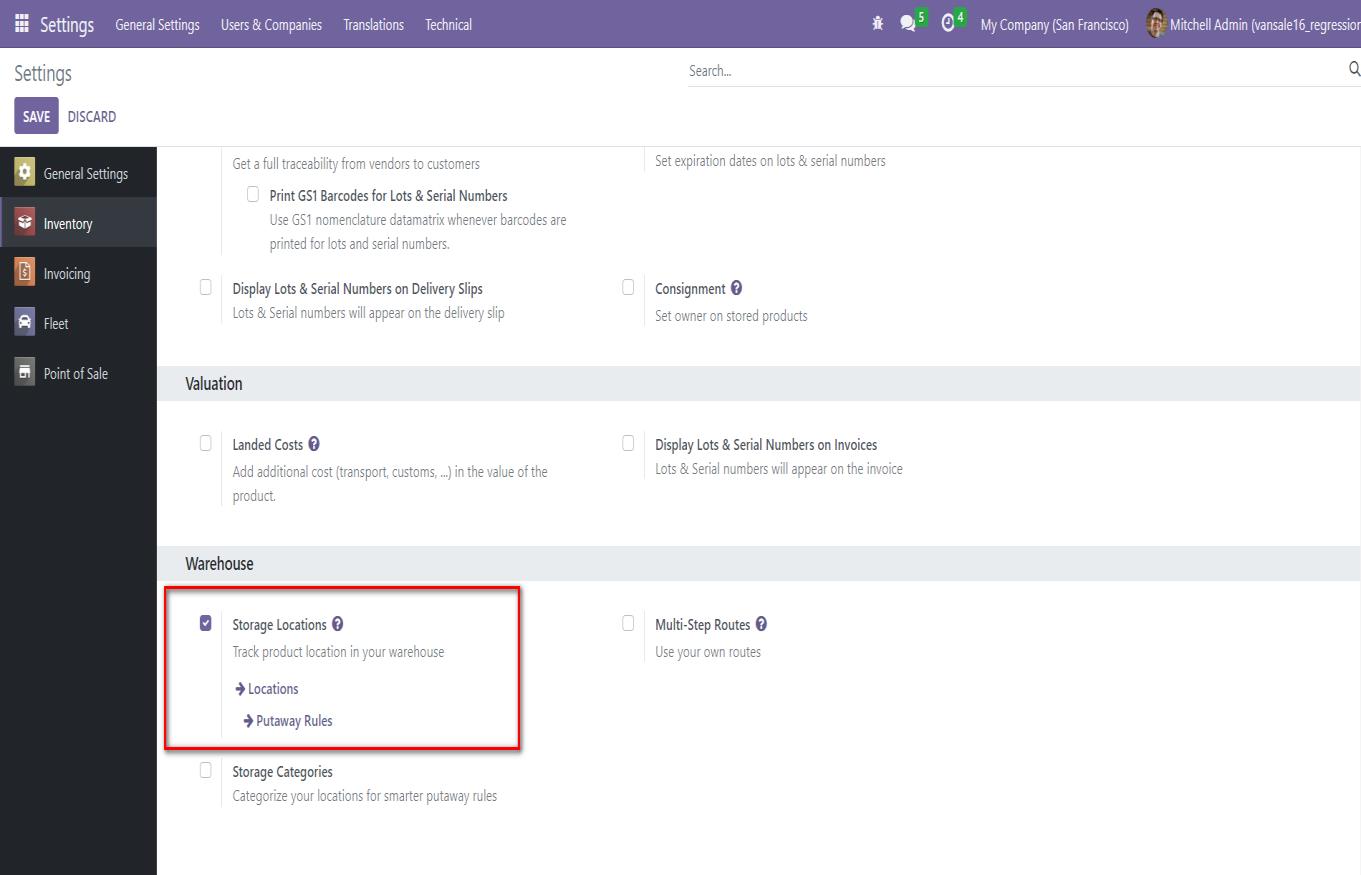
Screenshot 2: Van point of sale - Enable Storage locations:
- Go to Settings -> Inventory.
- Enable Storage Locations checkbox -> Save.
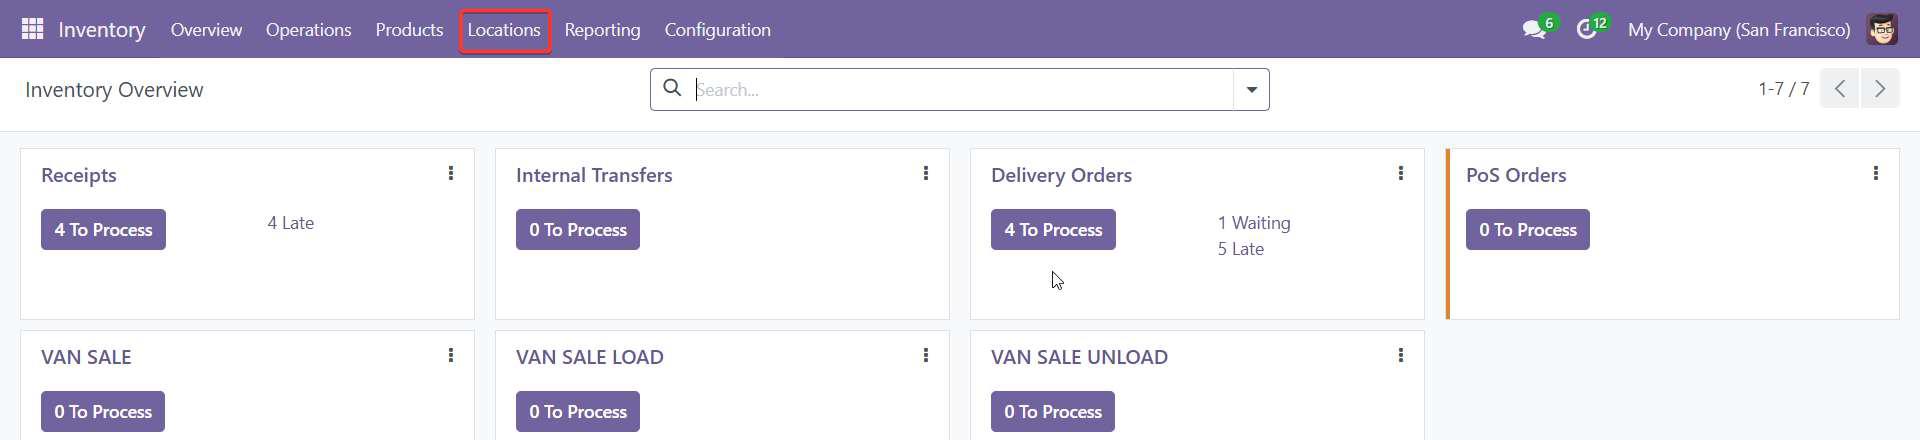
Screenshot 3: Van point of sale – Locations menu item:
- Go to Inventory.
- Locations.

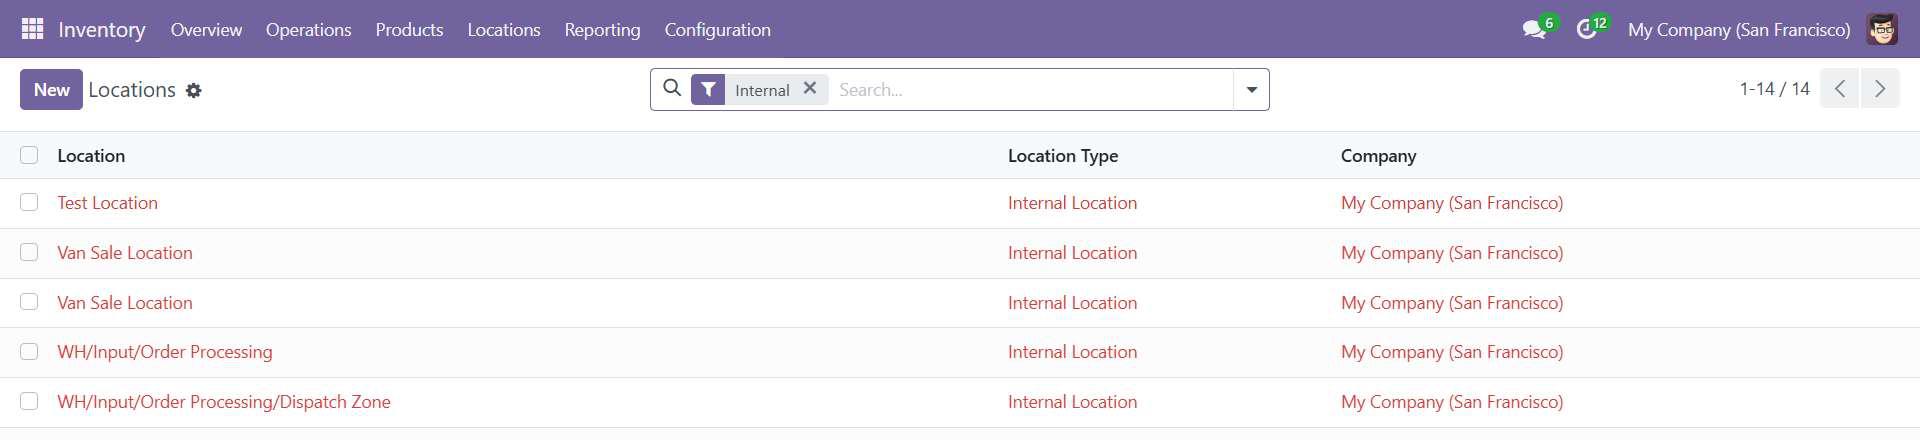
Screenshot 4: Van point of sale – Locations list view:

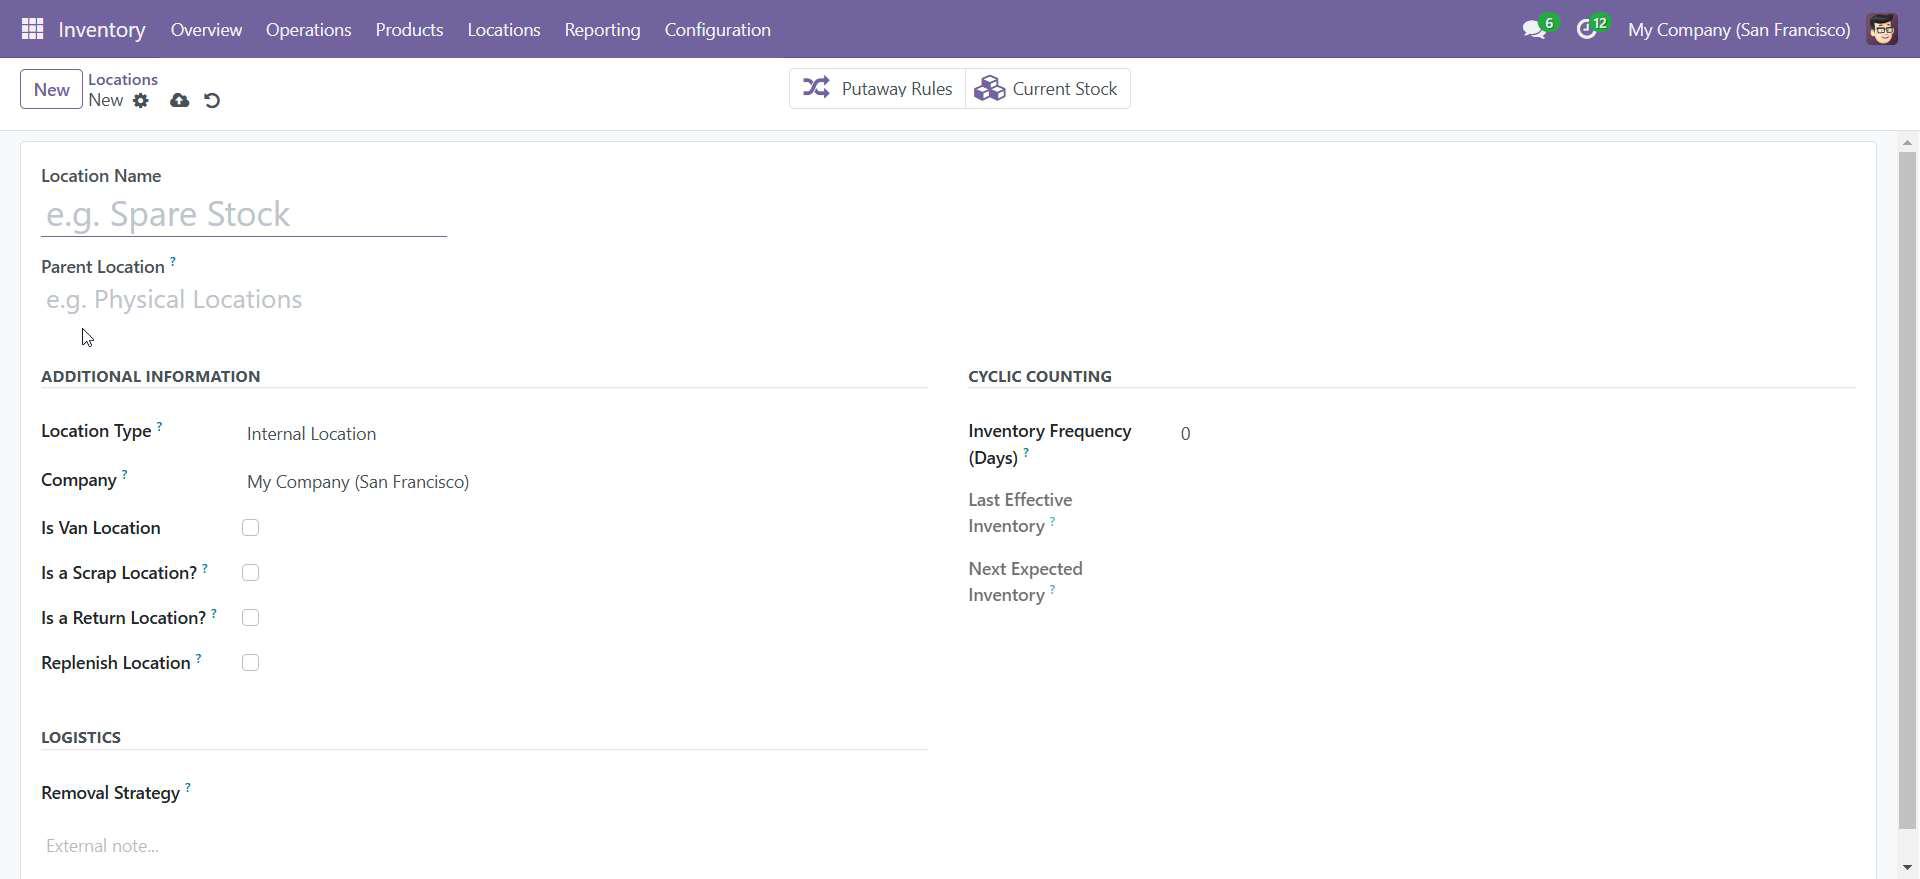
Screenshot 5: Van point of sale – Adding a new location:
- Enable the "Is VAN Location" checkbox to allow this location to be selectable in the POS Configuration's Stock Location settings.
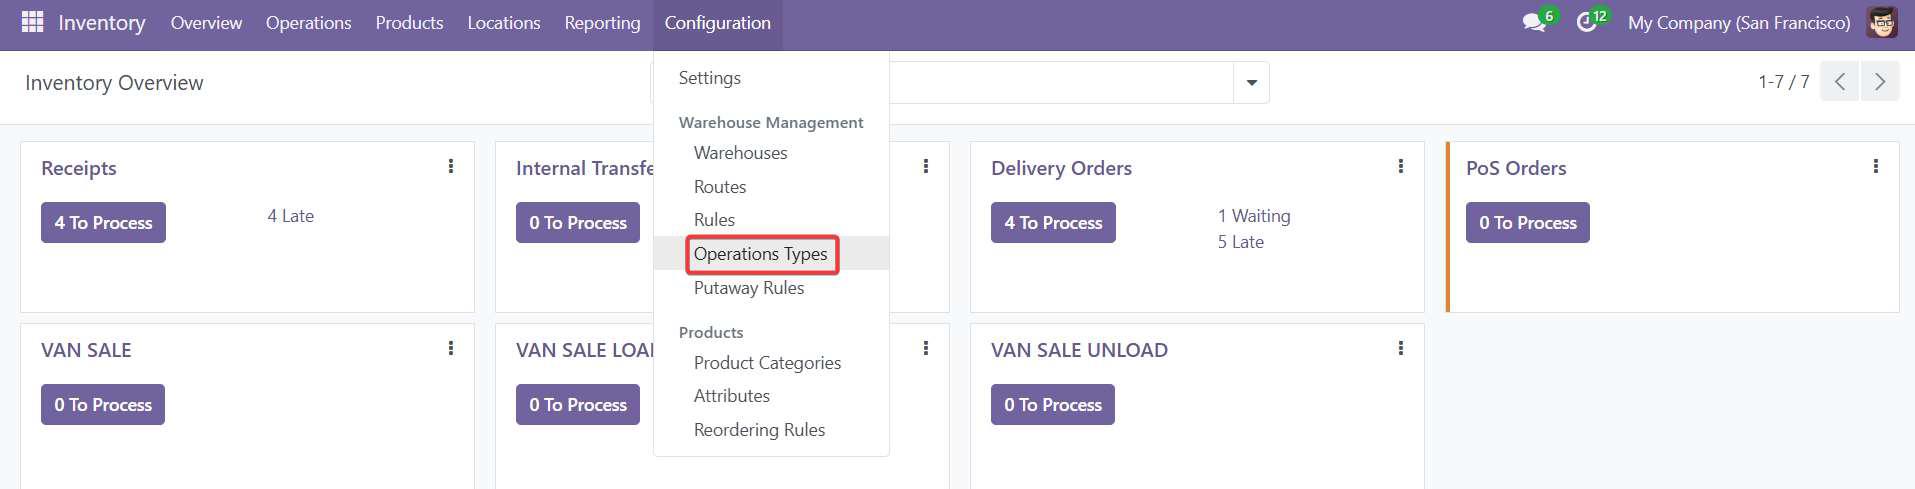
Screenshot 6: Van point of sale - operation types:
- Go to Inventory
- Navigate to Configuration -> Operation types
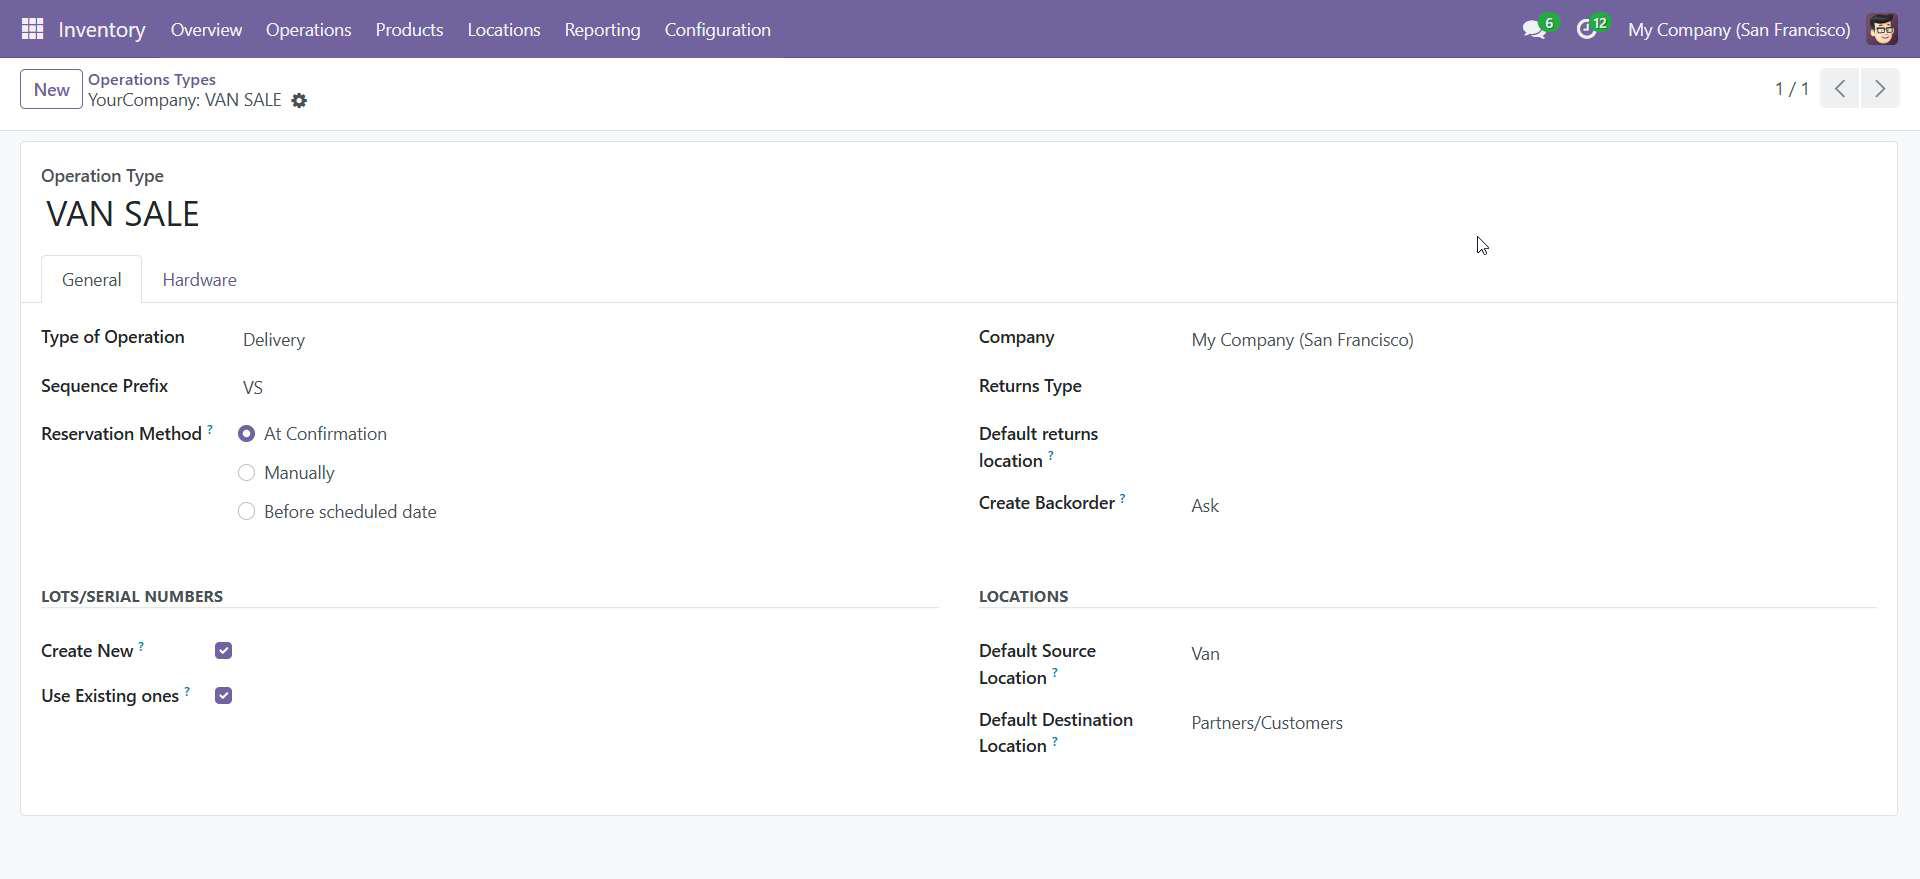
Screenshot 7: Van point of sale operation type - VAN_SALE:
- This operation type is used for stock move from VAN to Partners/Customers locations.
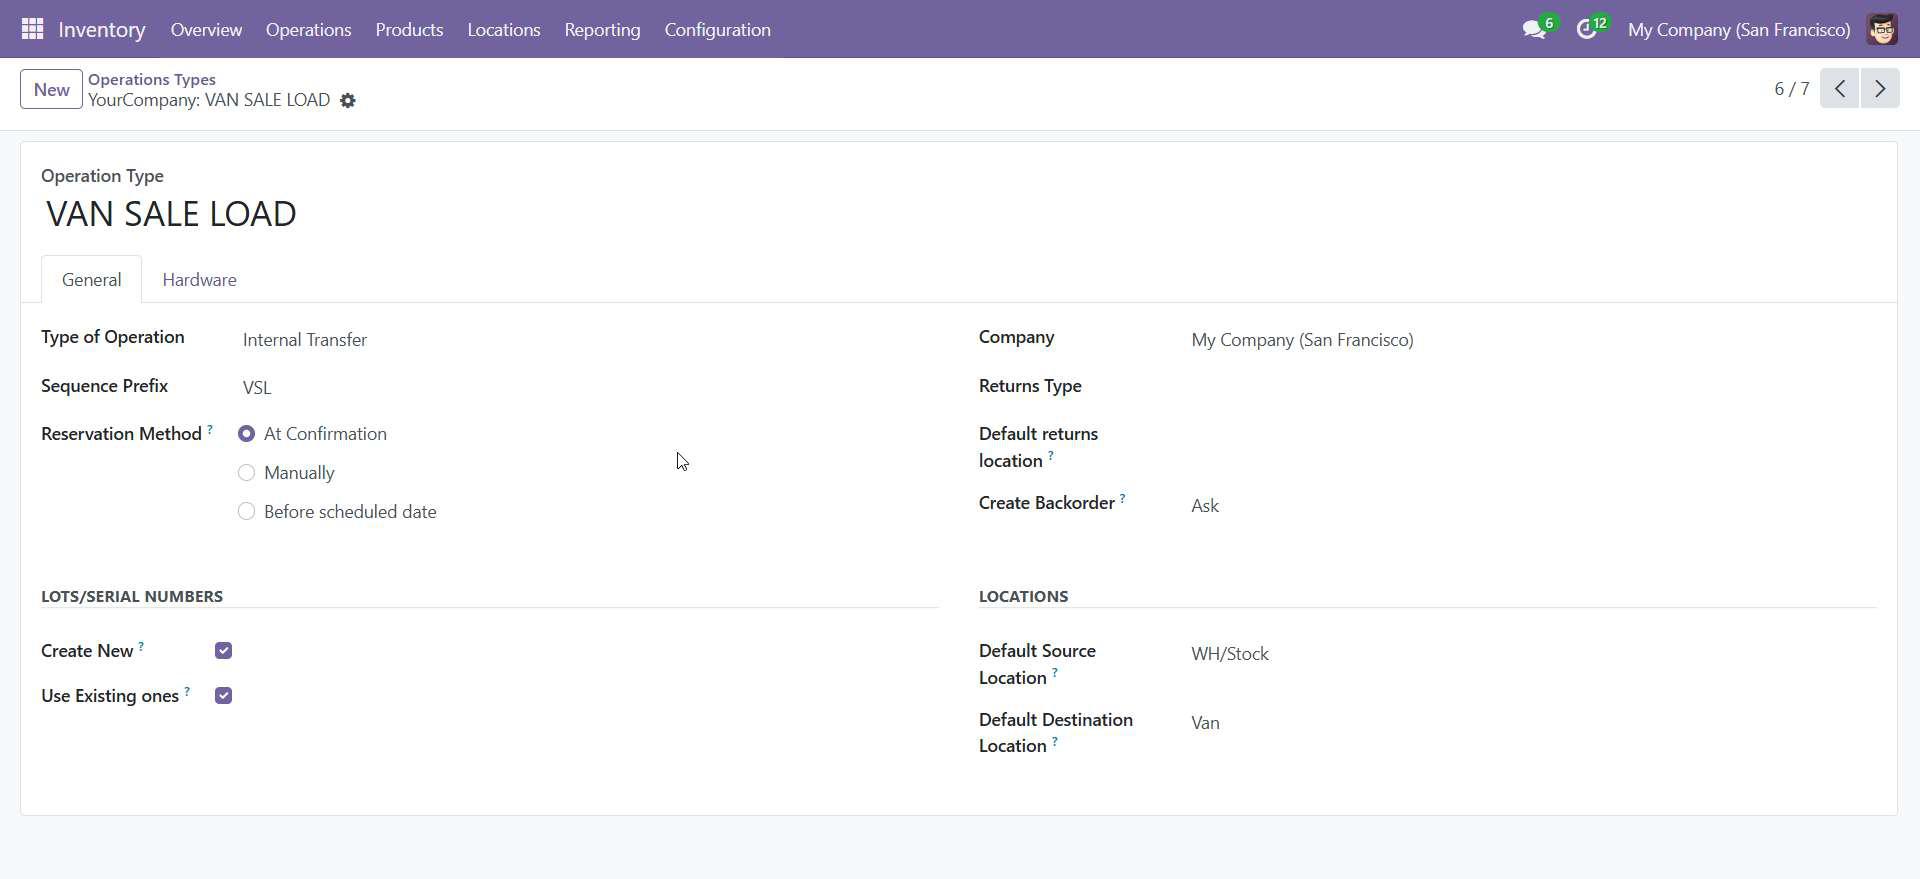
Screenshot 8: Van point of sale operation type - VAN_SALE_LOAD:
- This operation type is for stock move from warehouse locations to the VAN prior to the beginning of sales
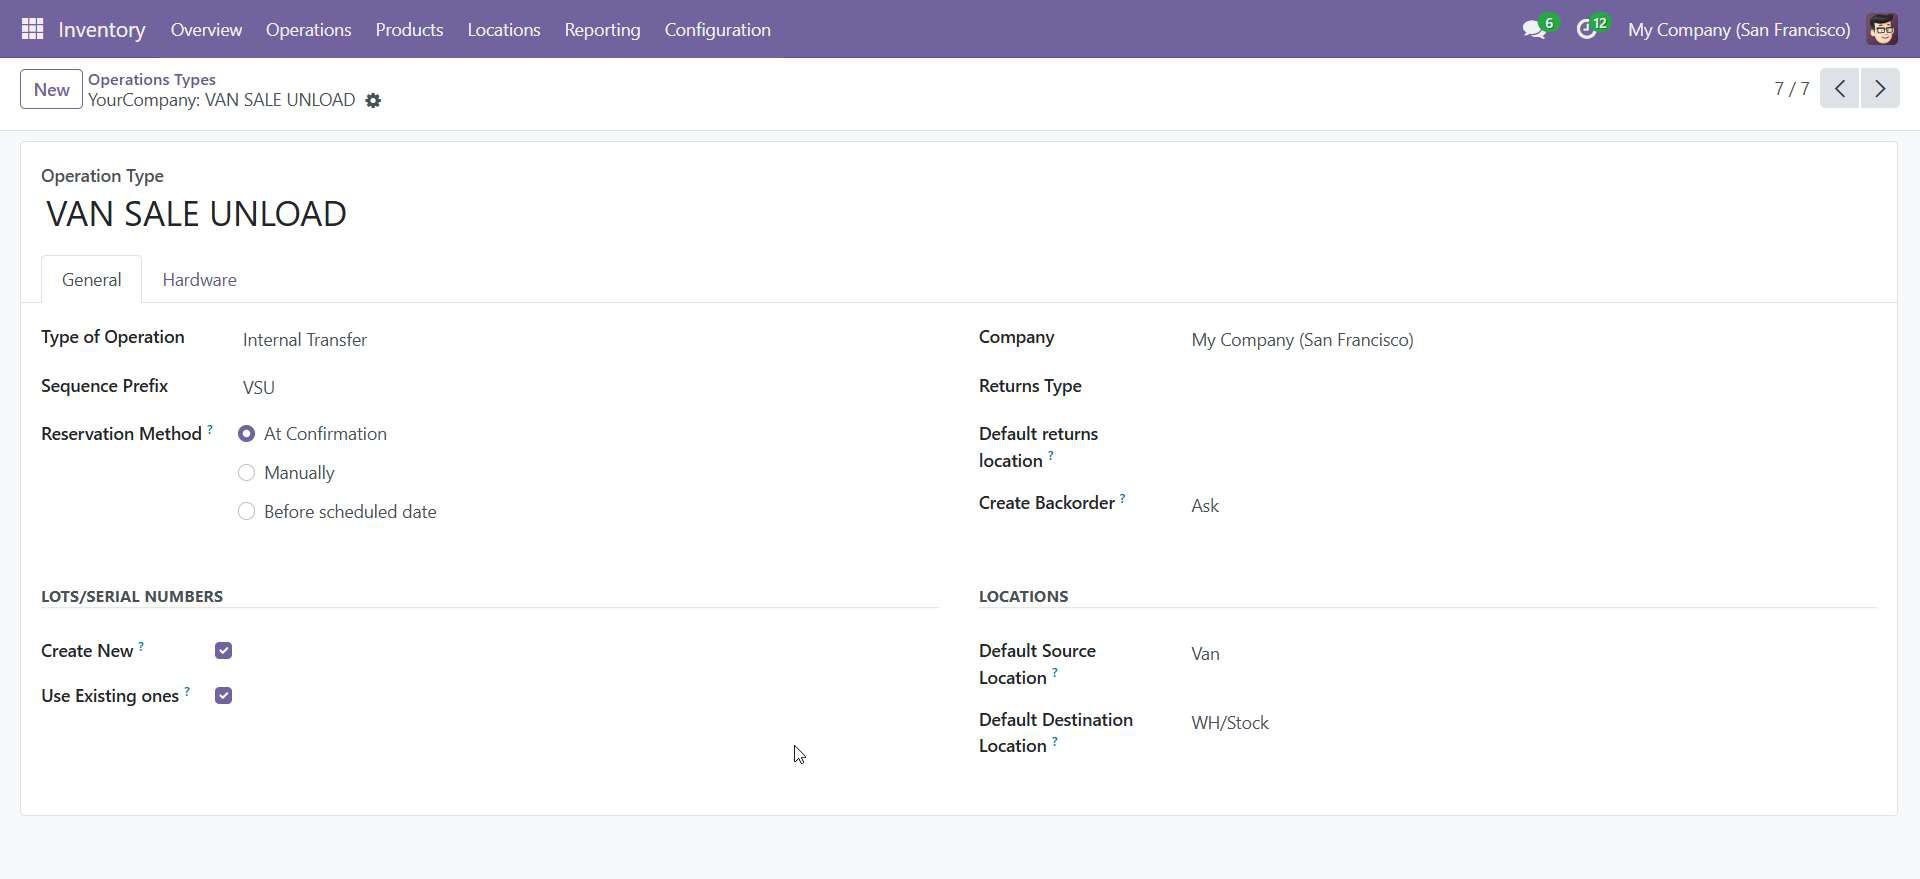
Screenshot 9: Van point of sale operation type - VAN_SALE_UNLOAD:
- This operation type is for stock move of unsold products from VAN to Warehouse locations after sales.
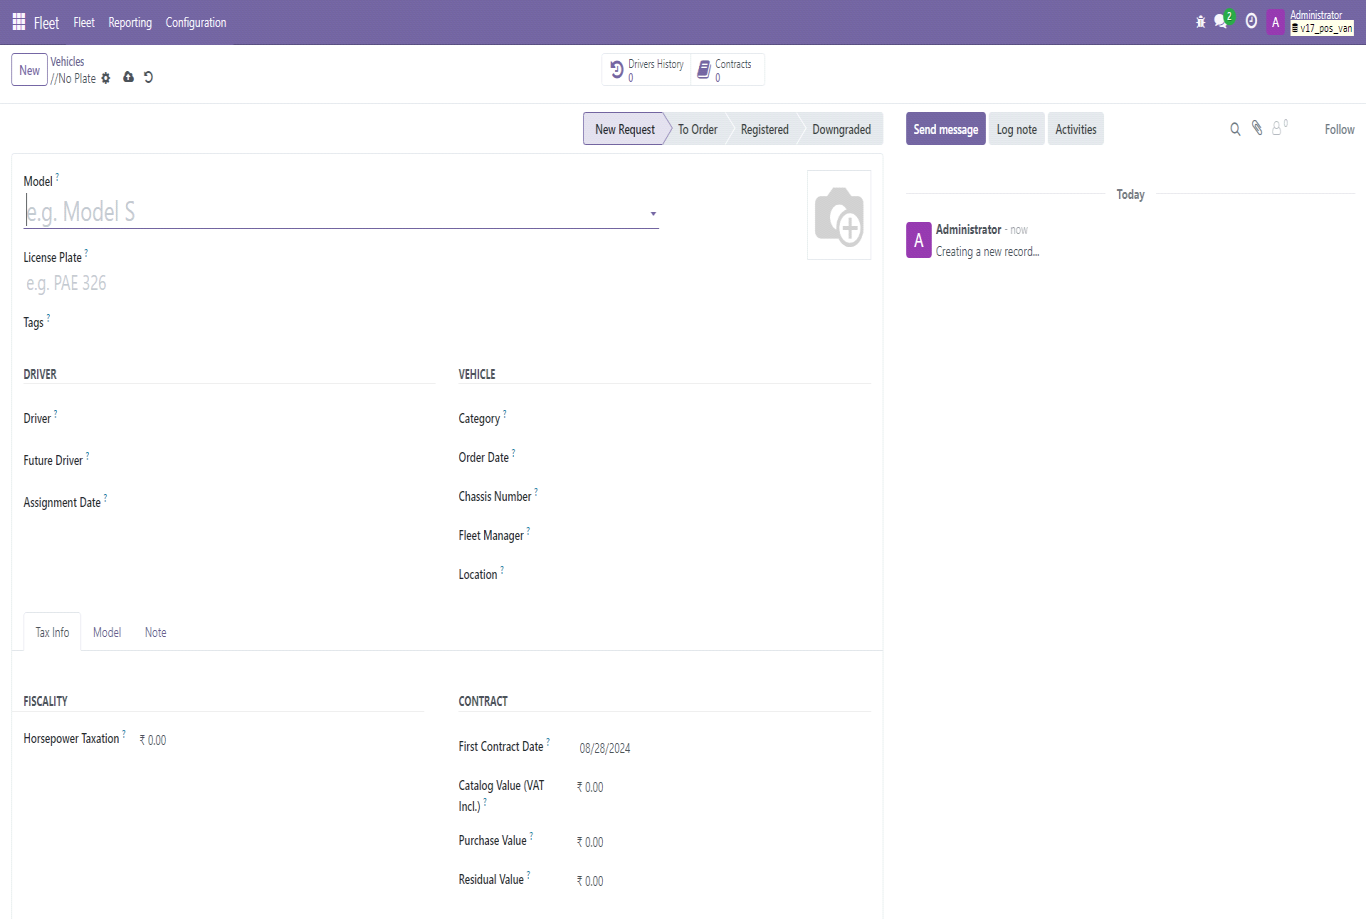
Screenshot 10: Create a Van in Fleet management:
- Go to Fleet management module.
- Click New.
- Enter Driver, Fleet manager and other van details -> Save.
Fleet manager is considered as the Salesman for the Van.
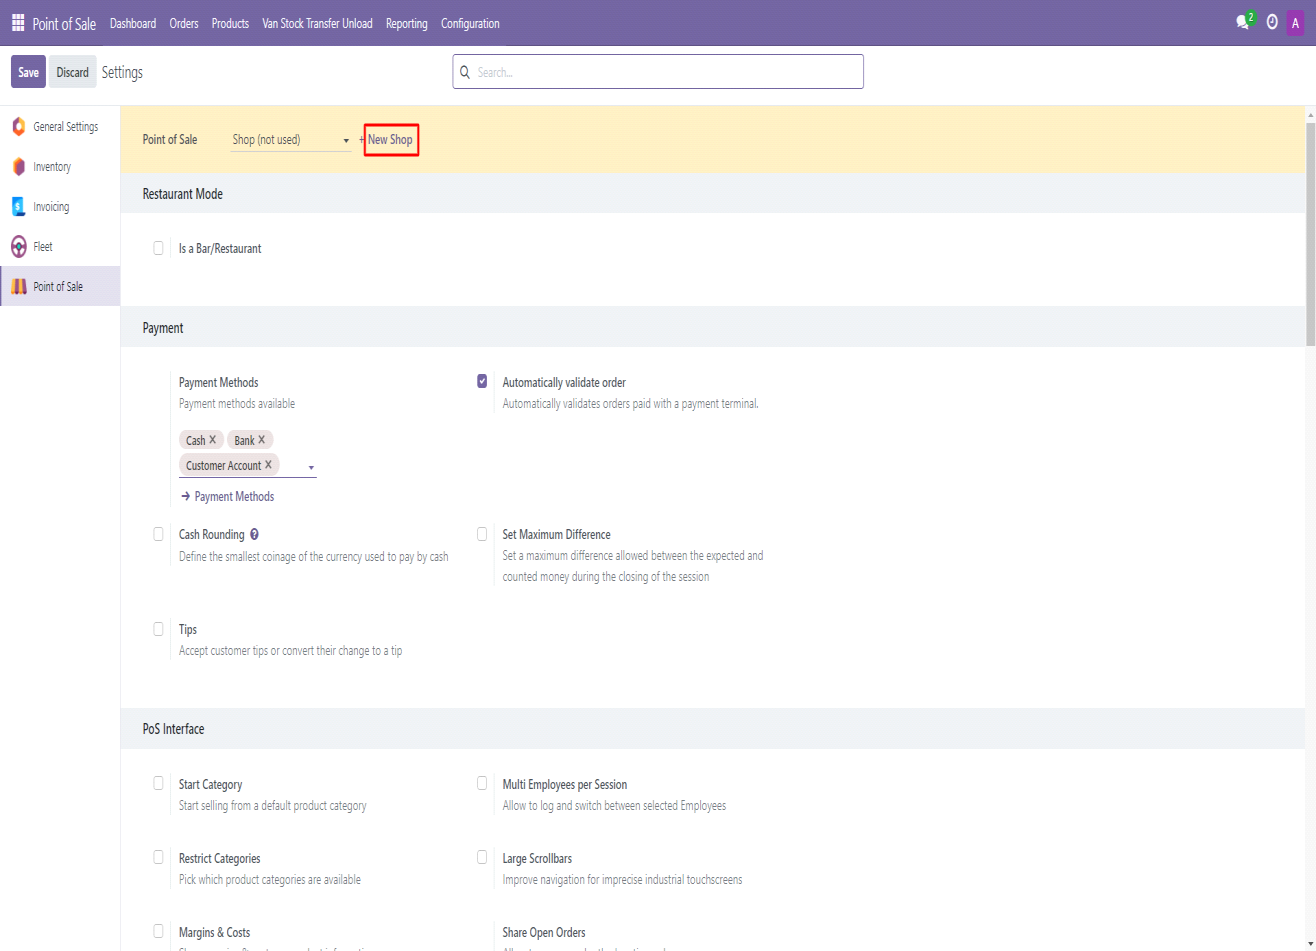
Screenshot 11: Create a new Point of Sale:
- Go to Settings -> Point of Sale.
- Click on New Shop.
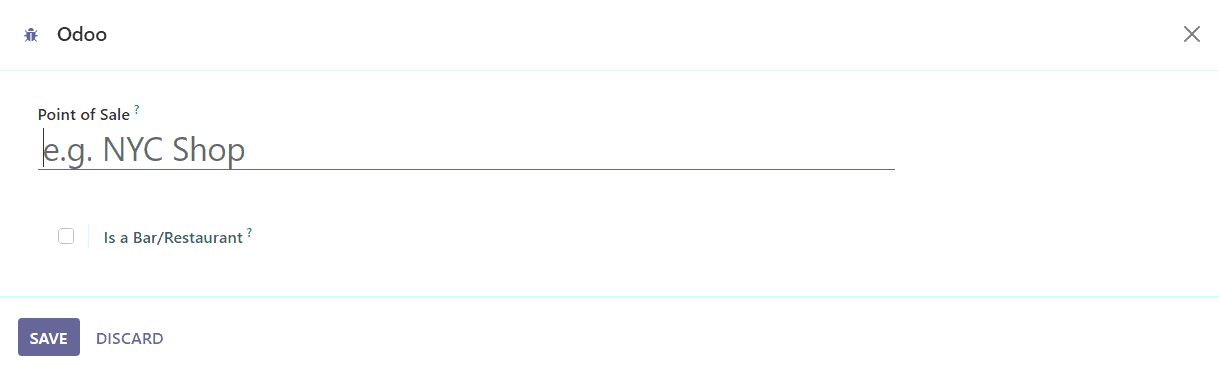
Screenshot 12: Enter new POS details:
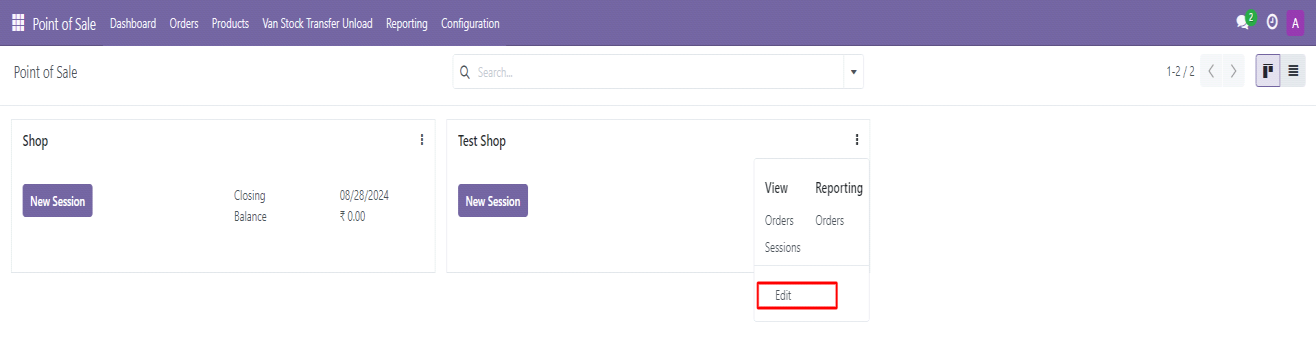
Screenshot 13: Edit new POS:
- Go to POS module.
- Click on three-dot menu of new POS -> Edit
Screenshot 14: Configure new POS to Van Sale POS:
- Enable Is Van POS checkbox.
- Add a van to the POS.
- Add VAN_SALE, VAN_SALE_LOAD, VAN_SALE_UNLOAD operation types to the Shop. These will be loaded by default if Is VAN POS is enabled
- Add Stock Location - Location added here will be considered as the Van Stock location for this POS and will be used for all stock transfers. Stock Location is mandatory for Van POS.
- Click Save.

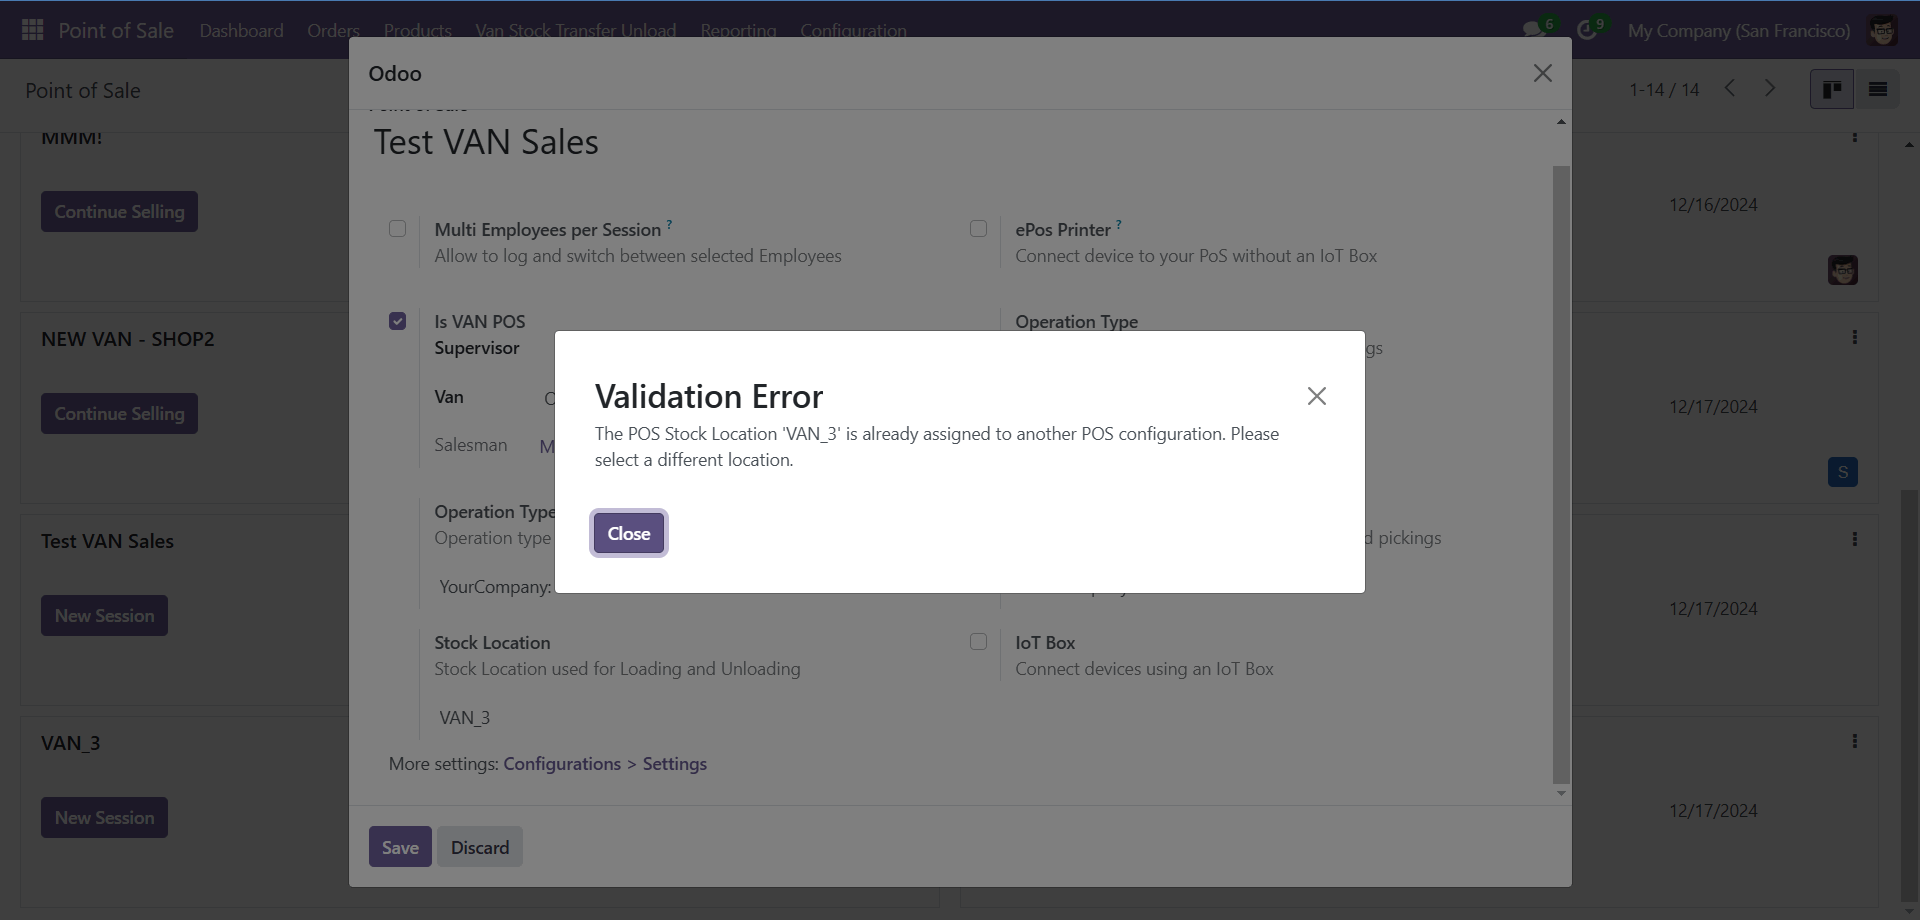
Screenshot 15: Validation displayed if same Van location is configured to more than one POS:
Screenshot 16: Van point of sale - Van Stock Transfer Load:
- Go to Inventory.
- Navigate to Operations menu -> Select Van Stock Transfer menu item.
- This process is defined under the operation type: VAN_SALE_LOAD.
- Van should be loaded with products before opening related POS session.

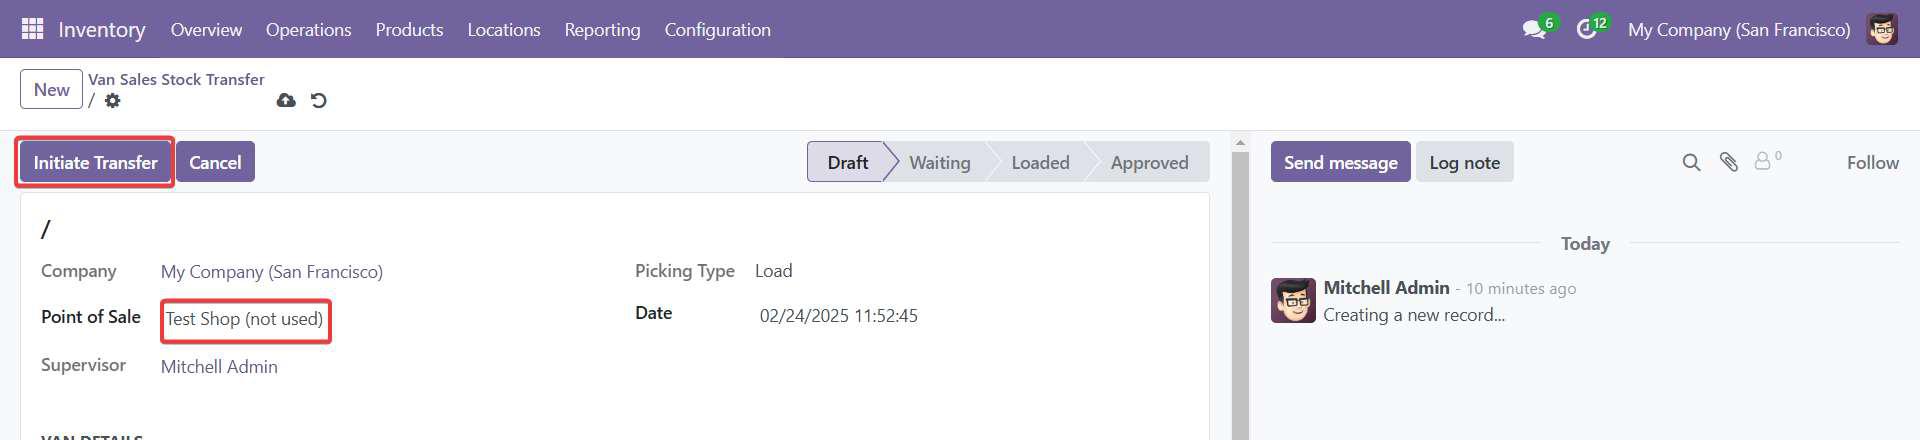
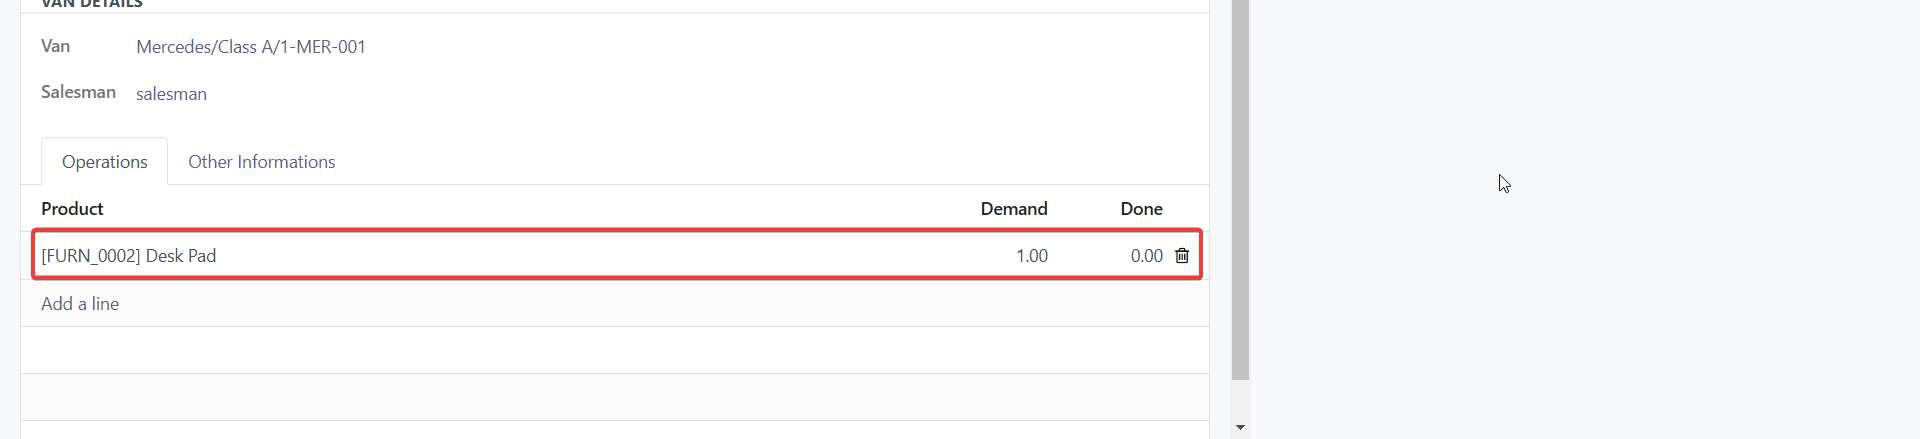
Screenshot 17: Van point of sale – Create Van Stock Transfer Load:
- Select a POS.
- Add products to the van – Van stock transfers are restricted to storable products only.
- Click on Initiate Transfer.
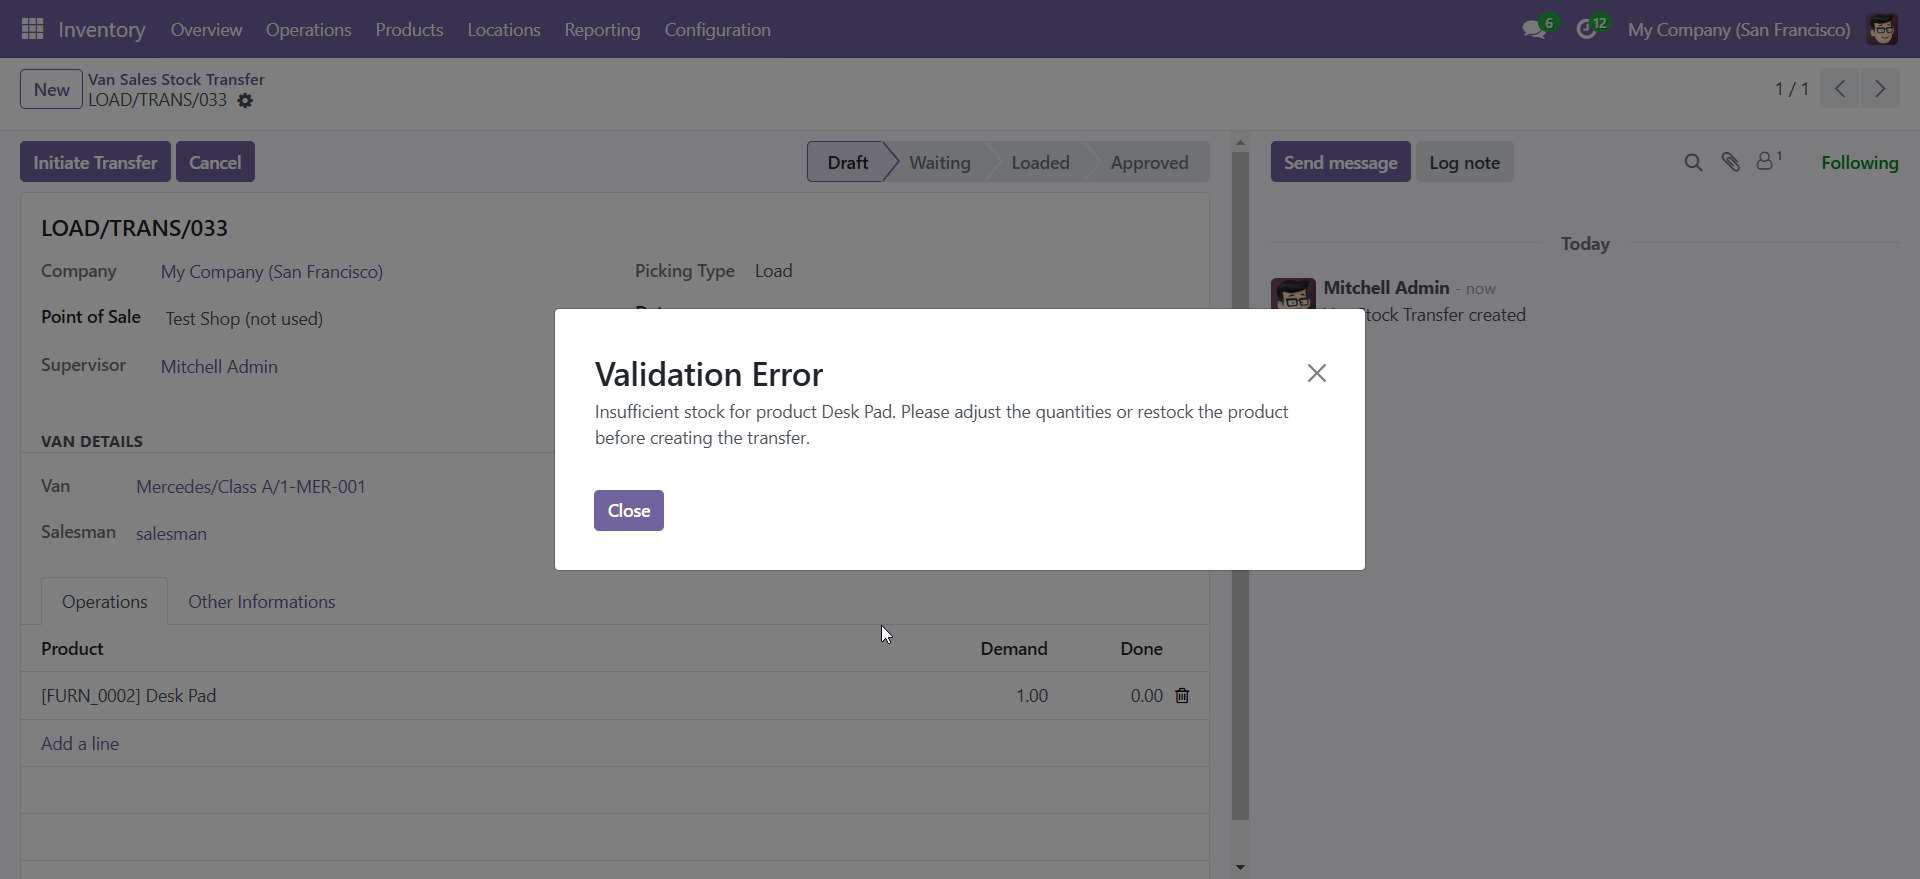
Screenshot 18: When we do not have enough stock for the Product it will not let us initiate the transfer, it will raise validation.
- While initiating the transfer.
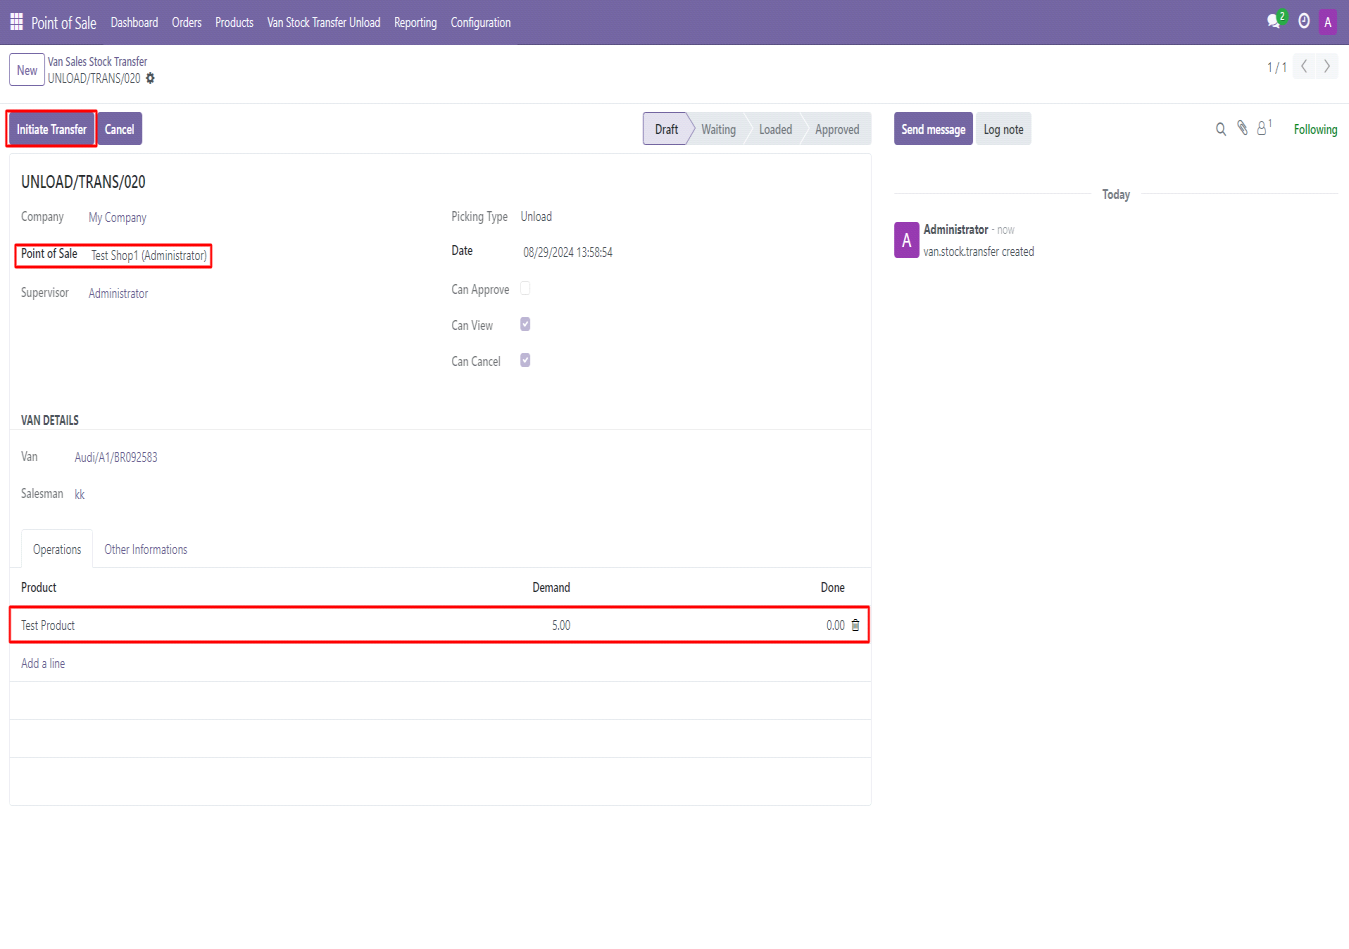
Screenshot 19: Van point of sale – View the created transfer if we have enough stock then transfer will be initiated:

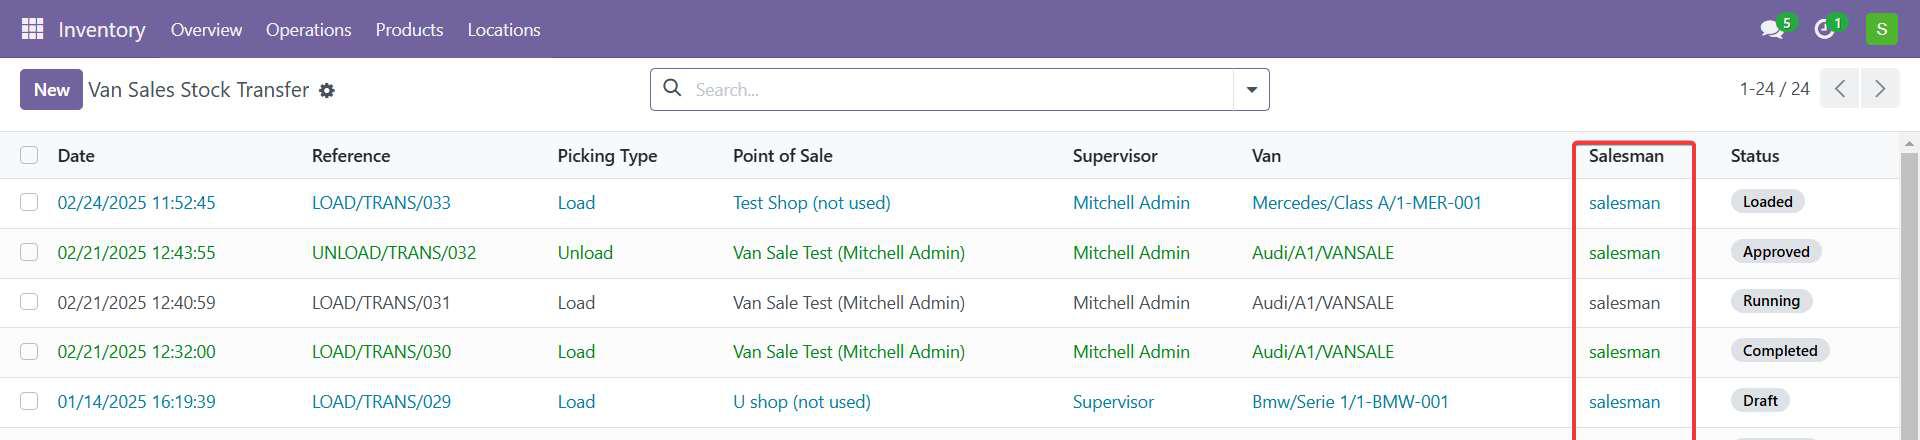
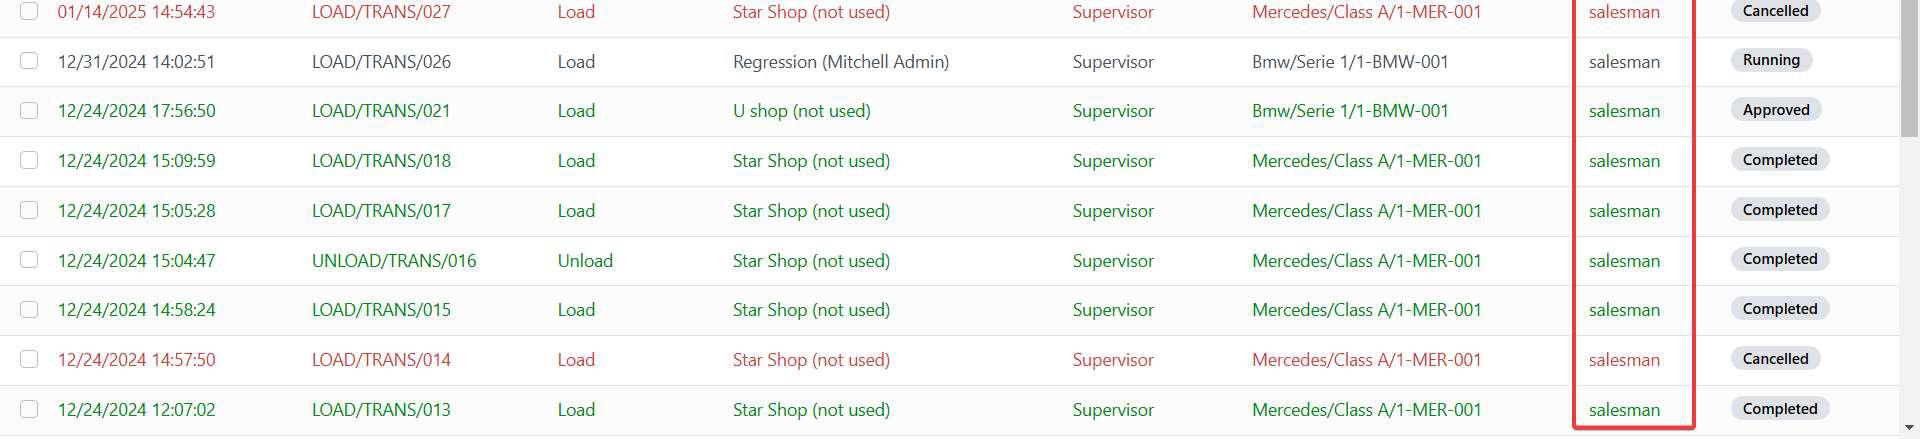
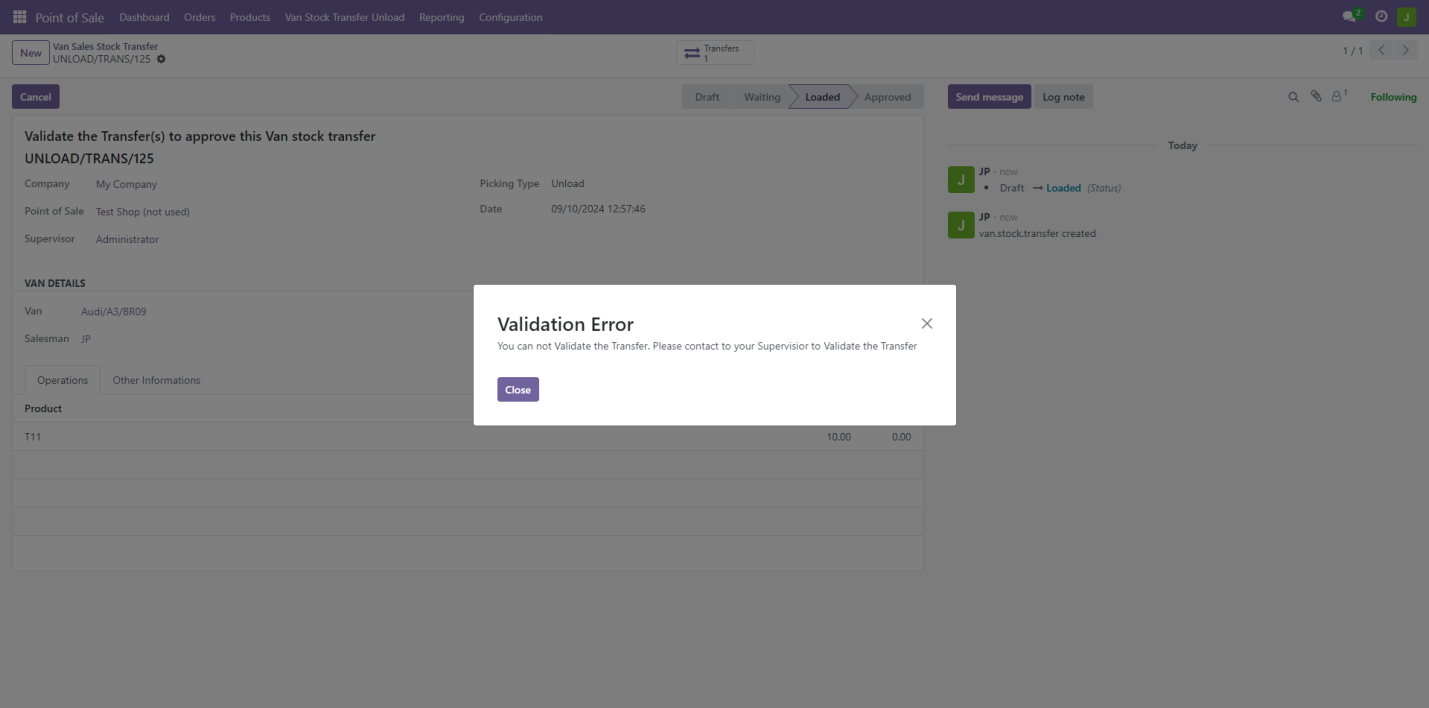
Screenshot 20: Van point of sale – logged in as a salesman.
- If you are logged in as salesman, you cannot validate the transfer.
- For validating the transfer, you need to contact to your supervisor.
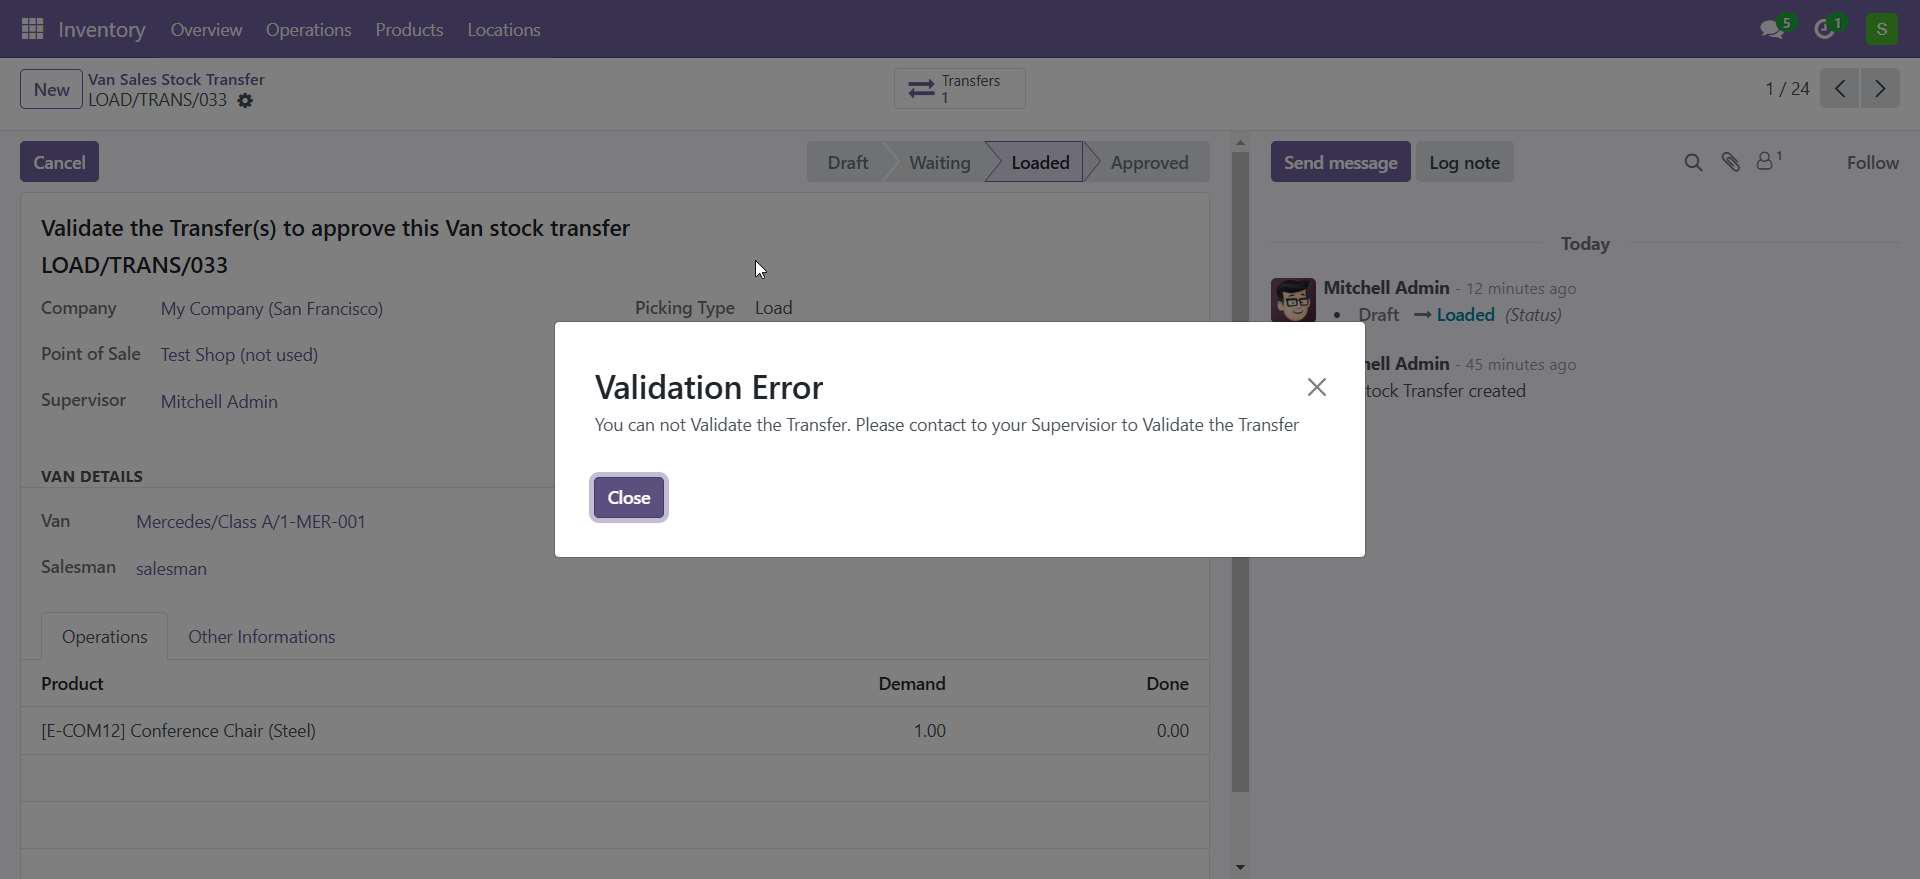
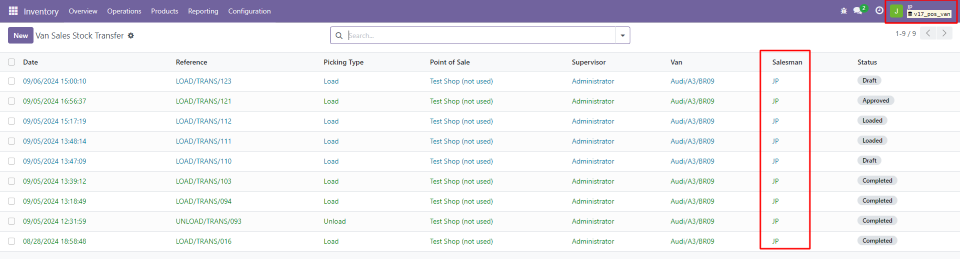
- Each salesman can see only his/her Records.
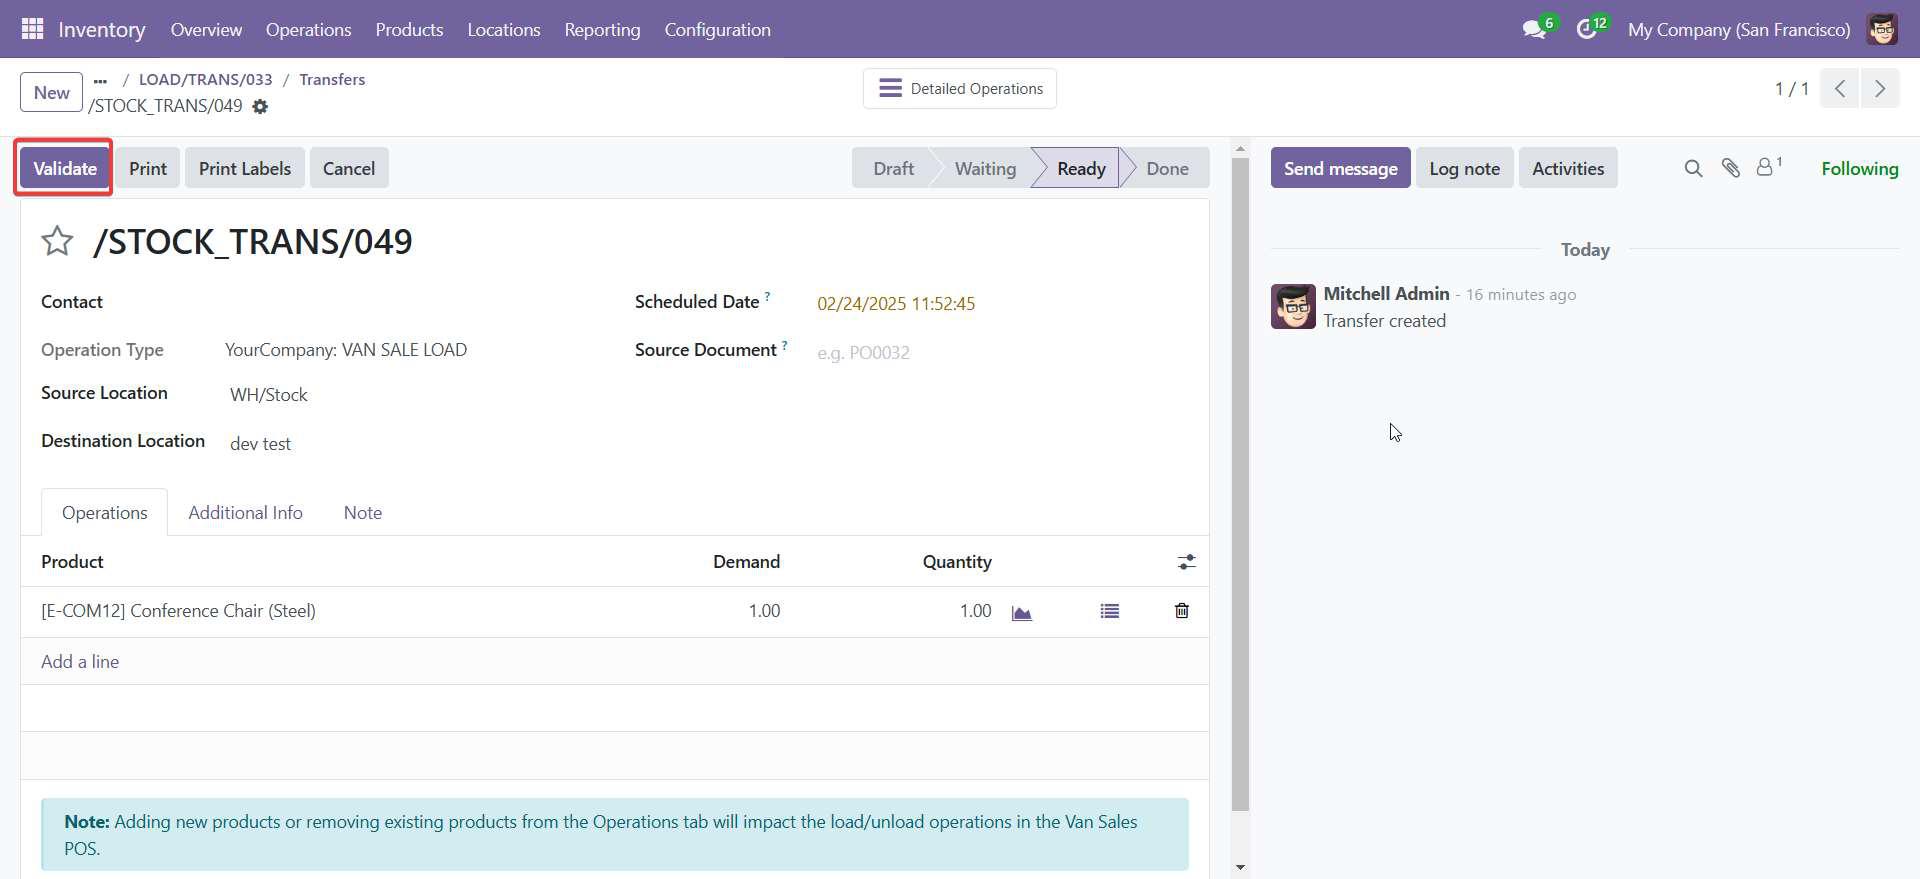
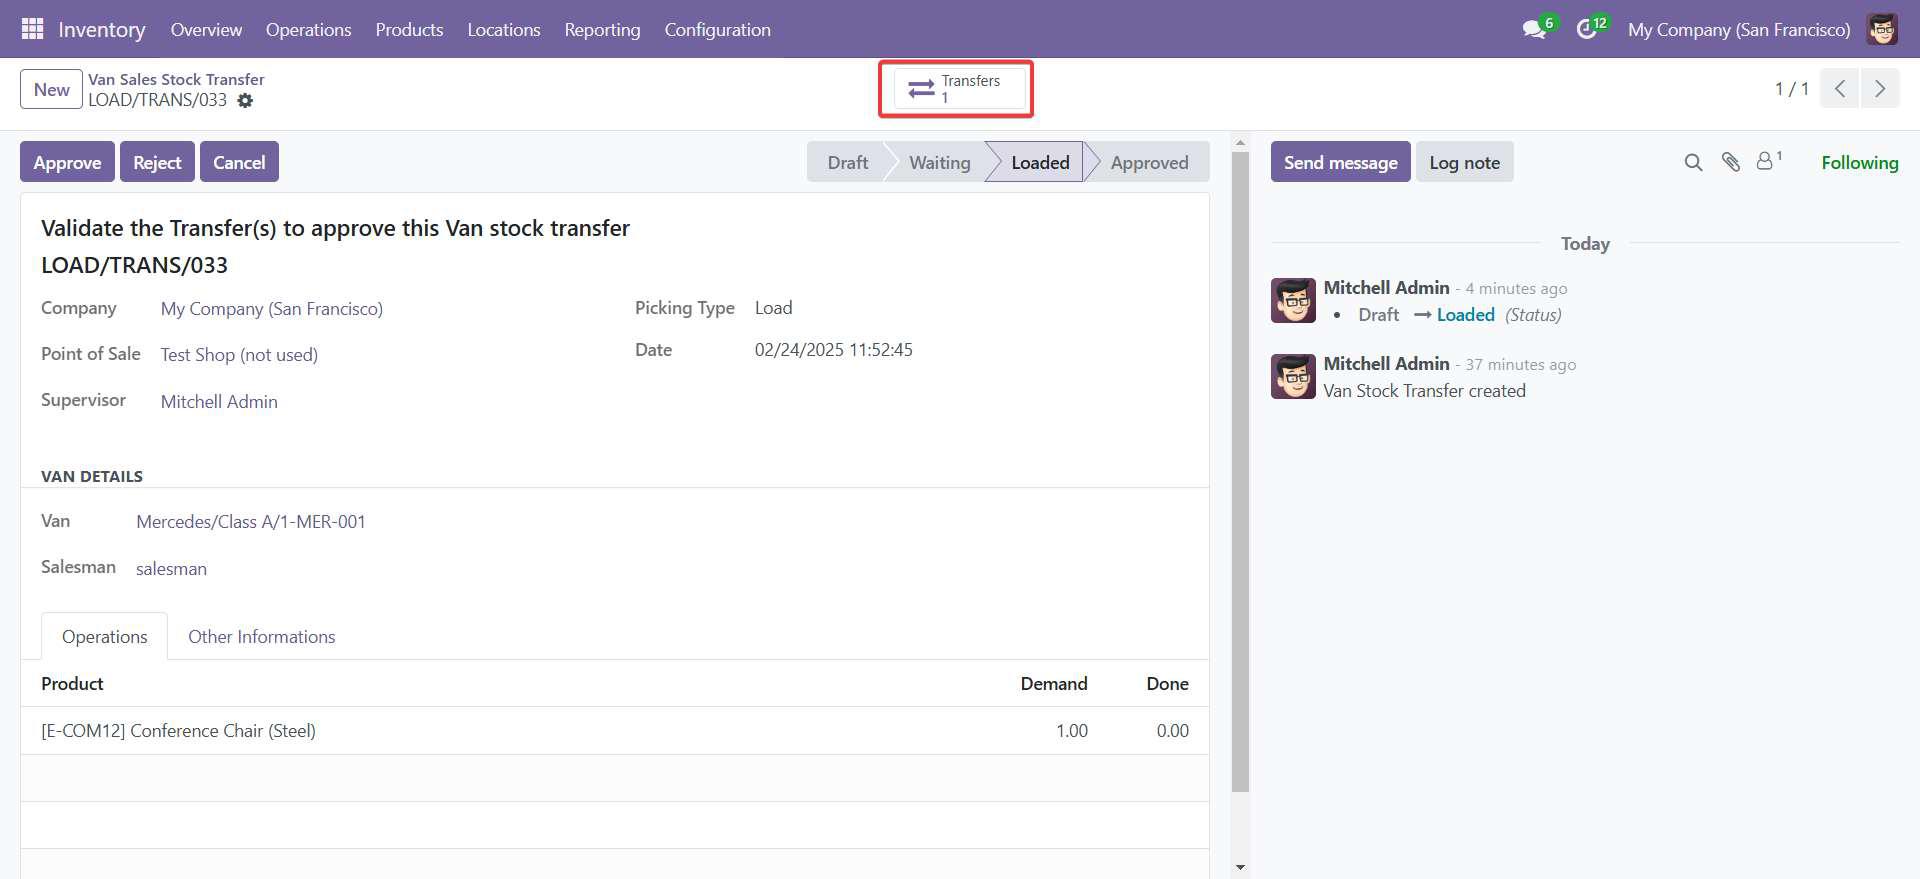
Screenshot 21: Van point of sale – Validate transfer:
- Only Supervisor can validate the transfer.
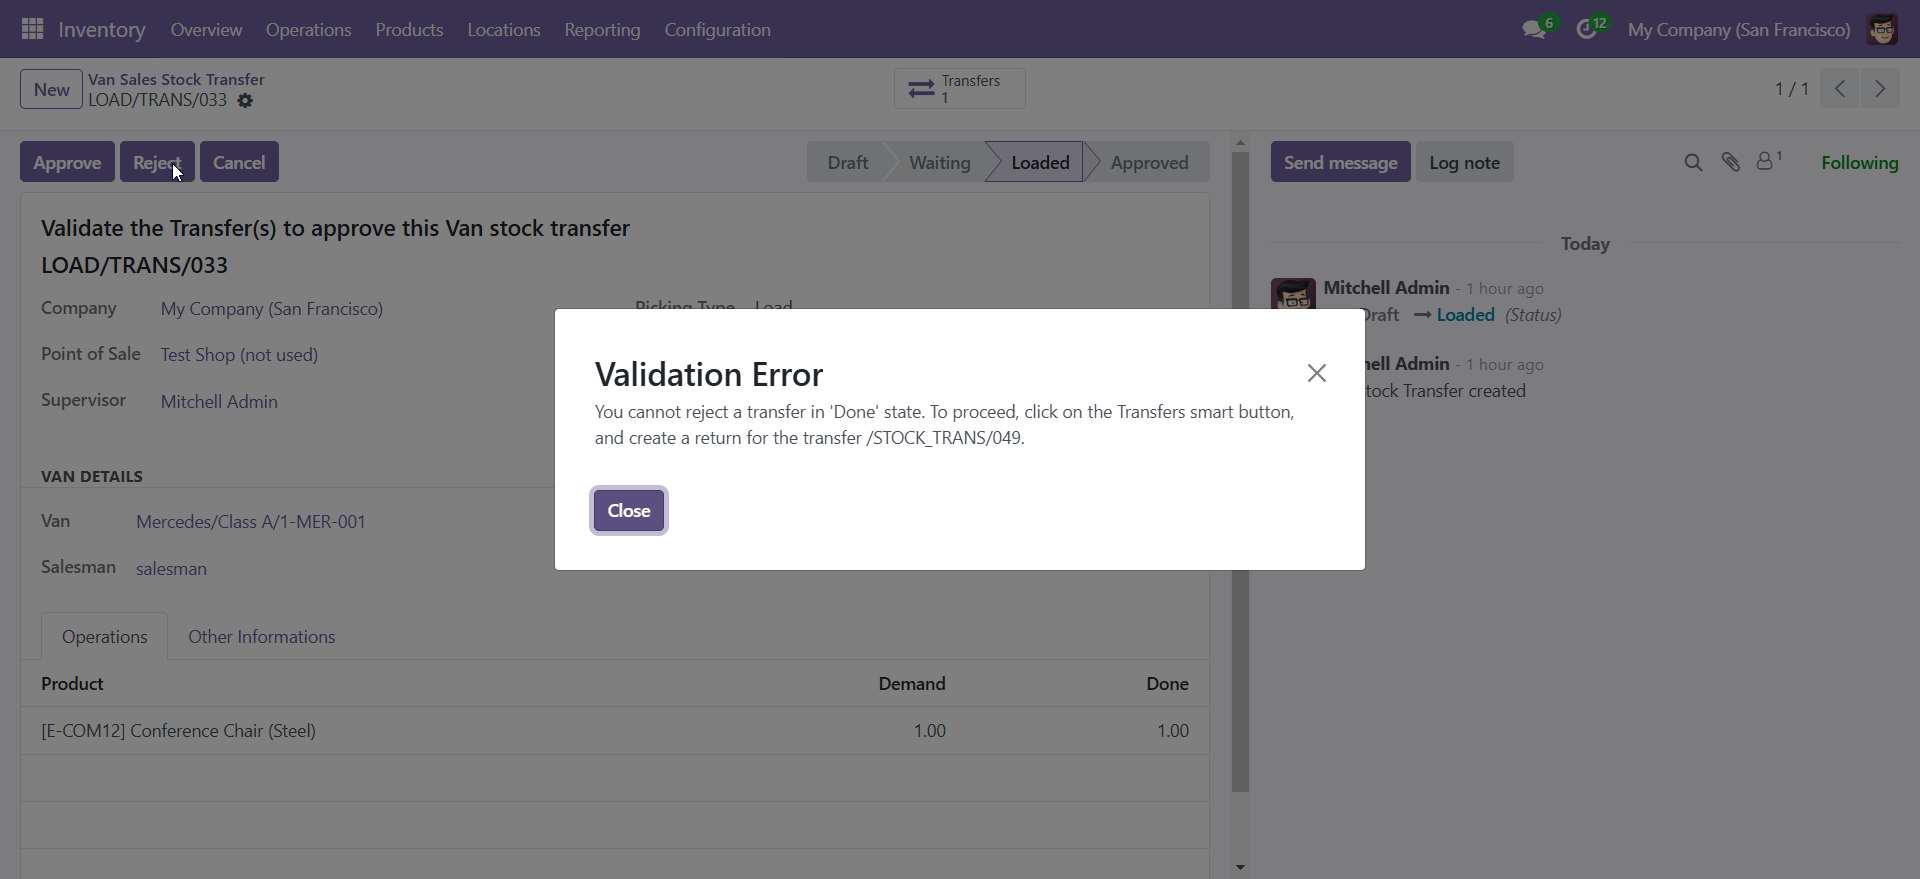
Screenshot 22: Before ‘Approve’ If we want to reject or cancel the Transfer - Once transfer is validated you cannot reject and cancel the load it will raise validation.
- Go back to Load Transfer record.
- Click on Reject and Cancel.

Screenshot 23: In case of Reject and Cancel getting stock back to Warehouse – Create Return.
- Click on Transfers smart button.
- Go to Transfers.
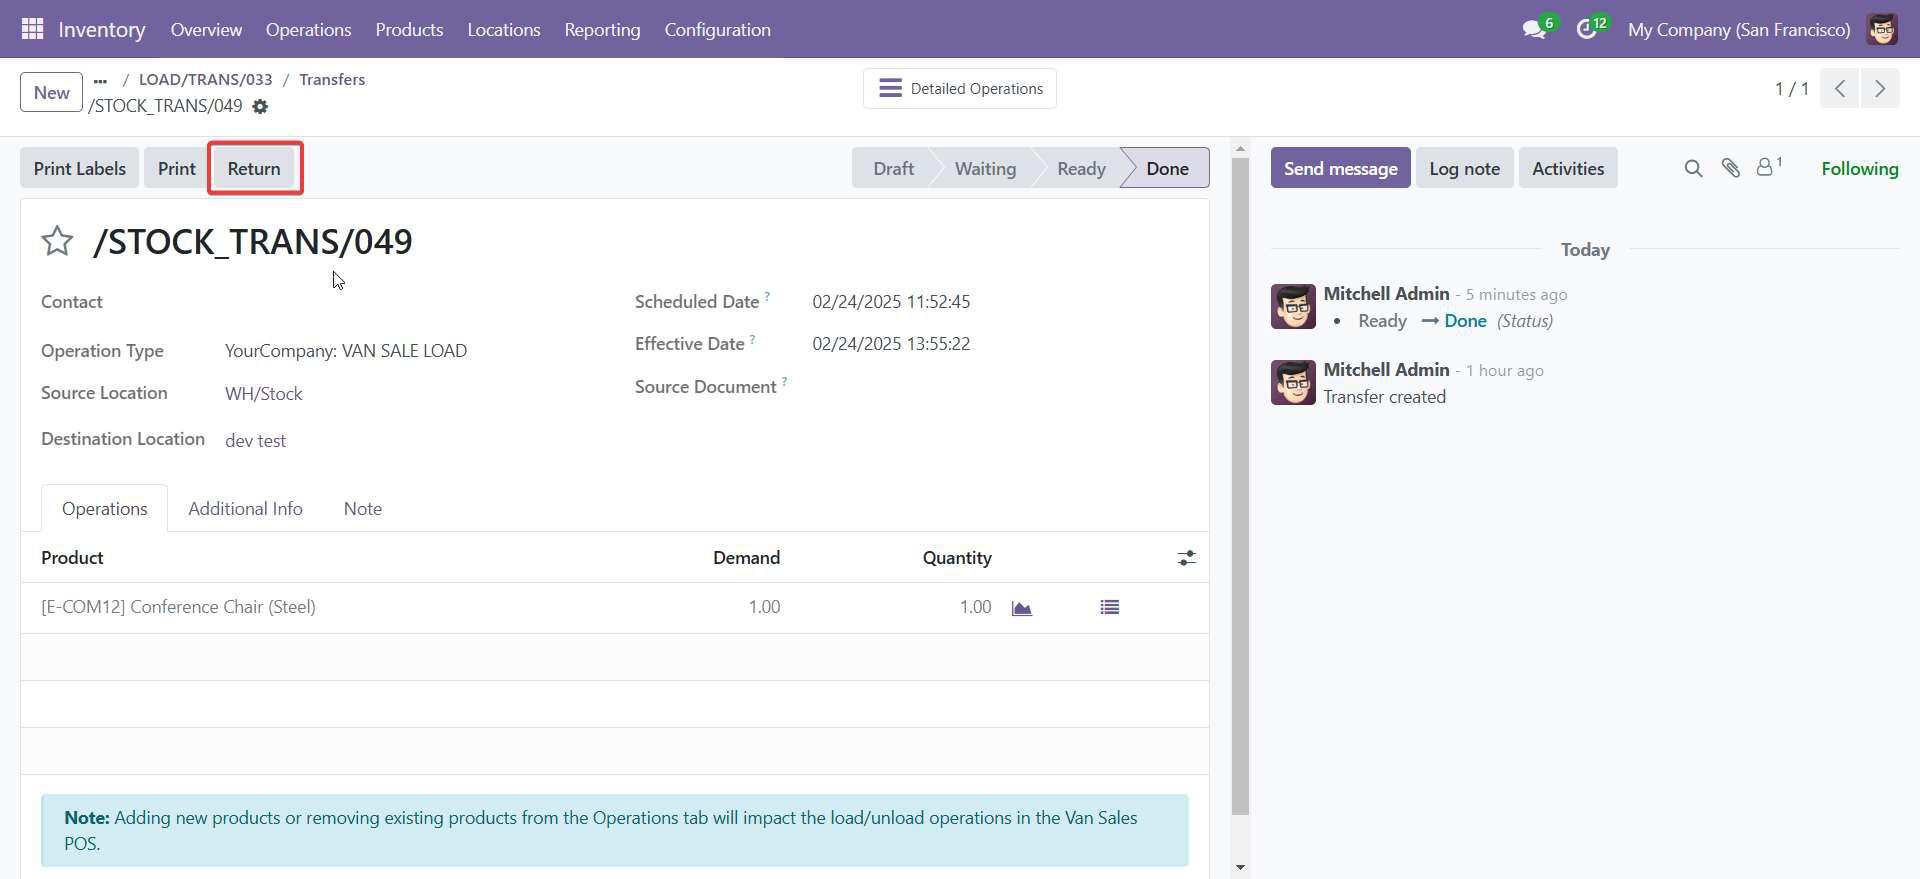
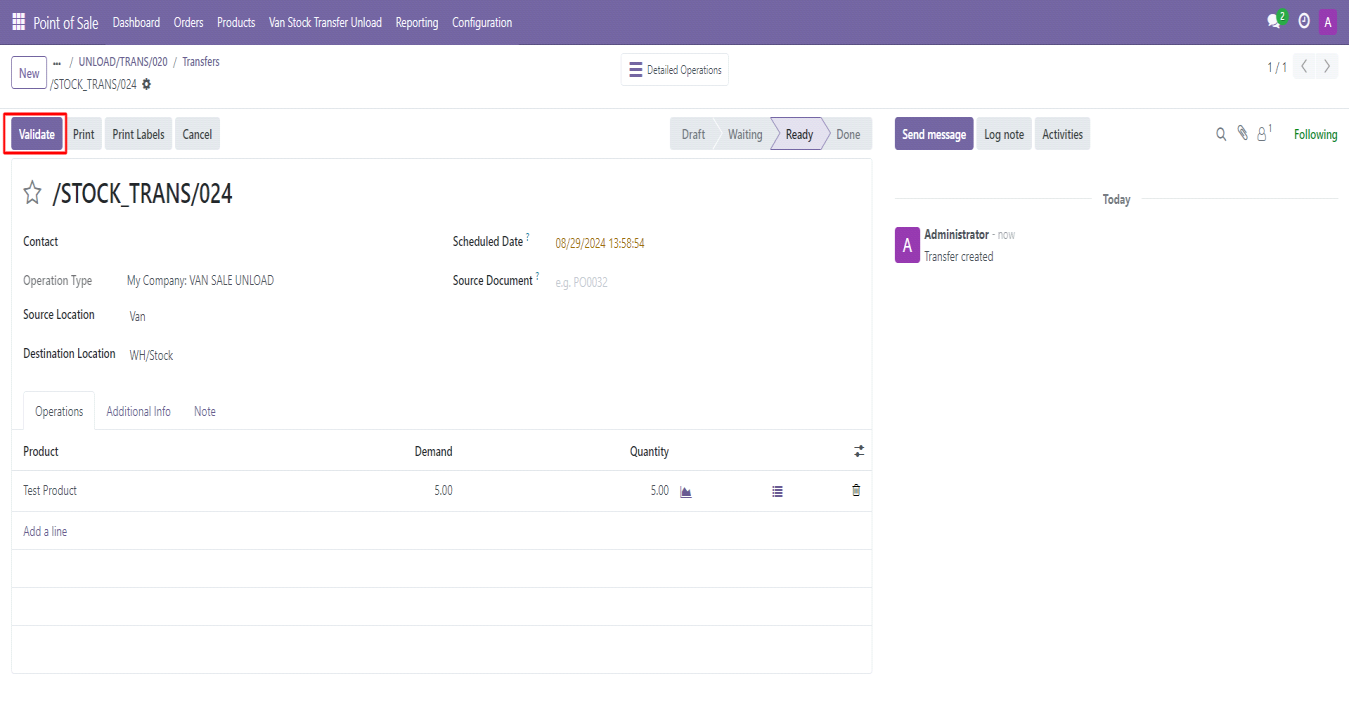
Screenshot 24: Create Return:
- Click on return button.
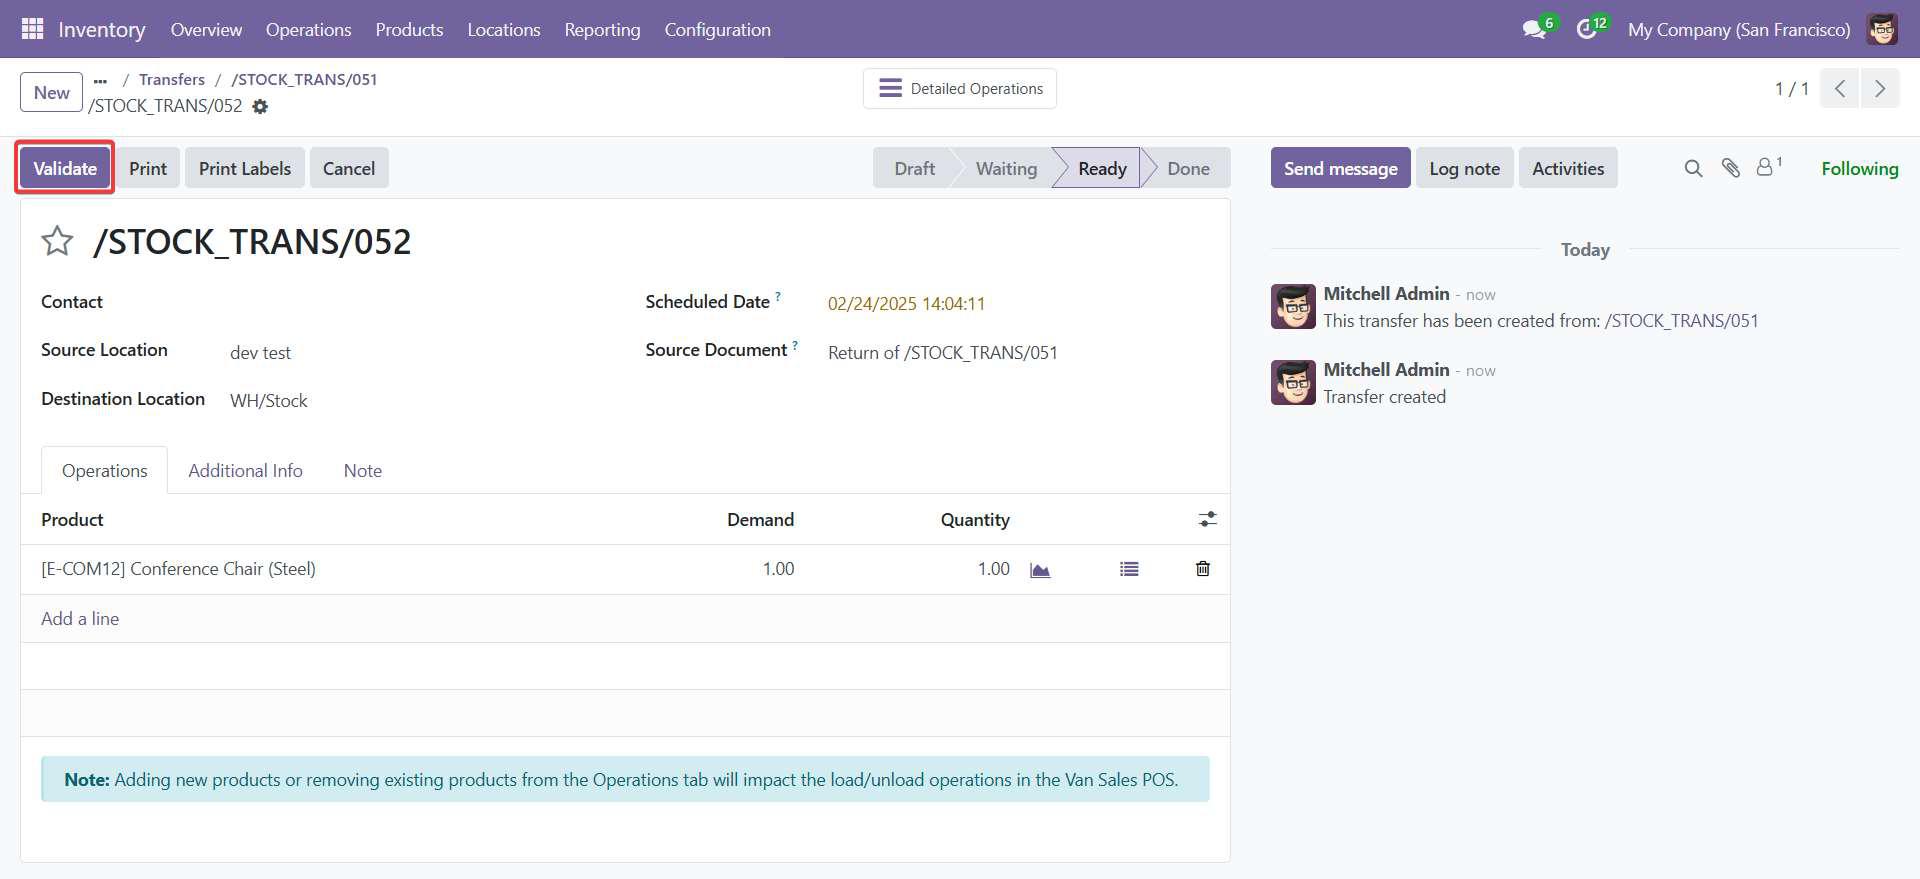
Screenshot 25: Validate the Return:
- Stock will be moved to warehouse.
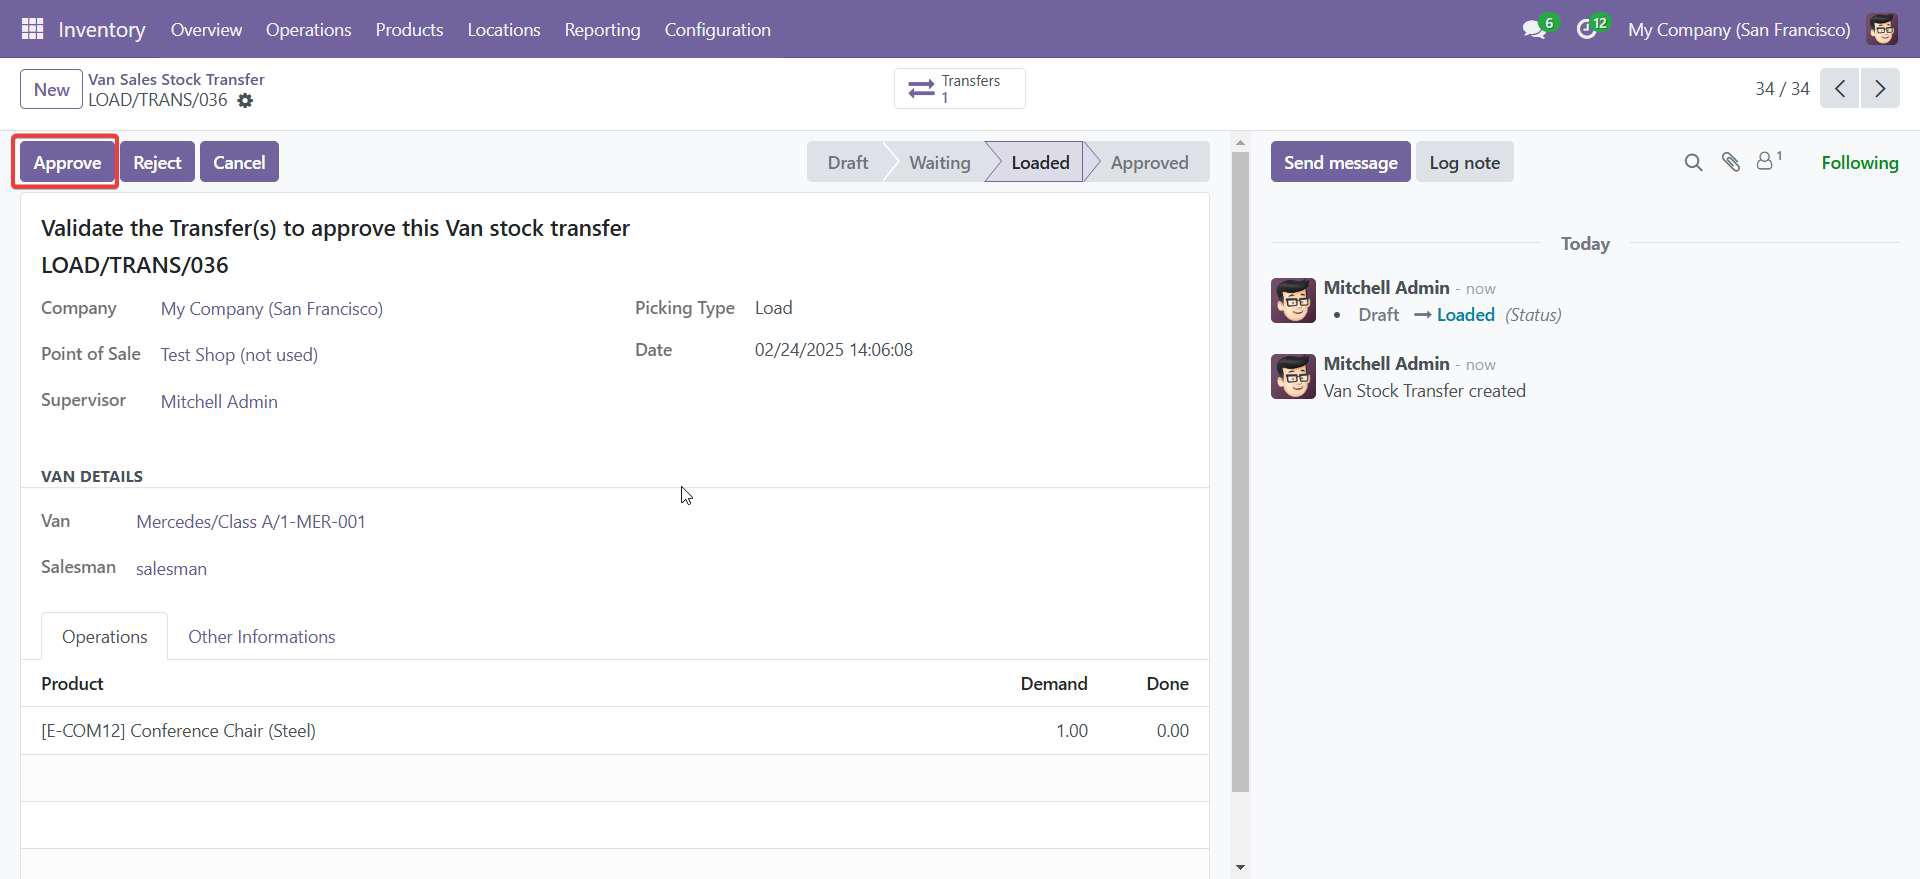
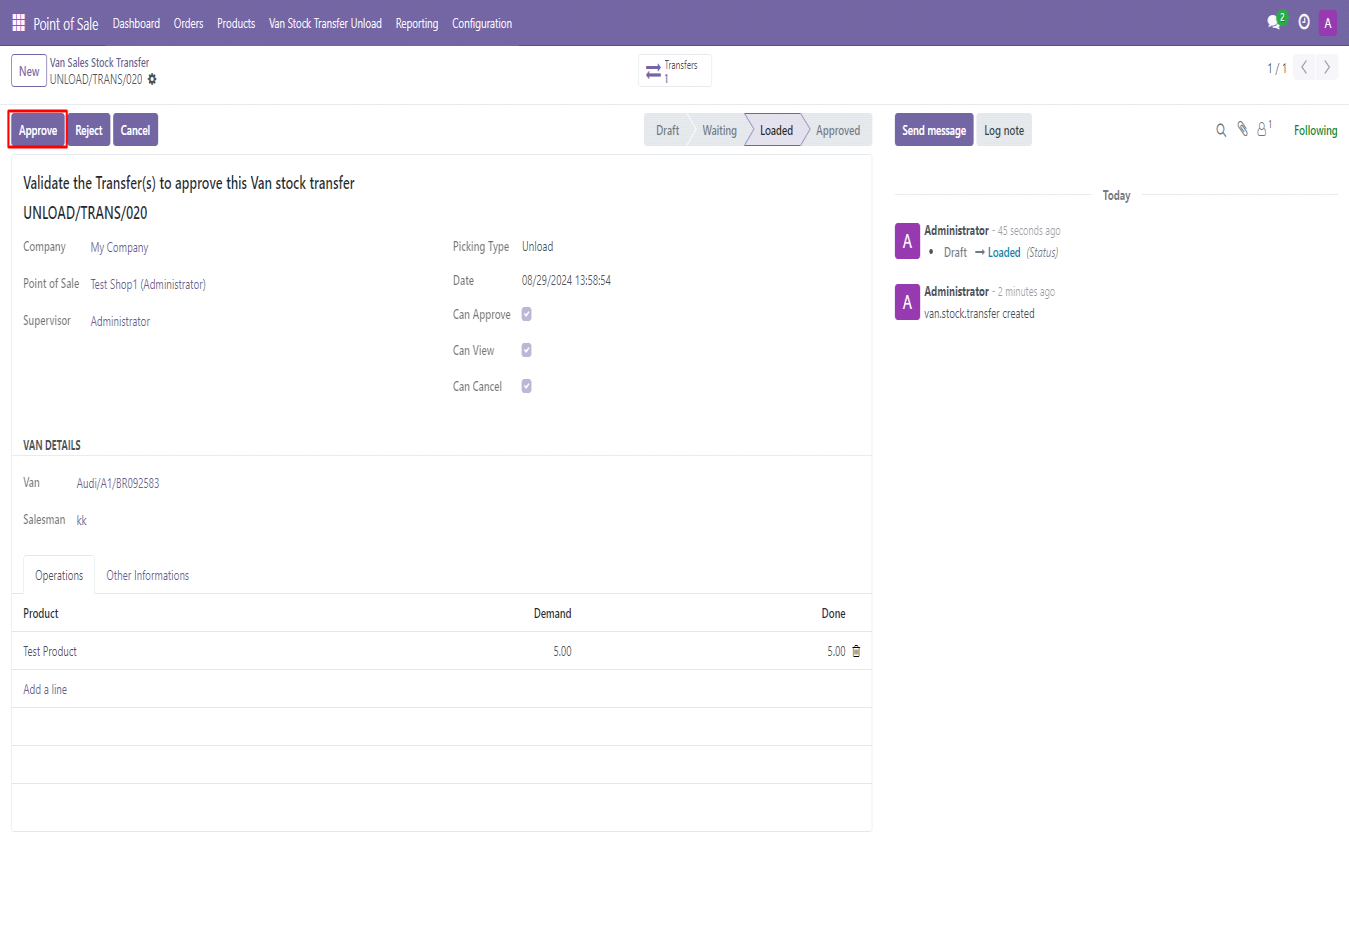
Screenshot 26: Van point of sale – Load Transfer Approval:
- Go back to Load Transfer record.
- Click Approve.
- Only Supervisor can approve the Load Transfer.
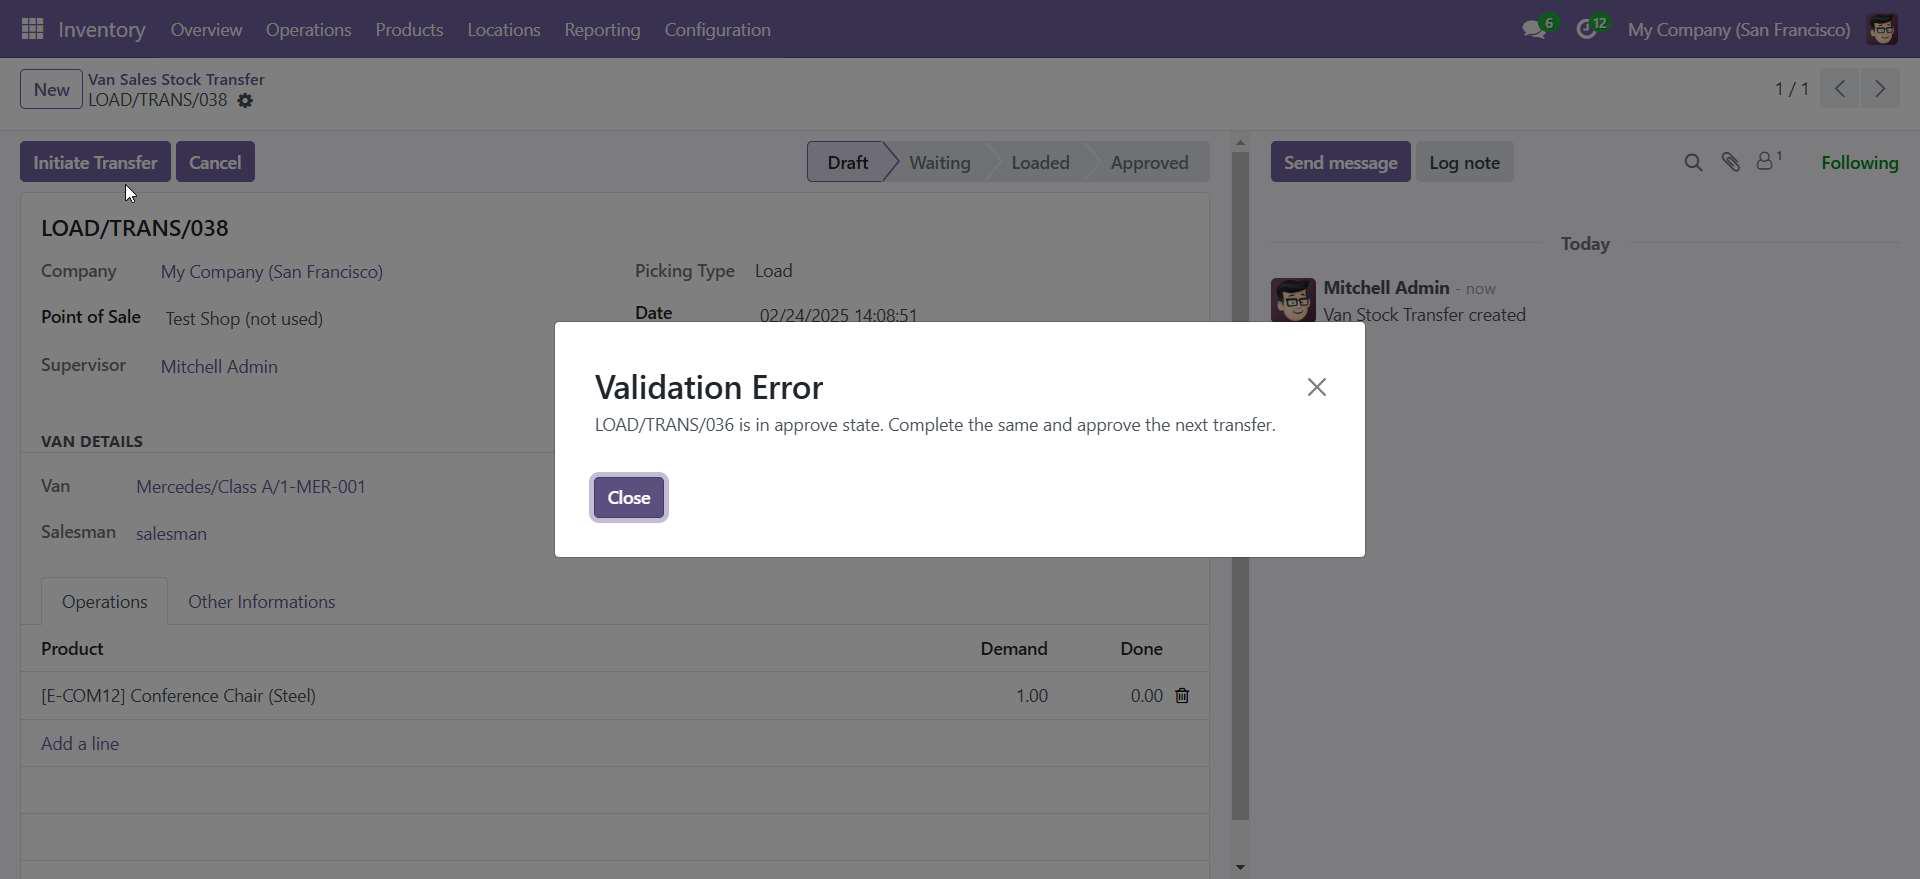
Screenshot 27: Once the Van Stock Transfer Load is approved then you cannot create another Van Stock Transfer Load for the same session it will raise validation. You need to complete the previous Load.
Screenshot 28: Van point of sale – Open new POS session:
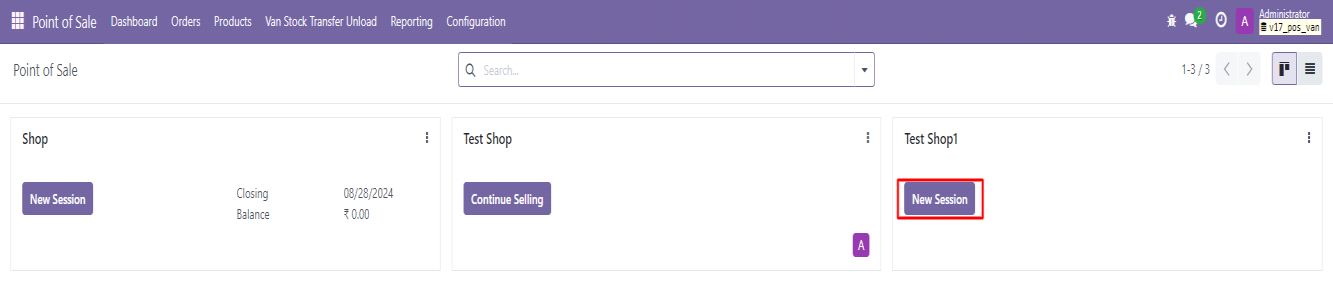
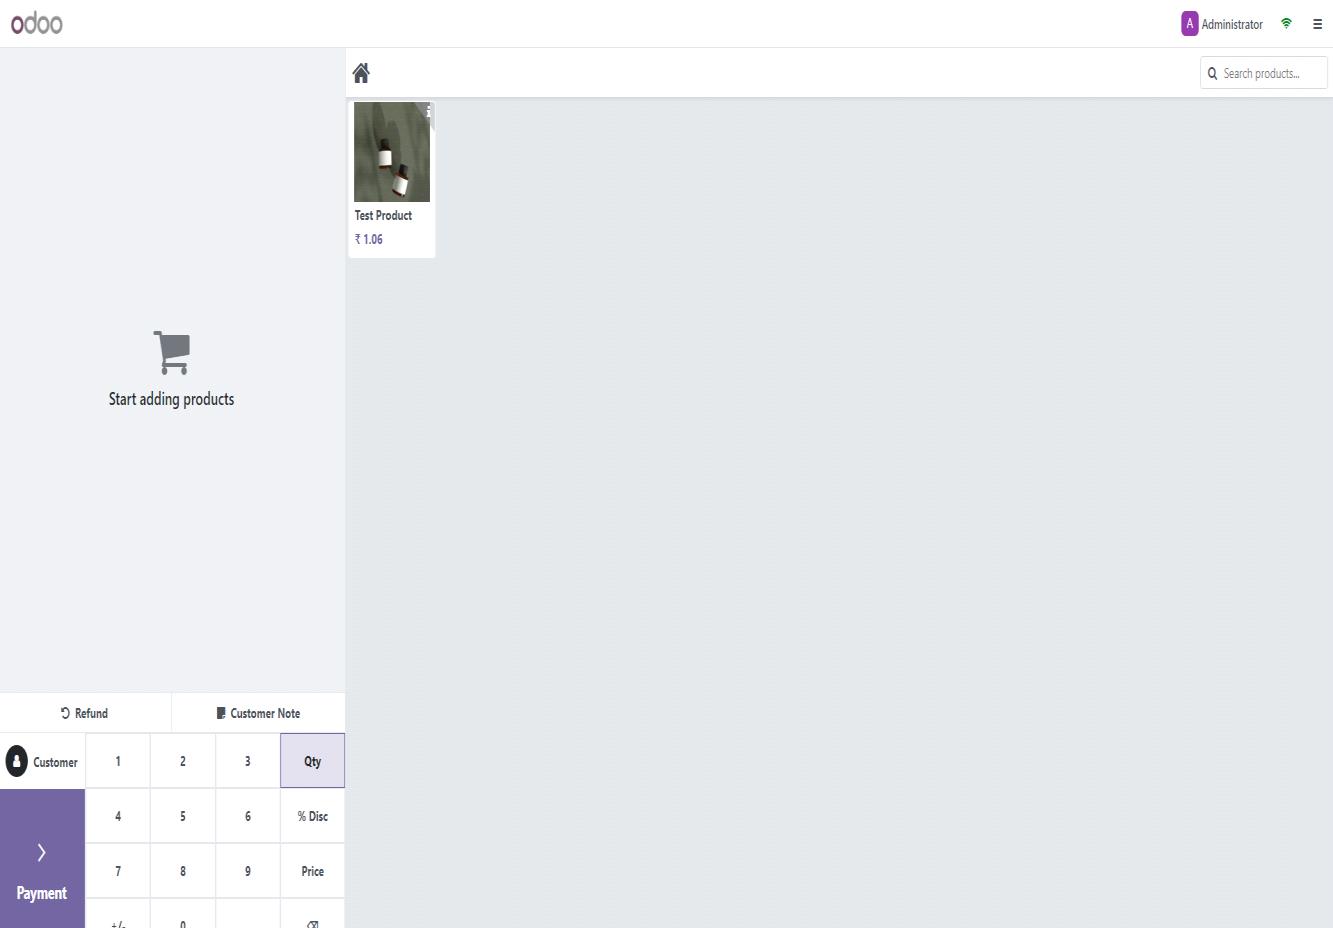
Screenshot 29: Van point of sale Sell the loaded products:
- Here Only Van Location Product will be visible.
- Click on product to add to cart.
- Click on Payment.
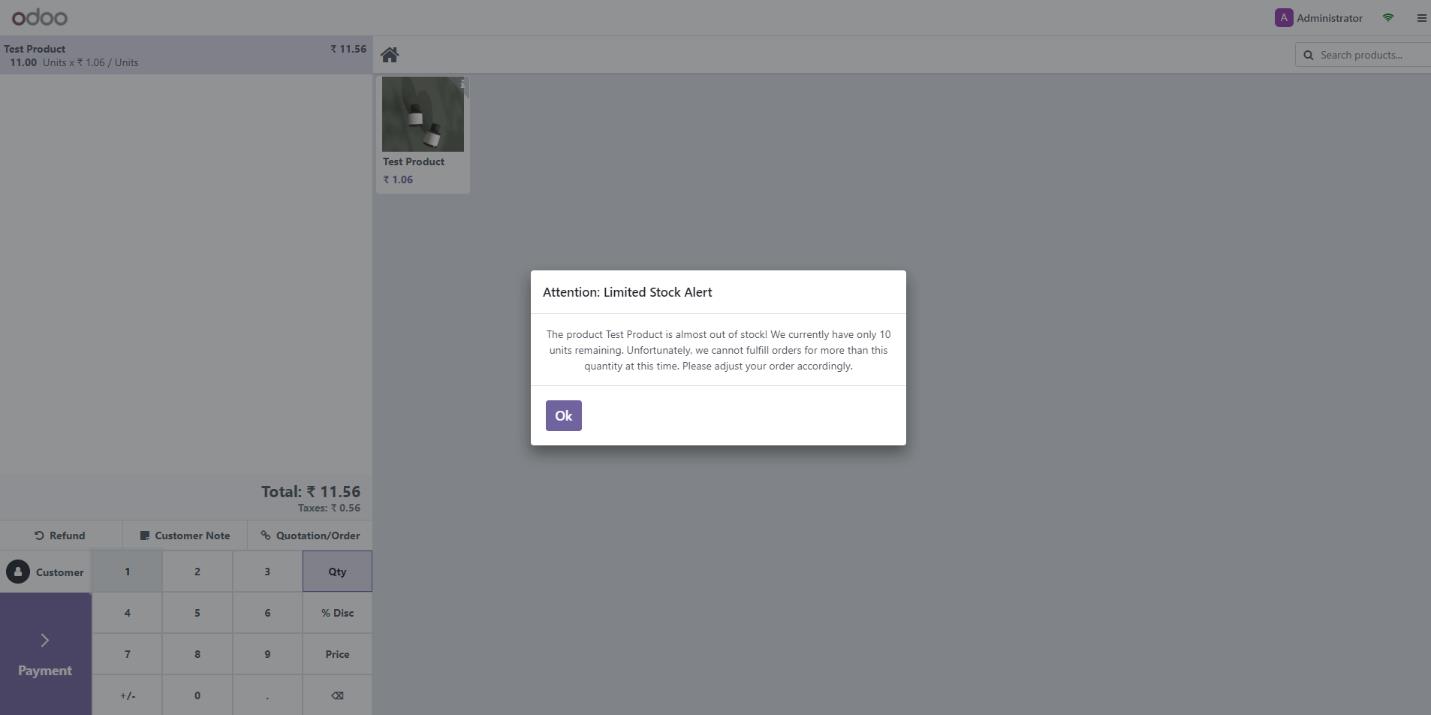
Screenshot 29: Van point of sale, Sell the loaded products:
- If we want to Sell more than available quantity in Stock, it will not let us sell more than available quantity in Stock.

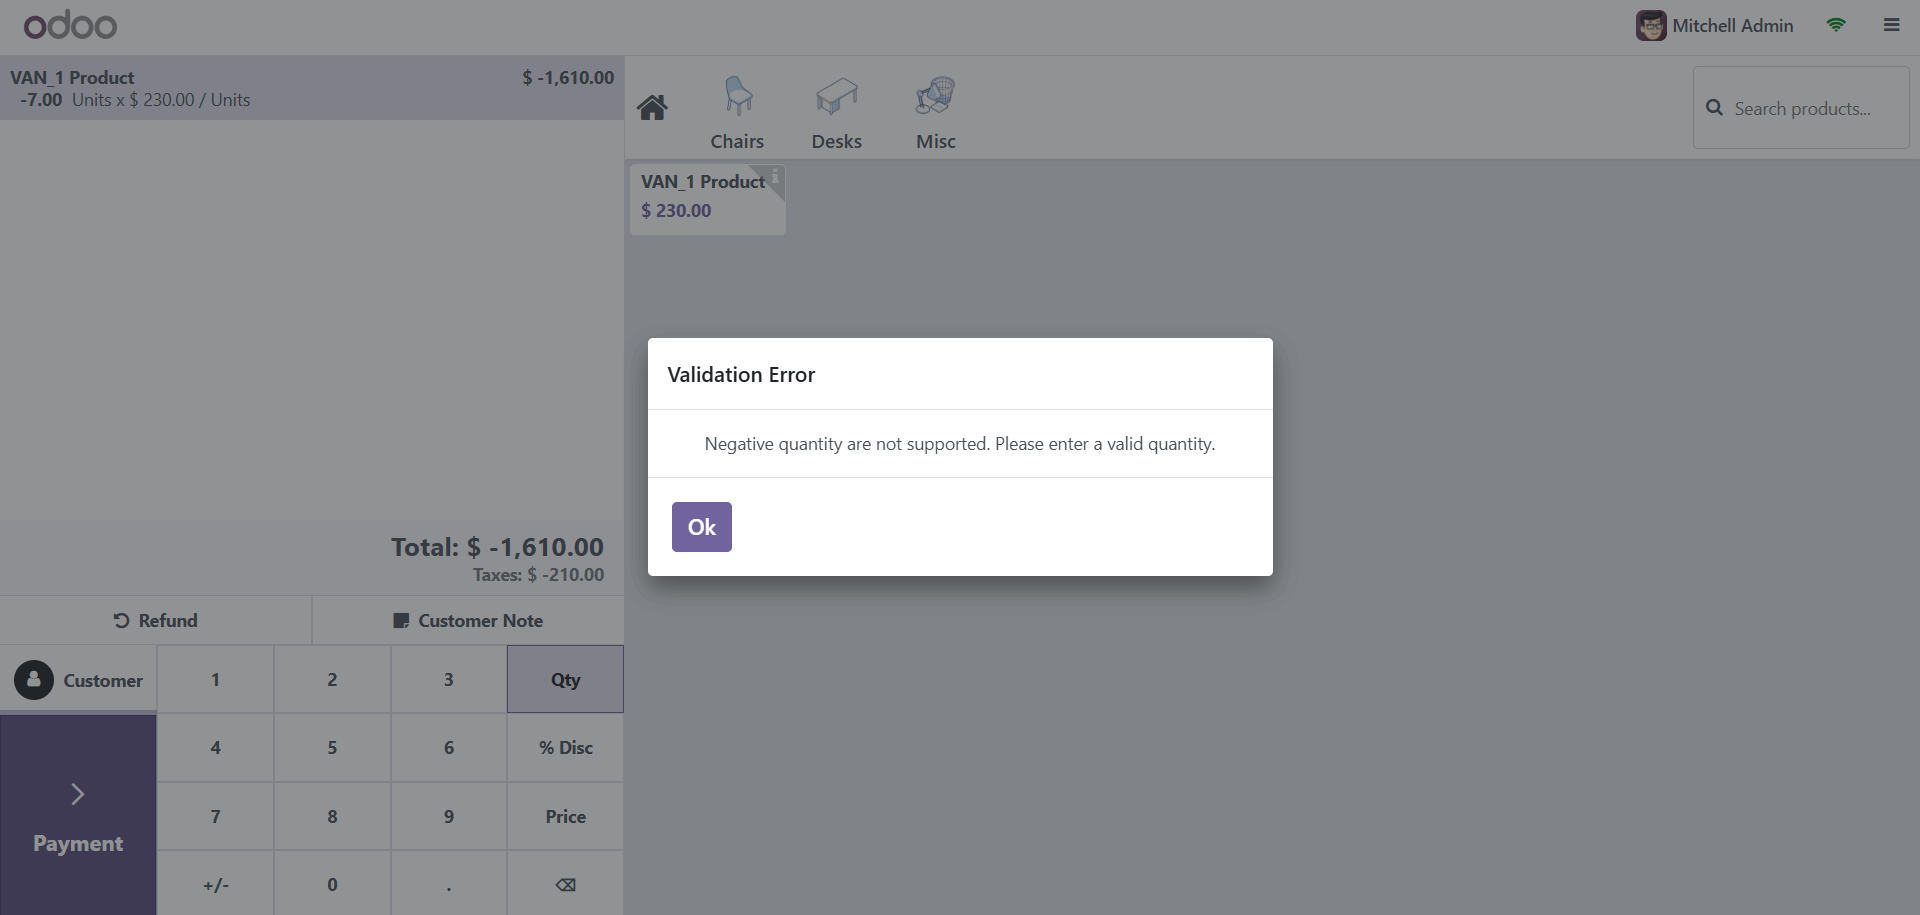
Screenshot 30: Negative or zero quantity is not allowed in Van Sale POS and validation message will be raised:
Screenshot 31: Van point of sale, Sell the loaded products
- If we want to Sell more than available quantity in Stock, it will not let us sell more than available quantity in Stock.
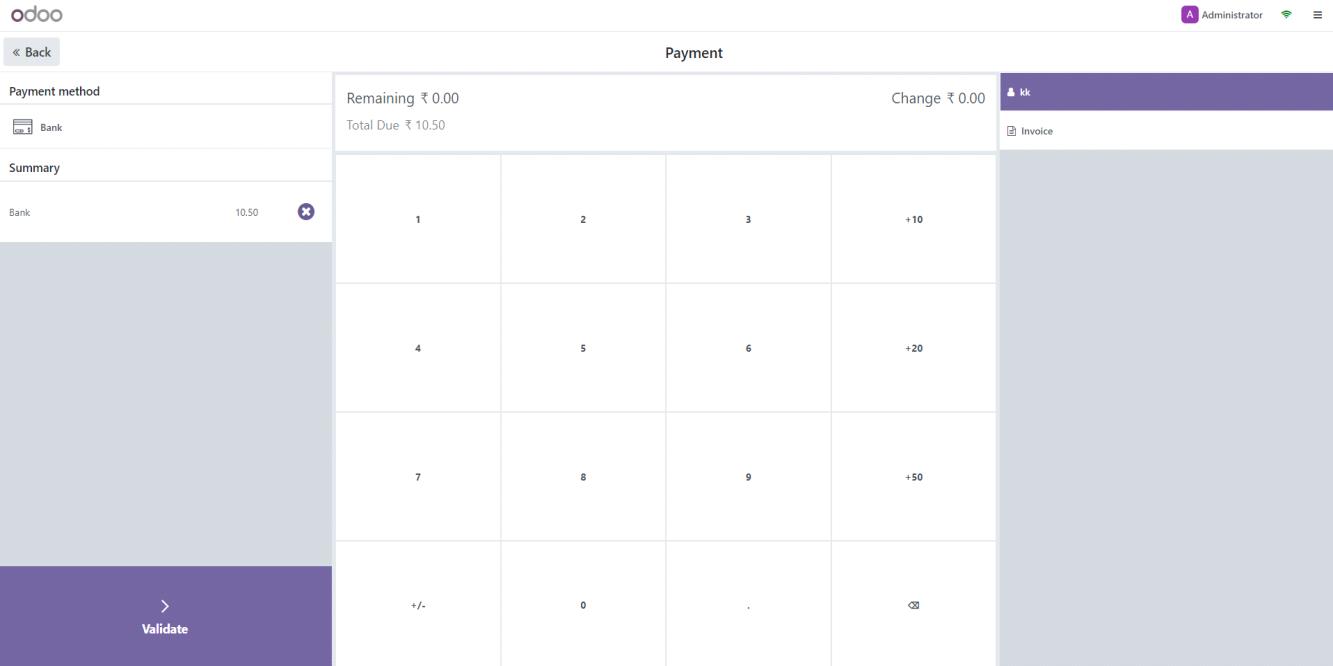
Screenshot 32: Van point of sale, Sell all loaded products:
- Select any payment method – Bank/Cash.
- Validate payment.
Screenshot 33: For real time stock update:
- Activate Developer mode from Settings as in Screenshot 1
- Go to POS
- Click Configuration Menu
- Click Settings menu
- Select In real time (accurate but slower) option.

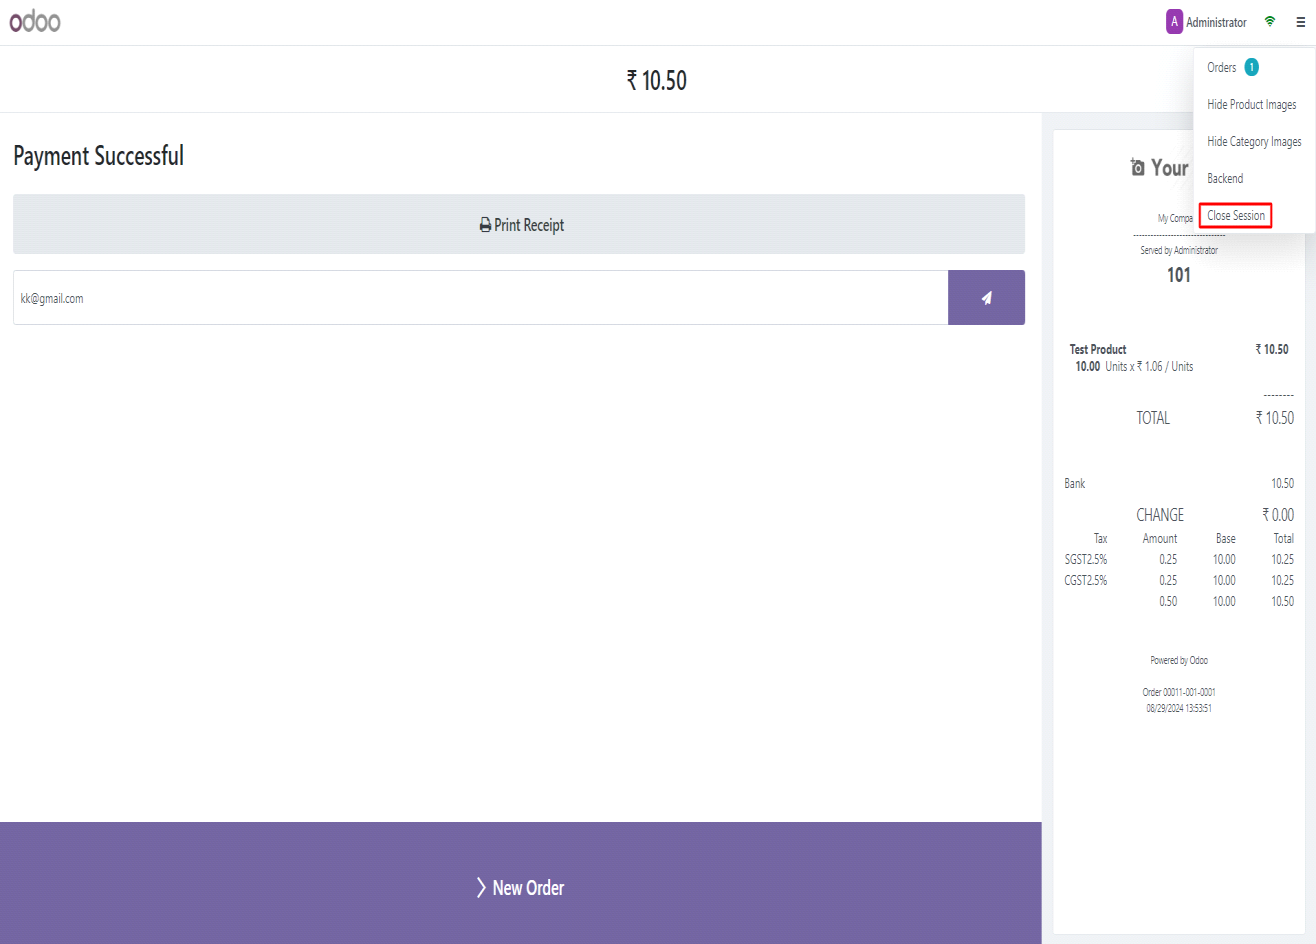
Screenshot 34: When all Loaded Products are Sold it will update stock in real time. if we go to product screen it will show blank because all the loaded items are sold.

Screenshot 35: When all Loaded Products are Sold, in That case we do not have to create Unload, we can simply close the session. Stock will auto be updated.

Screenshot 36: Van point of sale Unload transfer to move unsold products to warehouse:
- Go to Point-of-Sale module.
- Click on Van Stock Transfer Unload.

Screenshot 37: Van point of sale - Create an unload transfer:
- Create new unload transfer.
- Select POS -> Unsold products auto updated in line with remaining Quantity.
- Click INITIATE TRANSFER
Screenshot 38: Van point of sale – If you logged in as salesman:
- If you are logged in as salesman, you cannot validate the transfer.
- For validating the transfer, you need to contact to your supervisor.
- Each salesman can see only his/her unload Records.
Screenshot 39: Van point of sale – Validate Product Transfer:
Screenshot 40: Van point of sale – Approve Unload Transfer:
- Only Supervisor can Approve the transfer.
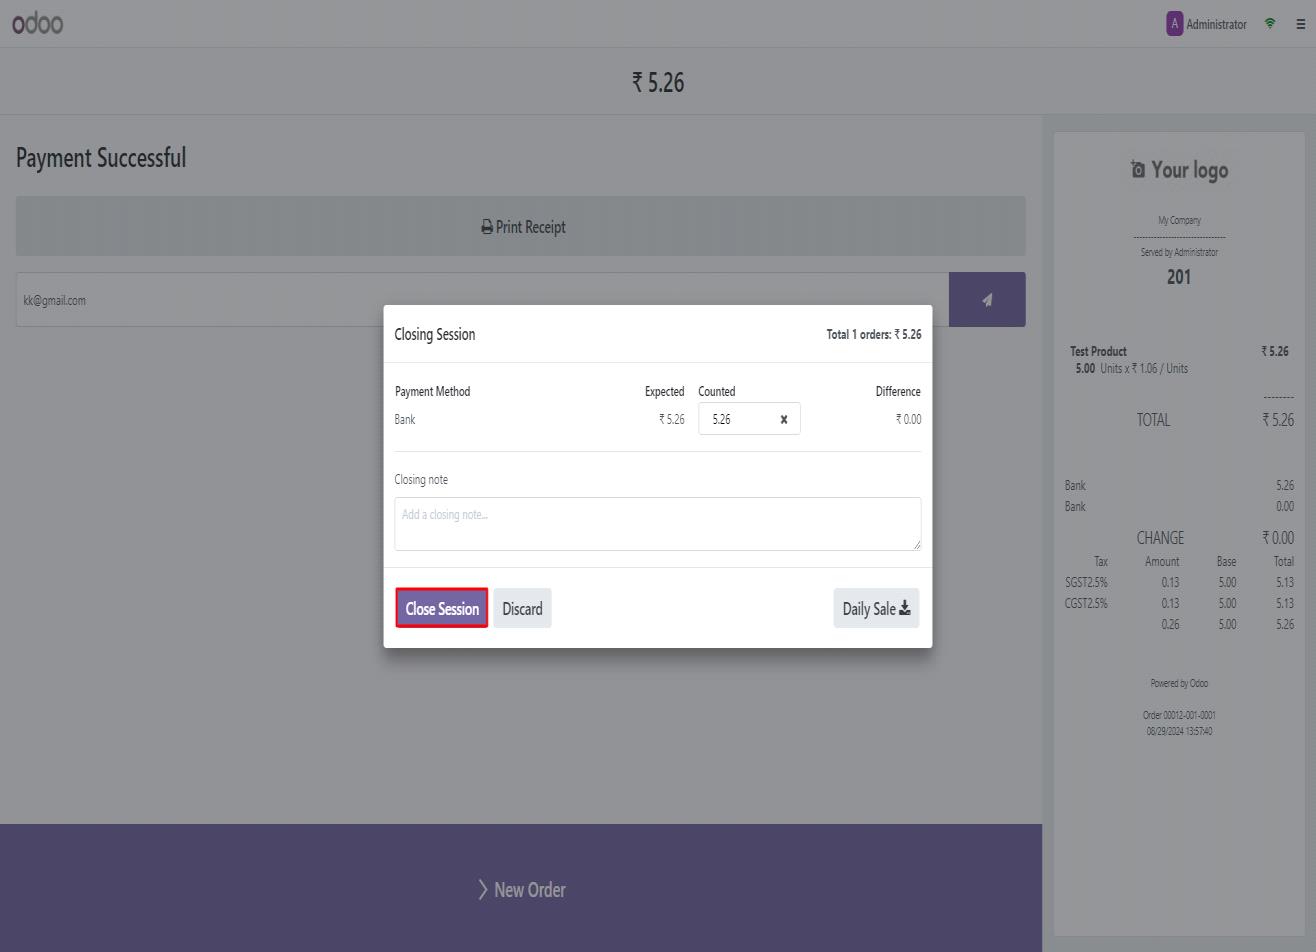
Screenshot 41: Van point of sale – Close session:
- Click ‘Close’ in POS terminal.
- Rectify the cash differences.
- Click Close Session.
4. Brief Description
This module adds new features point of sale that are specific to VAN sale. Each van stock is recorded. Mainly two types of functions or operations take place, that can be said as loading operation and the unloading operation. And the two operations get recorded. This module mainly adds new features to the point-of-sale module. Here in this Van sale module mainly two user groups created manager and salesman. Where managers have all the access in modules, on the other hand the salesman only has certain access.
Initial step-by-step description
- Install the module Van Point of Sale.
- Go to inventory module and activate the settings option.
- Set user groups for the corresponding users.
- Add the location in the location setting.
- Add the operation types in module inventory.
- Then initiate the van stock transfer loading process.
- The load should be validated before it is approved to transfer state.
- The supervisor should give them access to transfer the load.
- Then create a new point sale.
- Ensure Operation Types are added in POS Config.
- After sale we can close the sale session in the POS module.
- If the product didn't get sold then we should make an unloading process then only we can close the session.
5. Technical Requirements / Compatible With:
- Technical Requirements: Odoo Point of Sale, Inventory, Fleet module.
- Compatible with: Odoo v17.0 Community and Enterprise Editions.
6. Changes Log / Release Notes
- Version 1.0.4: February 2025
- Resolved some issues in displaying products that are not loaded to the POS.
- Resolved issue in changing the operation type in POS config.
- Users can now add the same product with different prices on separate lines in POS.
- Version 1.0.3: December 2024
- Load transfers will now automatically move to a Cancelled or Rejected state if the Supervisor rejects the transfer after validation.
- Unloading is no longer required for rejected transfers.
- Resolved an issue where users encountered an error while closing a simple POS session.
- Implemented restrictions to prevent sales with negative quantities in the POS Shop.
- Fixed a stock discrepancy issue occurring when an unload transfer record is created in one window while simultaneously opening a session to sell items in another window.
- Addressed the issue of incorrect stock updates when multiple POS sessions operate with the same Van location.
- Version 1.0.2: September 2024
- System not let us sell more than available products in the current session’s van location stock.
- Real time stock updating.
- Once all loaded Products are sold then product will be disappeared from the session.
- Role access privilege set for salesman and supervisor.
- Version 1.0.1: August 2024
- Automatic updating of product line while unloading operation.
- Only Products in the Van location is visible in POS sale.
- Version 1.0.0: April 2023
- Initial release.
7. Support
If you have questions, use our contact form at webshopextension.com or email at support@webshopextension.com